

While a Bi-Phasal cleanser may sound complicated, in reality, it’s actually a super easy homemade cleanser for you to whip up at home!
But what exactly is it? Let’s take a look.

Introduction
‘Bi’, in this context, means two, and ‘phasal’ can be read as ‘part’. If you’ve made one of my diy moisturizers in the past, you’ll know I often refer to groups of ingredients as the ‘water part’ and the ‘oil part’. The concept here is the same, only this time we’re not emulsifying.
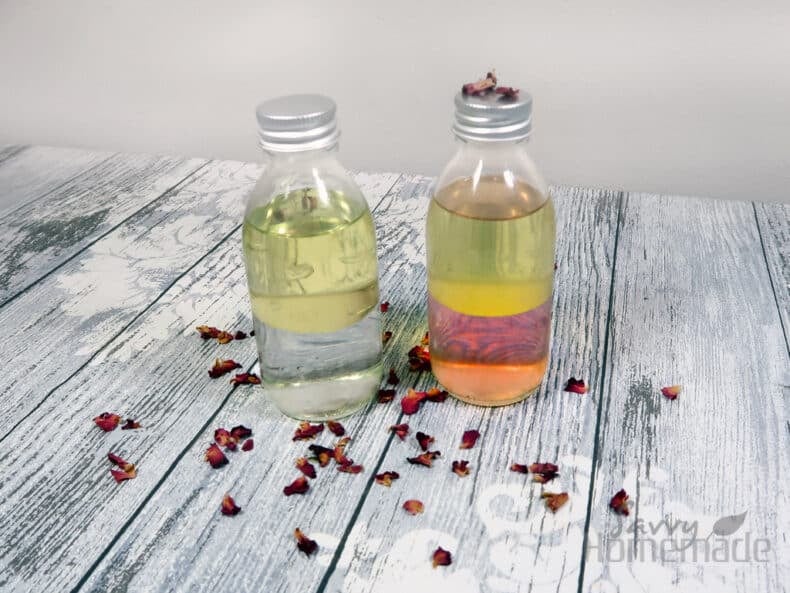
Oil and water don’t mix on their own (which is why we use an emulsifying wax in a moisturizing cream). So essentially, a bi-phasal cleanser consists of one water part that sits on top of one oil part. As I’ve already said, they don’t mix, so they sit in a cool looking contrast between oil and water.
When you come to use it, all you’d need to do is give it a good shake. They won’t come together for long, but you’ll have enough time to get it on your skin to get rid of all that makeup, daily grime, and unwanted impurities.
A Cleanser That’s Good For All Skin Types
Because this recipe has equal parts water and oil, it could happily be recommended for pretty much all skin types. I find bi-phasal cleansers are super versatile for this reason, as it will not exacerbate problematic skin types such as oily or dry skin in the way other cleansers might.
However, I usually recommend bi-phasal for normal skin types. While it won’t make someone’s oily or dry skin worse, there are perhaps better cleansers that will benefit them. People with oily skin may find a foaming cleanser more useful, and dry skin types will benefit more from an oil cleanser or cream cleanser.
Nevertheless, if you don’t know what skin type you have or of the person you’re planning to gift a cleanser too, then this recipe would be an ideal place to start.
Easily Customizable To Suit Your Skin
If you know you have oily or dry skin types and want to give a bi-phasal cleanser a try, this recipe is easily customizable to compensate for your skin type. If you have dry skin, try increasing the oil part to 60% and decrease the water part to 40%. If you have oily skin, do the opposite.
You can further customize your cleanser by adding various essential oils and botanicals for extra benefits. Although be careful to use the right type of botanical in the right part. E.g. essential oils should be used in the oil part as they are oil-soluble, whereas aloe vera gel can be used in the water part as it is water-soluble.
Try not to use your most expensive botanicals and essential oils in your cleansers. Save these for your skincare recipes that will be left on the skin.
As cleansers are wiped or washed off after use (to rid the skin of makeup and impurities), you won’t get the full benefit of all your added ingredients. Nevertheless, there are plenty of affordable botanicals and essential oils you may wish to use.
On the flip side, this cleanser will work great with minimal ingredients too. Then you can save all your botanicals exclusively for your leave on toners and moisturizers.
Looks Cool, So Great For Gifts and Customers

Okay, so this isn’t really an actual benefit of this cleanser, but I have found that bi-phasal can often peak people’s interests more than the others. Similar to the novelty of a foaming cleanser, people see the two parts and often think it’s more complicated and impressive than it actually is.
If you add a natural coloring to your water part, this strange novelty effect only increases. They can be quite eye-catching in a gift basket, on a store shelf or in product photography.
While the look of a product doesn’t mean it will be more or less effective on the skin, it is definitely a consideration for someone who gifts or sells their homemade skincare products.
Ingredients
- 20g Rose Hydrosol
- 20g Aloe Vera Hydrosol
- 8g Glycerine
- 27g Sweet Almond Oil
- 22g Peach Kernel Oil
- 1g Preservative (Preservative Eco)
- 1g Vitamin E
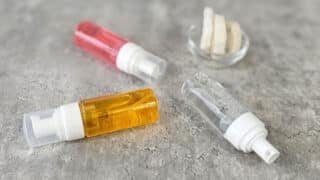
The oil and water parts are split evenly 50/50. All the ingredients add up to roughly 100g, so you’ll need a PET plastic or glass bottle that can accommodate this. I often use a cotton pad for a bi-phasal cleanser, so an ordinary screw cap will work just fine.
Notes
Hydrosols
The hydrosols I’ve chosen for this recipe are very cleansing, which is apt considering this is a cleanser. Nevertheless, there are further benefits.
Rose hydrosol is very soothing for the skin and boasts some wonderful anti-aging properties. Research has also started to show signs that rose hydrosol has some antiseptic properties.
Aloe vera hydrosol, like rose, is quite soothing also. If you’re versed in the magical benefits of aloe vera, you’ll know how amazing it is for burns. However, it’s also great for detoxifying skin, which makes it perfect for this cleanser recipe.
Oils
When choosing oils for a cleanser, it’s important not to select oils that sink in too quickly. So-called ‘vanishing oils’, such as Avocado or Macadamia Nut oils, would be totally unsuitable. You need that ‘rubbing time’ in order to properly cleanse the skin.
So, I’ve selected two oils with medium absorbency speeds, which should afford plenty of time to work over the skin, ensuring it is left clean and sparkling. But these oils also offer some further benefits as well.
- Sweet Almond oil is probably the most universal carrier oil. It’s great for all skin types, is easy to get hold of and is relatively inexpensive. I recommend this oil to anyone who is new to working with carrier oils because it’s a great oil that works well in many contexts.
- Peach Kernel oil is similar in this respect, although I usually don’t recommend it for oily skin types. If you have oily skin, I recommend replacing it with more sweet almond oil.
- Sweet Almond has some wonderful benefits to rejuvenate and soothe the skin. There is also some research that suggests it has anti-aging properties. Peach Kernel has many of these benefits as well, but also has some anti-inflammatory properties also.
Functional Ingredients
- Glycerine is a humectant, which means it draws moisture to both the product in which it is used and also on the skin when the product is applied. In this product, we’re using it for its skin moisturizing and hydrating qualities. It’s a great ingredient that I use often.
- Vitamin E is necessary here for the oil part of my two-part oil and water cleanser. On their own, oils can become stagnant, but with the introduction of an antioxidant, we can prolong the life of our oil part. This is by no means a preservative, though, and it cannot take the place of one.
- Preservatives are vital in any product that includes both water and oil. When they come together in one product, we create a breeding ground for lot of different types of bacteria and fungi. These microorganisms can lead to various skin conditions and even blindness. Not using one is horrifically dangerous, so definitely include one in this recipe if you plan to make it.
Method
Step 1: In two separate beakers, measure out your water and oil parts.
In your water part, you should include your two hydrosols, glycerine, and the all-important broad-spectrum preservative.


In your oil part, you should include your two oils and vitamin e.

Give them a good stir.
Step 2: If you want to add a little color to your bi-phasal cleanser, this is the point you’ll need to add it.

As many natural dyes and colorants work best in water, I would add it to the water phase and stir thoroughly.
Step 4: Pour both parts into your chosen bottle. I’ve chosen glass, but you can make use of plastic.


If you have included both your preservative and your vitamin e, your cleanser should have a shelf life of around 6 months.
Although if you’re using it as directed (twice daily in the morning and evening) then it shouldn’t last this long anyway.

What kind of natural colorant works best?
Hi Dena,
It really depends on what color you’re looking for. I like to use a beetroot powder for red and pink.