

A good homemade facial cleanser is the foundation of my skincare routine. It removes daily build-up, excess oil, SPF and makeup, and prepares my skin for the rest of the routine.
Over the past few weeks we’ve shared several specialised DIY cleansers designed for particular skin need, including cleansers for dry skin, oily skin, aging or mature skin, sensitive skin, and even a powdered face wash for glowing skin. Those recipes allow you to tailor your cleanser very precisely.
But sometimes what you really want is a simple everyday cleanser, something gentle, balanced, & suitable for most skin types. That’s exactly what this DIY face cleanser is designed to be.
Watch It Being Made

Benefits
- Its a gentle foaming cleanser, suitable for everyday use.
- Made with mild plant-derived surfactants that cleanse without stripping skin.
- Simple beginner friendly recipe with only a handful of ingredients.
- Easy to customize for dry, oily, sensitive, or mature skin types (see below post).
- A lightweight foaming texture that feels fresh & rinses away cleanly.
- Makes use of a foamer bottle which instantly creates the foam.
- Affordable to make and easy to scale & adapt.
- A great foundational recipe for learning DIY skincare formulation.
About This Cleanser Recipe
This is a lightweight foaming cleanser recipe, it uses mild plant derived surfactants to lift away dirt and excess oil built up through the day.
The formula is super simple, making it perfect for beginners and easy to customize later if you want. If you’re just learning how to make a homemade facial cleanser, this is a wonderful starting point.

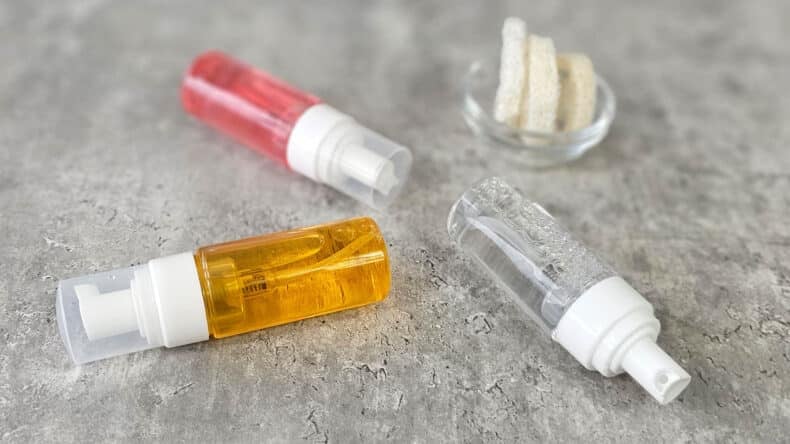
A foaming cleanser is a thin liquid formula that turns into soft foam when dispensed through a special foamer pump bottle.
The bottle itself does all the work of whipping air into the cleanser as it’s pumped out, this instantly turns the liquid into a light airy foam. The formula doesn’t need heavy thickeners or complicated ingredients.
Foamer bottles can sometimes be a little more expensive than standard bottles, but they are reusable and can last for years, making them a good investment for future recipes.
The result is a soft foaming face wash that spreads easily across the skin, cleans very effectively & rinses away quickly.

As an Amazon Associate, I earn from qualifying purchases. If you buy via the links here I may earn a small affiliate commission at no cost to you, please read my affiliate disclosure.
Ingredients
Equipment
Method
- 88 grams Distilled Water, 5 grams GlycerineCombine the water and glycerin into a clean beaker. Stir well to combine

- 4 grams Decyl Glucoside, 2 grams Coco GlucosidePour the glucosides into the beaker with the water. Gentle stirring needs to be done here so as not to create too many bubbles.
- 1 gram SaliguardAdd the preservative and stir, once again trying not to create too many bubbles.
- Finally we need to check our pH. When using surfactants we always need to check the pH of the finished product to check that it's not too high. Dilute a small sample of the cleanser (1 part cleanser to 9 parts distilled water). Dip a pH strip into the diluted sample and check it reads pH 5.0–5.5. We found most of our foaming cleansers needed a small adjustment of around 6 drops to lower it. (see how to adjust bellow)
- Foamer BottleOnce you have the correct pH balance, transfer to a foamer bottle.


Notes
New to DIY skincare?
If you’re enjoying making your own products, you might like Radiance, my free email course where I teach the foundations of DIY skincare step by step!How To Lower The pH
If the pH is too high, add a couple of drops of a 10% citric acid solution to the main batch of cleanser and stir gently until fully combined.
Take a fresh small sample, dilute again (1 part cleanser to 9 parts distilled water), and re-test the pH. Repeat if needed until the pH is 5.0–5.5.
Ingredients Spotlight

We have formulated this homemade face cleanser so that it’s suitable for all skin types. You can tweak the recipe to tailor it to suit a specific skin type such as dry, oily or mature.
In addition there are lots of water soluble botanical and functional powders that can be added to elevate this recipe. However as this is a wash off product we don’t advise adding too many expensive ingredients.
Water
Distilled water is simply water that has been purified through a distillation process. It’s been boiled into steam and condensed back into liquid, which removes minerals, metals, microorganisms and other impurities. In skincare formulation, we use it because it’s clean, stable and predictable. It won’t react with your ingredients or affect your preservative system.
Glycerin
Although when cleansing the point is to rid the skin of dirt and oils we don’t want to strip it completely. The glycerin will help to draw moisture into the skin to keep it plump and hydrated.
Even in a rinse off product like a foaming cleanser, a small amount of glycerin makes a noticeable difference to the finished cleanser. It softens the feel of the formula and helps counterbalance the surfactants
Surfactants
Both decyl glucoside and coco glucoside are mild, plant-derived surfactants made from sugar and coconut. They’re both considered gentle and suitable for sensitive skin, which is why they’re so popular in natural style formulations.
- Decyl glucoside is slightly milder and produces a light soft foam. It feels very gentle on the skin and is often chosen for sensitive or everyday cleansers.
- Coco glucoside is still gentle, but it has a little more cleansing strength and produces a slightly richer foam. It can make a formula feel a touch more “cleansing” without becoming too harsh.
Saliguard PPC Preservative
Because this is a water-based cleanser a preservative is essential. Saliguard PPC provides broad spectrum protection to keep the formula safe and stable during use, without being harsh on the skin.
Liquid Soap Coloring
This is a little optional extra. I like to change things up sometimes so I add one of drop soap dye.
Substitutions
- Distilled Water, hydrosols are a wonderful addition, substitute all are part of the water.
- Glycerin, panthenol would be a decent substitute. Use the liquid at the same rate. For the powdered, lower the usage rate to 1g and up the water by 4g. Dissolved in the water and continue to step 2.
- Decyl Glucoside, Caprylyl/capryl glucoside would be nice or leave it out and up the cocoa glucoside.
- Coco Glucoside Caprylyl/capryl glucoside or leave it out and up the decyl glucoside .
- Saliguard PPC Preservative, Liquid Germall Plus its water soluble and has a good pH range. Its usually used at 0.5% so you will need to adjust the amount from 1g to 0.5g
Adjustments For Skin Type
Mature skin
We can lower the surfactant to make it less stripping, and up the glycerin for more hydrating. We can also replace some of the distilled water with a Rose hydrosol that adds a soft, calming feel and makes it feel more luxurious.
The recipe looks like this; 45g Distilled Water – 44g Rose Hydrosol – 6g Glycerin – 4g – Decyl glucoside – 1g Saliguard PPC Preservative.
Oily skin
Our oily skin cleanser has a slightly higher surfactant for better cleansing power, but still gentle. We can substitute around half of the water for Witch Hazel Hydrosol, try to get the alcohol free one. You could also add an optional 0.2–0.3% of niacinamide if you wanted to elevate it more but for now lets keep it simple.
The recipe looks like this; 47g Distilled Water – 40g Witch hazel Hydrosol – 4g Decyl Glucoside – 4g Coco Glucoside – 4g Glycerin – 1g Preservative
Dry Skin
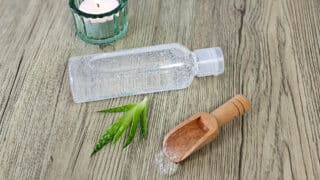
Here we are adding a little extra humectant, and lowering the surfactant. We also feel adding aloe vera gel would be a lovely addition.
The recipe looks like this; 82g Distilled Water – 5g Glycerin – 7g Aloe Vera gel – 5g Decyl GlucosidNo extras.
Sensitive Skin
This one is super simple. We are going for low and only one surfactant. We are also going to lower the glycerin. This one is so mild that I often use it as an eyelash wash.
The recipe looks like this; 93g Distilled Water – 2g Glycerin – 4g Decyl Glucoside – preservative.
How to use it
- Pump 1–2 pumps of foam into damp hands. Because you’re using a foamer bottle, the product will already come out light and airy so you don’t need much.
- Gently massage the foam onto damp skin using small circular movements. There’s no need to scrub. Let the surfactants do the work of lifting away dirt, excess oil and daily build-up.
- Rinse thoroughly with lukewarm water, then gently pat your skin dry with a clean towel.
- Follow with your usual toner, serum or moisturiser.
How to store it
Store in a cool, dry place, away from direct sunlight, and place the lid on after each use. With a proper preservative such as Saliguard PPC, you can generally expect a shelf life of around 6 months.
More DIY Cleanser Recipes
• DIY Oil Cleanser – gentle oil-to-milk cleanser that melts away makeup.
• DIY Micellar Water – lightweight cleanser ideal for sensitive skin.
• Dry Skin Balm Cleanser – rich balm that transforms to a milky cleanser when rinsed.
• Cleanser for Aging Skin – moisturising, creamy cleanser that glides over the skin.
Browse all cleanser tutorials →
Homemade Cleanser Recipes
Final Thoughts
This simple DIY foaming cleanser is one of the easiest ways to start making your own skincare. With just a few ingredients and a foamer bottle, you can create a gentle daily cleanser that feels fresh, effective and balanced.
The recipe is purposely minimal, so it works well for most skin types. From here, you can begin experimenting by swapping part of the water for hydrosols or adjusting the surfactants, or adding simple functional ingredients to suit your own skin better.

Hi ANGELA , great Homemade Facial Cleanser Recipes. I like it