
Foaming cleansers are, without a doubt, one of the best homemade face cleansers for removing makeup. Whether it be simple, day to day makeup or the elaborate eye makeup we wear for special occasions. A DIY foaming cleanser will cut through all of that and leave skin clear and clean. Using a cleanser does wonders for your skin. It’s one of those go-to beauty and skincare tips I always recommend.
You’ve probably seen lots of foaming cleansers at your local drugstore, but did you know they’re actually easy to make? They promise a lot, and they deliver.

Natural Surfactants
Store-bought foam cleansers do have a big problem, and that’s the surfactant. Look at the ingredients of your favorite store-bought foaming cleanser. Many contain totally unnatural surfactants that are very harsh on the skin.
Anyone with sensitive skin should really avoid these, but if we make them ourselves we can include less harsh, more natural surfactants. Coco glucoside, for instance, is a good natural alternative to something like SLSA, which is totally synthetic.
However, if your skin is especially sensitive, I would probably recommend a different recipe. I know plenty of people who will still struggle to use a cleanser that includes a natural surfactant. If you think you may be the same, take a look at my cream cleanser recipe.
Other good options would be my Bi Phasal cleanser, or if you have dry and sensitive skin there’s no better cleanser for you than my gorgeous Oil Cleanser DIY Oil cleanser recipe.
Clearer Skin For Longer

But a cleanser isn’t all about cleansing. The ingredients chosen below can actually impart powerful benefits for our skin. This cleanser, for instance, includes witch hazel and tea tree hydrosols (completely alcohol-free) which can be great for anyone suffering from acne.
While ordinarily, I wouldn’t recommend a foaming cleanser to someone with acne, due to the surfactants they contain, but because we’re using one that’s less harsh on the skin you should be good to go. My DIY foam cleanser is also amazing at cutting through the oiliness we associate with oily skin types, which are naturally more prone to acne and pimples.
So, let’s look at the ingredients we’ve included in this gorgeous foaming cleanser recipe.
Ingredients
- 50g Witch Hazel Hydrosol (alcohol-free)
- 31g Tea Tree Hydrosol
- 10g Glycerine
- 8g Coco-Glucoside
- 1g Preservative
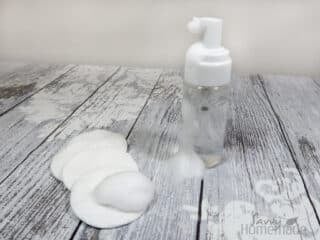
- Foamer Bottle
This recipe should produce about 100g of product, and you should get a bottle that can contain this much. You must make use of a foamer bottle for this product. While ordinarily, I would recommend many options, but without using a foamer bottle you won’t get the lovely bubbles we associate with a foaming cleanser.
Hydrosols
This hydrosol pairing of Witch Hazel and Tea Tree are absolutely great for anyone with oily skin, but also wonderful at preventing acne. You may have used tea tree essential oil in your anti-acne recipes in the past, and hydrosols can do a similar job. While hydrosols aren’t as powerful they still have many of the benefits of their essential oil cousins. After all, hydrosols are actually the byproduct of the essential oil manufacturing process.
I’ve found that Witch Hazel has a subtle but sweet aroma. Tea tree, as you’ll know if you’ve used the essential oil before, isn’t really a pleasant smelling ingredient and will overpower the smell of the Witch Hazel entirely. However, it’s perhaps a small price to pay for a great product.
I always talk about aromas being an important aspect of the skincare experience, but occasionally your products kinda have to smell a little funky. Nevertheless, you could try to combat this by using another hydrosol to try and sweeten the blend.
I haven’t done this, but only because I prefer to keep my cleansers as simple as possible. Ordinarily, we remove a cleanser after use, by either washing the face or wiping it away. It sometimes seems pointless to add too many experience ingredients when they won’t sit on the face for too long. But if the smell of a product is a deal-breaker for you, this is always an option.
Surfactants
As already discussed, this product contains a surfactant. In this case, I’m using coco glucoside, a surfactant that is widely accepted in natural skincare. While you could substitute this for less natural alternatives, such as SLSA, I wouldn’t recommend it.
Something like SLSA is a totally unnatural product, synthesised in a lab. While ‘natural’ doesn’t necessarily mean less harsh, in this case, it definitely is. Unless using an unnatural product doesn’t bother you at all, and your skin tends not to respond negatively to unnatural ingredients, I would recommend sticking to the coco glucoside.
But what is the surfactant doing in this recipe? Well, without the surfactant, this product wouldn’t foam at all. It’s entirely responsible for the lovely bubbles when it’s pumped from the bottle. However, it does do another job.
Surfactants are great at cutting through makeup, dirt and daily grime. It’s the key ingredient in many different cleansing options, including gel cleansers and micellar waters. Without them, we have a product that would be more akin to a toner than a cleanser.
If using surfactant concerns you, why not take a look at the other cleansing options available. You can read more about cleanser here in my facial cleanser post.
Functional Ingredients
The only functional ingredient in this DIY foam cleanser is the preservative. While I haven’t included any oils in this recipe, I find that using a preservative is still a good idea. While many hydrosols come with a preservative already added, hydrosols tend to go rancid fairly quickly.
By adding a preservative, we ensure the product has a good shelf life. This is especially important if you’re gifting a cleanser. You have no idea how long it might take your giftee to get through the cleanser. While I recommend daily use, they might find that once a week works well for them.
So, a product that may last less than a month for you could last many months for another. There’s also no excuse not to use one nowadays, with plenty of preservatives accepted in natural skincare (e.g. Preservative Eco).
How To Make Foam Cleanser
Step 1: In a beaker, combine the Witch Hazel and Tea Tree hydrosols. Give them a quick stir so they are fully blended.

Step 2: Add the glycerine and stir until it has fully combined with the hydrosols.

Step 3: Add the coco-glucoside. While you can add it to the main beaker immediately, I find it’s easier to weigh it out first and then add it. The surfactant needs to be added very slowly and carefully, and so weighing it first allows you to concentrate.


When you do add it to the main beaker, stir until it is fully blended in our hydrosol and glycerine blend.
When stirring, be sure to stir slowly and gently. Otherwise, you will agitate the surfactant and create unnecessary foaming.

We want the product to foam after it’s in the bottle and when it’s pumped, not before.
Step 4: Add the preservative and stir, again being careful not to agitate the surfactant.

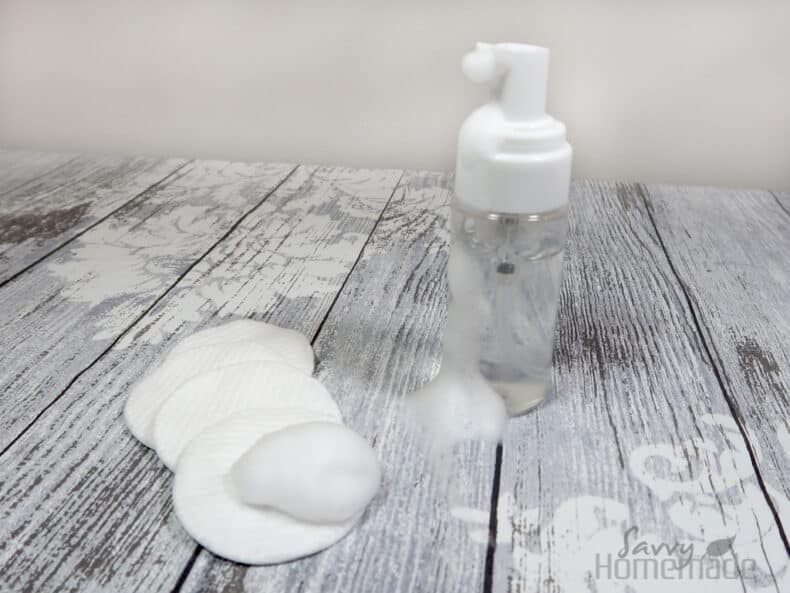
Step 5: Now we can transfer to our chosen bottle. It’s very important to make use of a foamer bottle for this product.

While it’s the surfactant’s job to create the bubbles, the pump action of a foamer bottle is necessary to agitate it enough to create bubbles when it leaves the bottle. Otherwise, no bubbles.
And no, an ordinary pump bottle is not a good substitute. The pump top of a foamer bottle is designed specially to agitate the surfactant, which doesn’t happen in an ordinary pump bottle.
When pouring the DIY foam cleanser into the foamer bottle, pour slowly and carefully. Pouring quickly risks agitating the surfactant, and again we want this to happen when we pump the product and not before.

Hello, I just love your page! I would like to make a foam face wash to help remove / reduce dark Marks particularly for dark skin. I’ve done minimal research and have see that Frankincense, carrot,turmeric,tea tree,aloe vera and sandalwood essential oils work great for this. Could all these oils be added to your foam recipe?
Also what preservative would you suggest?
Thanks
Sindi
Hi Sindi,
Absolutely they can, and they would do a wonderful job as well. Another option would be my cream for hyperpigmentation, which is basically dark circles. The only thing you need to worry about is to make sure you don’t add too much essential oil. I would try to limit yourself to 2 grams total of all your essential oils added up.
This should be quite safe. A jewelry scale will most definitely help you, as these are relatively small measurements and you need to be quite accurate to ensure you’re not oversaturating your skin with essential oils.
As for a preservative, I would recommend anything that is water-soluble. I like to use Preservative Eco, but you can also use Geogard ECT.