

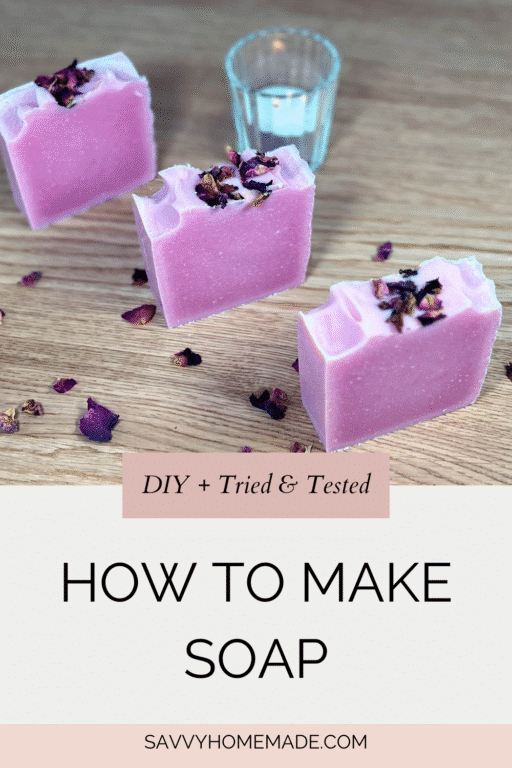
If you want to learn how to make soap at home, without feeling rushed or overwhelmed, this gentle homemade soap is a lovely place to start. I use simple natural ingredients, calm temperatures, and clear steps so you can follow along confidently from your own kitchen.
I’ll walk you through handling lye safely, reaching trace, and getting a smooth pour. Your bars will need a little patience while they cure, but that time lets them become harder, milder, and longer lasting.
By the end, you’ll have beautiful bars you made yourself, and the confidence to create many more.
Making Homemade Soap From Scratch
Making cold process soap at home is a lovely blend of kitchen craft and gentle chemistry. In this DIY soap recipe we combine a simple lye solution with olive oil, coconut oil, and shea butter to create a creamy, long-lasting bar that suits most skin types.
Below you’ll find the full cold process soap making procedure and ingredients. From setting up your workspace and mixing the lye solution to pouring, unmolding, cutting, and curing your bars. Then keep reading because I’ve included several more cold process soap recipes here, I think you’ll absolutely love!
If you enjoy making cold process soap and want more reliable results, you might also like my Natural Soap Making Course.
Inside the course I share tested recipes along with clear guidance on oils, lye, colors, and additives, so you can make beautiful, dependable, & natural soaps with confidence.
It’s 25% off this week. 👉 Explore the course here

The Science of Saponification
Soap happens when our lye solution meets the oil mixture and they saponify, which means the lye breaks the oils into two useful things: soap, which is the cleansing part, and glycerin, which is wonderfully skin friendly. This reaction makes its own warmth, so the batter gently heats as it gets going. At first we are just creating a stable emulsion with the blender, a bit like making mayonnaise, then the mixture thickens to what we call trace and it is ready to pour.
Once the batter is tucked up in the mold, the reaction carries on. Some batches pass through gel phase, where the soap looks a touch translucent and feels warm in the middle. That is normal. After unmolding and cutting, the bars need time to cure. Curing is not a mysterious extra step, it simply lets water evaporate so the bars become harder, milder, and longer lasting. Four to six weeks is a good window for this recipe.
You may hear the word superfat. That just means we have measured so a small amount of the oils is left unsaponified at the end. It helps the finished bar feel kinder on the skin. The lye you started with is not sitting in the bar. It is used up by the reaction, provided you have weighed carefully and followed the formula.
Fresh soap is naturally alkaline. Handmade bars usually settle around pH 9 to 10 when they are finished and cured. That is expected for real soap. pH strips are not a reliable safety test for lye heavy batches, so your best safeguard is accurate weighing, calm temperatures, and a trusted recipe. Do those three well and the chemistry will take care of itself.
Soap Making Setup Costs
Your setup costs to start making soap at home will not break the bank! The full rundown of items that I recommend can be found at wholesale soap supplies and equipment. These items are not very expensive and some of them you will have already, some you can make and some you will need to purchase.
Safety Before You Start Making CP Soap

Pop the kettle on and let’s set ourselves up properly. We’ll work in a well-ventilated spot with the windows open, pets and little ones out of the room, and our tools laid out so nothing feels rushed. Wear your safety goggles, long sleeves, and good gloves; they’re simply part of the uniform, like an apron in a cosy kitchen.
We’ll be using sodium hydroxide (lye), which is perfectly manageable with tidy habits. Measure calmly, label your jugs, and always add lye to water, never water to lye. Use distilled water and stick to sturdy plastic or stainless steel. Absolutely no aluminium, it doesn’t get along with lye. Your immersion blender, silicone spatula, and silicone mold should be clean and dry before we begin.
If a splash ever lands on skin, don’t fuss. Step to the sink and rinse under cool running water straight away. If it touches clothing, off it comes and into the wash. Keep your bench clear, wipe spills promptly, and you’ll find the whole process pleasantly methodical, like following a well-loved recipe.

Important Things to Remember
- All of the recipes on Savvyhomemade allow 5% superfatting. This ensures correct saponification (the chemical reaction that creates soap) making sure there is zero free caustic alkali remaining and a good ph balance is achieved. As long as you have measured your ingredients correctly you have nothing to worry about.
- Once you add the Lye to water it creates a small chemical reaction, some choking fumes will rise from your bowl. This is the area that concerns most people, but all you need to do is keep your face away from these fumes while you stir the lye solution and try to not breathe them in. You could use a mask here if you want.
- Never leave your soap mixture unattended, this is a big no-no, especially if you have children or pets in your home.
- When cleaning your soap making equipment, keep your gloves and be thorough.
- Don’t be tempted to use your soap until you are sure that it has cured, if in doubt test it with a ph strip to make sure it is somewhere between 7-10. If you made a mistake and after 4 weeks it measures above 10 don’t just throw it away as you can rebatch it.
For more reading on this subject take a look at my in-depth guide on why we use Lye (sodium hydroxide) which is definitely worth a read.

As an Amazon Associate, I earn from qualifying purchases. If you buy via the links here I may earn a small affiliate commission at no cost to you, please read my affiliate disclosure.
Ingredients
Equipment
Method
- Gather and measure the ingredients shown in the above recipe. You will need to measure your ingredients carefully, do not try to guess or use cup sizes, as when you make soap it needs the correct mixture to complete the saponification process.Use either grams or ounces, do not mix the two. I prefer grams as I find it much more accurate. Prepare a mold. We use silicone molds as it's so much easier to remove the soap If you don't have a specific soap mold, then any good-sized container will do. Sturdy plastic containers that still have enough give to ease the soap out. Wood, ceramic or cardboard (all lined with freezer/butcher paper) will also make suitable molds. Avoid using any metal molds unless you can be sure they are stainless steel.You should also prepare your scent and color by mixing the essential oils together, and mixing the teaspoon of mica/color with a tablespoon of the olive oil. Set them to one side for later.

- 129 grams Distilled Water, 65 grams Soapmaking LyeNow it’s time to mix the lye with water, and as I already mentioned above, this is a chemical reaction, so we need to take some precautions.Make sure you are making the soap in a well-ventilated area. Put on your gloves and eye protection, your mask, apron, and long rubber gloves.Pour the distilled water into a large sturdy plastic jug. Now, slowly pour the lye into the water, using a spoon or plastic spatula to stir until dissolved.The water will start to heat when it reacts with the lye (caustic soda/sodium hydroxide); it will need to cool until it reaches the required temperature (100 to 120°F) so set this to one side for later.

- 50 grams Shea Butter, 135 grams Coconut Oil, 265 grams Olive OilIn a large heat-safe bowl or jug, gently melt only the solid oils and butters (such as coconut oil and shea butter) using short bursts in the microwave. Or if you prefer over a low heat in a stainless steel saucepan. Once melted, add the remaining liquid oils (olive oil) and stir well to combine. Leave to cool to around (100 – 120°F)

- Use a digital thermometer to check the temperature of both your melted oils and your lye solution. They should be roughly the same temperature before mixing, ideally between (100 °F–120 °F).

- When both mixtures reach an equal temperature, begin to pour and stir the lye solution into the oils. Do this slowly, and remember that you should always add lye to oils, not the other way around. Pouring liquid into dry lye crystals can cause splashing and burns.Be very careful handling and mixing the lye. It is extremely caustic and can burn if it gets and stays on the skin. If at any point you spill or splash lye or batter onto your skin, wash it off immediately with plenty of water.

- Using a stick blender, begin carefully stirring your mixture for several minutes, slowly at first without switching the blender on.Then give your mixture a few short 3-second bursts, stirring between each burst until the mixture thickens slightly and looks like custard.This stage is called trace, and it’s a sign that your soap is forming properly. Dip your spatula into the mixture and drizzle some back into the bowl, it should leave a faint line or “trace” that slowly blends back in.If mixing by hand, it will take longer (up to an hour), but with slow, even stirring using a whisk, you’ll reach trace eventually.

- 7 grams Lavender Essential Oil, 7 grams Rose Geranium Essential OilNow is the time to add our essential oil. After adding it, give the batter another quick burst with the stick blender or if the batter is starting to look a little on the thick side, stirring with a spatula is recommended.

- 1 tsp Pink MicaNext we can add the color to the batter, As the batter begins to thicken, only use a spatula to stir the color in. Stir it in well, making sure that it has been fully dispersed within the soap batter.

- Pour your soap batter into the mold. If the batter has become too thick to pour, just spoon it in, then give the mold a quick tap to help level the soap batter you could also use a spatula to level it.

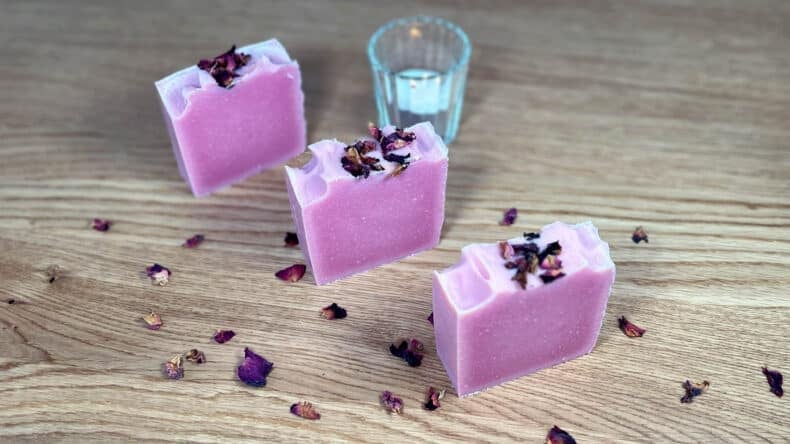
- You can leave the top of your soap smooth and flat, or use the back of a spoon or spatula to create texture or decorative patterns. Wait until the soap has thickened enough to hold its shape before doing this. If you’re not happy with the design, simply smooth it out and try again.

- Dried Rose PetalsFor an attractive finish, you can add a few petals or botanicals to the top of the soap. Lightly sprinkle them across the surface or arrange them in a neat row. Some petals may fall away once the soap has set, but most will stay in place, giving your bars a beautiful touch.

- Cover the soap with a piece of cardboard and wrap an old towel around the mold to help retain heat. Allow your soap to set for 24 hours in a warm, draft-free place until it has hardened. Don’t be alarmed if the soap looks slightly translucent during this stage, this is known as the gel phase and is completely normal.

- Once your soap has hardened (usually after about 24 hours), carefully remove it from the mold. If the soap still feels soft, leave it for another 12–24 hours before unmolding to avoid dents or marks.

- After removing from the mold the soap will need to be cut into bars. You can use a kitchen knife for a rustic look, or a soap cutter if you prefer straight, even bars. The soap should be about the consistency of firm cheese when cutting. Handle with gloves, or you may get finger prints on the soap, plus it may still be slightly caustic at this stage.Finally, place the bars upright on a tray or rack lined with cloth or paper towel so air can circulate. Cure in a dry, ventilated space for 4–6 weeks, turning them regularly.During this time, the remaining lye is neutralized and excess water evaporates. If a fine white layer appears, it’s soda ash, perfectly harmless and can be scraped or rubbed off before use.

New to DIY skincare?
If you’re enjoying making your own products, you might like Radiance, my free email course where I teach the foundations of DIY skincare step by step!More Cold Process Soap Recipes
Once you understand how to make cold process soap, it’s fun to experiment with different ingredients, natural colorants, and scent blends. Here are a few popular soap recipes you might enjoy trying next.
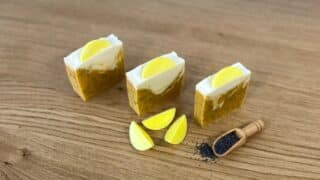
- Lemon Poppy Seed Soap – fresh citrus scent with a gentle exfoliating texture
- Turmeric Soap – naturally coloured and loved for its skin-soothing properties
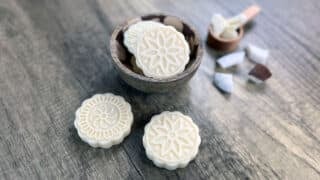
- Castile Soap – a traditional olive oil soap that’s wonderfully mild
- Coconut Oil Soap – a coconut oil soap that’s unusually gentle on skin
Explore more soap tutorials →
Cold Process Soap Recipes
Adjusting The Volume Of Your Scent

You can adjust the scent volume here up to 3% of all the oils and water added together. Anything over 3% would be very strong depending on the oils you are using, so I recommend starting at 2%.
However, anyone looking to sell their soaps would want to be more cautious. IFRA (the International Fragrance Association) publishes guidance on best practice for working with essential oils in wash off formulations such as these.
The recipe above is a good old-fashioned homemade soap that makes a great base for any fragrance, colorants, and exfoliates that you may wish to add. If making your own recipe, remember to use the lye calculator and formulation guide to get the correct volumes.
CP Soap Troubleshooting & FAQ
Can you make soap without lye?
Short answer: no, if you want a true liquid soap, you’d use potassium hydroxide (KOH) instead of sodium hydroxide. It makes a paste that’s later diluted into a golden, pourable wash. It’s the same comforting chemistry as bars. Oils plus lye become soap and glycerin, just in a liquid form. When you feel curious, have a look at my step-by-step KOH liquid soap guide.
If you’d rather skip lye entirely, you can make gentle surfactant-based (detergent) cleansers. These blend mild cleansing agents with water, humectants, and a preservative to create silky hand or body washes. They’re wonderfully tweakable and very kind to skin when chosen well. I’ve a beginner’s guide to surfactant formulas that keeps things nice and simple.
There’s also the easiest route of all: start with a premade liquid soap base and add your own aromatics and botanicals, a little fragrance or essential oil, perhaps a touch of glycerin or an herbal infusion. It’s a lovely way to personalise without learning the whole process at once. I’ll point you to my quick tutorial on customising bases, and you can pick the path that suits your kitchen today.
Is this safe if I’m new to lye?
Yes, making soap at home is safe as long as you respect the lye and follow good habits. Work in a ventilated space, wear gloves and eye protection, always add lye to water (never the other way around), and measure everything carefully. Once the soap has fully saponified and cured, there’s no active lye left in the bar.
How long do my homemade soap bars need to cure before I use them?
For this basic cold process recipe, I like to cure the bars for at least four weeks, ideally up to six. That curing time lets water evaporate so the soap becomes harder, milder, and longer lasting when you finally use it.
Can I change the essential oils in this soap recipe?
You can absolutely swap the lavender and rose geranium for other skin-safe essential oils or a well-behaved fragrance oil. Just make sure you stay within your supplier’s recommended usage rate for cold process soap and test small batches when trying new scents.
What equipment do I need to start making soap at home?
You’ll need a digital scale, stick blender, heat-safe jug or pan, sturdy plastic jug for the lye solution, a silicone or lined mold, thermometer, spatula, and good gloves and goggles. Keep these items just for soap making rather than returning them to your cooking kitchen.
When is the best time to cut my soap loaf into bars?
like to cut this recipe after about 24 hours, when the loaf feels like firm cheese. If it’s still very soft, leave it another 12–24 hours. Cutting too early can cause dents, and cutting too late can make the edges crumble, so a little patience here really pays off.
Why did my batter thicken suddenly after I added the scent?
That is acceleration or a full seize. Stop blending. Hand stir and spoon it into the mold. Next time, blend only to a light trace and add the fragrance by hand. Some fragrance oils are fast movers, so test small and keep notes.
My mix looked thick right away, then separated. What is that?
That is false trace. Hard oils were a touch cool or not fully melted. Warm gently and blend back to a true emulsion. Next time, be sure all solids are fully melted and mix within 100–120 °F, which is 38–49 °C.
I see tiny grainy bits after the fragrance or color. Can I save it?
Yes. That is ricing. Short pulses with the stick blender usually smooths it out. If it will not smooth, try putting it in a slow cooker or crock pot and switching to a hot process method.
There is a pale, powdery film on top, is my soap ruined?
No. That is soda ash and it is harmless. You can rinse or wipe it off, or plane the surface for a crisp finish. To prevent it, spritz the surface with isopropyl alcohol just after the pour and insulate the mold.
My loaf has a darker middle and lighter edges. What went wrong?
That is partial gel, sometimes called a gel ring. Insulate more evenly or use CPOP by placing the mold in a warm oven that has been turned off. If you prefer no gel at all, chill the mold instead.
It is still soft after a day and will not unmold. What should I do?
Give it another 12 to 24 hours. You can chill the mold briefly, then unmold. Next time, keep the room a touch warmer and be patient with high olive recipes.
I cut the soap loaf and found clear veins through the bar.
Those are glycerin rivers. They are cosmetic only. Soap a little cooler, disperse color well, and consider a lower water amount in future. Many makers grow to like the marbled look.
The edges crumble when I cut. How do I avoid that?
Cut a bit earlier while the loaf is still slightly softer, or warm your wire or knife. Double check your lye weight for the next batch.
There are oily pockets or soft wet spots. Is it safe?
Small oily beads can be blotted and the bars can cure longer. If it is widespread the batter was likely under mixed. Aim for a steady emulsion before you reach trace next time.
My lovely scent has faded by the time cure is over.
Choose robust essential oils or good fragrance oils and always follow the supplier’s IFRA limit for Category 9. Weigh the scent carefully. Cure in a cool, ventilated place out of direct sun. Some delicate notes are naturally short lived.
I see rusty orange freckles after a few weeks. What is that?
Those are dreaded orange spots. Store bars cool and dry, use fresh oils, and consider antioxidants like rosemary extract if you wish. Trim the spots and use the bar promptly.
I think my DIY soap might be lye heavy. What now?
Do not use it on skin. Set the batch aside for rebatching or disposal. A careful recheck of your scale, weights, and temperatures will protect future batches. Accurate measuring is your best safeguard.
Other Types of Soap You Can Make at Home
There are a few lovely paths you can take, and each one suits a different mood in the kitchen. As we’ve already seen, cold process soap is the classic craft most soap makers start with. You mix a lye solution with your oils, bring it to trace, pour, then let the bars cure. It’s calm, versatile, and wonderful for natural colors and essential oils. That’s the method we’ll be using today.
If you like quicker results, hot process is simply the same ingredients cooked low and slow until the saponification is mostly finished in the pot. The bars can be used sooner and have a rustic, spooned look. Think of it as a cozy stew instead of a chilled dessert. less waiting, a bit more texture!

For absolute beginners who want to skip handling lye directly, melt and pour is a friendly option. You start with a premade soap base, melt it gently, add color and scent, and pour. It’s perfect for crafts with children and for practicing designs, though you have less control over the base formula.

There’s also traditional liquid soap, which is made with potassium hydroxide rather than sodium hydroxide. It becomes a clear, pourable soap, lovely for hand wash pumps and foaming bottles. It’s a different recipe style, but once you’ve made a few solid bars, you’ll find it well within reach.

Whichever path you choose, the heart of the process is the same: fats meeting alkali to make real soap. Start with cold process to learn the foundations, then branch out when curiosity taps you on the shoulder. I’ll be right here to guide you.
Final Thoughts
You have now seen the whole rhythm, from mixing the lye to pouring, unmoulding, and curing. If you take your time, measure carefully, and keep your workspace calm, the chemistry will do its good work and reward you with lovely, reliable bars. A hiccup here or there is perfectly normal when making homemade soap; that is why I have included the little troubleshooting notes, and I am always happy to help you puzzle things out.
When you are ready to explore, you can read my simple guides to liquid soap with potassium hydroxide, to gentle surfactant-based washes, or to customising ready-made liquid bases with your own aromatics and botanicals. They will open new doors without overwhelming you, and you can always come back to this basic bar whenever you want something classic and kind to the skin.
Pop your questions in the comments, keep a tidy notebook of your batches, and give your DIY soaps a proper cure. With each little soap loaf your hands will grow surer. I will be right here to cheer you on.

I just updated this post today. 10/24/2025
Can you add lemon to this recipe ?
You could add Lemon essential oil for sure! It’s lovely in a soap recipe and brings an uplifting, fresh aroma that is perfect in soap for a morning shower. For example, here’s my lemon poppy seed cp soap.
Hope this helps!
I made this recipe with shea butter and it was a fail maybe I didnt measure correctly but I couldnt even get it to trace just hard clumps in the pan 🙁
Hi Cindy, it sounds like something must have gone wrong here. You say that you used shea butter, so this does change the recipe quite a bit and alters the required lye and water. I’m wondering how much shea butter was used and if you ran it through the the soap recipe calculator.