
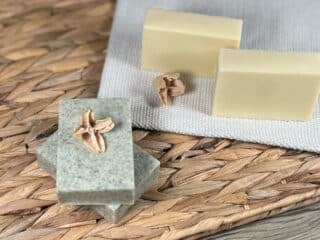
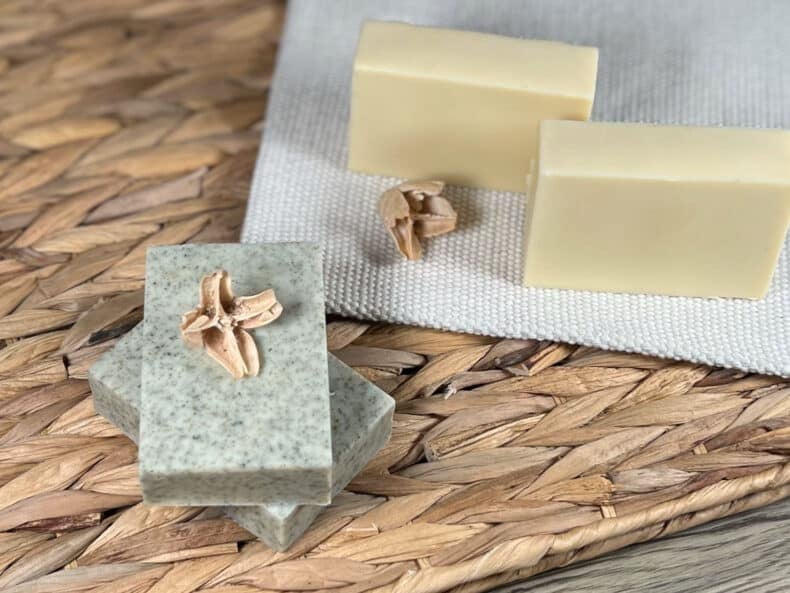
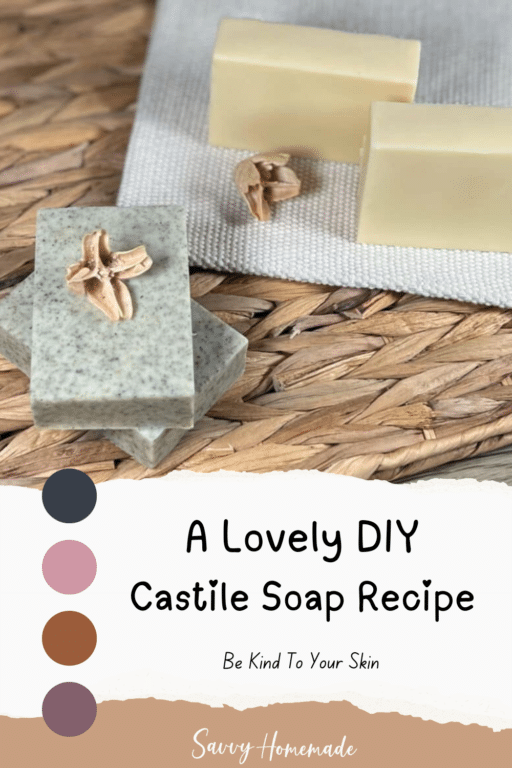
DIY Castile soap is one of the most inexpensive soaps you can make, perfect for beginners, yet it’s also one of the gentlest cleansers around. It’s a traditional olive oil soap recipe that’s easily one of my all-time favorites.
When my grandkids visit, I always have them use my Castile soap, because it’s so much kinder to their young skin than anything store-bought.
In fact, whenever someone I know has a new baby on the way, I make sure they get a big batch of this soap (without any essential oils). It’s perfect for delicate skin and saves them from buying pricey “baby soaps” that don’t come close to the real thing.
Watch It Being Made

This is a cold-process solid soap bar, not to be confused with my liquid castile soap recipe which is also great for sensitive skin.
Castile Soap v Bastile Soap

Throughout its history, Castile soap is ordinarily made with 100% olive oil, which is one of the reasons it’s so pure and mild on the skin. However, in recent years, soapmakers have started making what has been coined ‘bastile soap’.
Bastile is your standard castile soap recipe but adulterated with a small quantity of other oils and/or cosmetic butter to enhance the skin-softening and nourishing qualities. Bastile is usually 80-95% olive oil, with the 20-5% additives being anything from shea butter to macadamia nut oil. Basically, whatever you wanna put in it!
There’s also another key reason you might favor making bastile soap over castile and that’s because bastile is a lot firmer than it’s purer sister soap. Castile can sometimes melt quite quickly when exposed to warm water. So, instead of lots of your lovely soap ending up down the sink, bastile affords you much more ‘lather time’, for the lack of a better phrase.
So, I thought it might be fun to share with you two of my favorite recipes, castile and bastile, all in one little blog post! Then, you can give both a try and see which one you prefer. So let’s kick things off with the traditional castile and come on to bastile in a little bit.
One thing I should note is that Castile has quite a rich, creamy texture to it. This is predominantly because of the high oil content and lack of other ingredients such as cosmetic butters. It almost feels like a lotion bar! Bastile is very similar, although a bit less creamy and easier to lather.
If you enjoy making cold process soap and want more reliable results, you might also like my Natural Soap Making Course.
Inside the course I share tested recipes along with clear guidance on oils, lye, colors, and additives, so you can make beautiful, dependable, & natural soaps with confidence.
It’s 25% off this week. 👉 Explore the course here
Ingredients In This DIY Castle Soap Recipe

You’ll notice here that the amount of water I say to use in this recipe seems a little low. Usually, I opt for a ratio of 2:1 water to lye, but this recipe doesn’t even come close to that. In fact, if you run this recipe through a lye calculator, it might tell you to add a lot more water than I’ve recommended. However, you really don’t want to do this.
Do you remember when I said Castile is quite soft? Well, it also takes a very, very long time harden in the mold. By decreasing the amount of water we add, this recipe behaves much more like your standard soap recipe and you should be able to remove from the mold in about 24 hours to cut into bars. Business as usual!
For Little Ones & Babies
As I’ve already said, castile is great to use on your little ones, especially babies, as it’s the most gentle of cleansers you could possibly use besides water. If this is what you intend to use it for I recommend to omit any essential oil. Fragrance-free is always the best in terms of purity, especially for your little baby.
If your kids are a little older, you could get away with using a small amount of essential oil but I would still never use a synthetic fragrance oil on a child who’s skin, body and brain are still developing. There are still many unknowns when it comes to synthetics, particularly fragrance oils.
The research just isn’t there yet, and we have no idea how a synthetic agent such as fragrance oil can affect the developmental physiology of a young child. So, I would rather not risk it. If you want to use essential oil, I’d recommend ones that aren’t overly expensive or potent, such as lavender or sweet orange.
Unsuited To Fragrance Oils
Moreover, I find that this Castile soap recipe is just totally unsuited to fragrance oils in general. I really struggle to use them, as it makes the batter seize like crazy! Take my advice and just use an essential oil instead. Or, don’t use either.
As this recipe is so simple, with literally only olive oil besides our lye solution and essential oils, there’s very little to substitute here. Bastile soap allows for more freedom, so if you want to get creative scroll down to give that one a try instead.

As an Amazon Associate, I earn from qualifying purchases. If you buy via the links here I may earn a small affiliate commission at no cost to you, please read my affiliate disclosure.
Ingredients
Equipment
Method
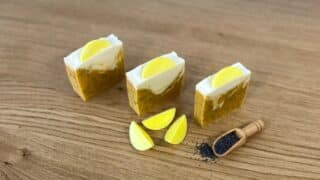
- 15 grams Lavender Essential OilWeigh the essential oil into a small glass container and set it aside for later use.

- Make sure you are making the soap in a well-ventilated area. Put on your gloves, eye protection, mask, apron, and long rubber gloves.
- 80 grams Distilled Water, 57.5 grams Soapmaking LyeWeigh the distilled water into a clean container. Never use a glass container as this is going to be holding the lye water. Lye can weaken glass so it can easily break. In a separate container, weigh your sodium hydroxide/lye crystals.
- When you’re ready, carefully pour your lye crystals into the water. Never pour the water into the lye as this can create a violent reaction.Once the lye is in the water, start stirring it. Although you are wearing a mask, we still recommend turning your head and leaning away while stirring, so you do not breathe any of the fumes. As the water and lye mix this will result in a chemical reaction, and the lye water will increase in temperature and release toxic fumes.
- Stir until the lye crystals have dissolved and the water looks fairly clear. Now place to one side, somewhere well-ventilated but safe so that it will not be knocked over. Allow to cool to around 120f (49c) as we get on with our other steps.
- 450 grams Olive OilPlace the olive oil into a large glass mixing bowl. Make sure the bowl is microwave safe, then pop it into the microwave and gently warm it to around 120f 49c)
- Check the temperature of the oils and the lye water. You can do this with a temperature laser gun or a jam thermometer. We want them both to fall between 120- 100 (49-38C). If they are still too hot, leave them to cool for a while longer. They do not need to be the same temperature, for example, the lye could be 120f and oils 110f, but it is best to keep them within 10 degrees of each other.
- Once you’re satisfied they’re balanced, carefully pour your lye solution into your oils. Before turning on the stick blender to mix the oils and lye, gently tap the stick blender against the bottom of your container. Continue tapping until all the air bubbles have been released.
- Turn the stick blender on and blend the soap batter until you reach a light trace. You will notice immediately that the color of the oil has changed to a creamy, yellowish hue. This is called emulsion and is the precursor to trace.If you’ve made any other type of soap before, you may notice that this soap takes a lot longer to trace than others. This is fine and totally normal, just keep blending until you can pick up some of the mixture with a spatula, and ladle it back onto the surface of the batter. If it sits on top of the batter for a few seconds before submerging back in, then your soap batter has reached a trace.
- Now that we’re at trace, it’s time to add our essential oils. I always recommend getting the mold ready before adding the essential oils, as they can sometimes thicken the soap batter, meaning you have to work quickly to get it into the mold.
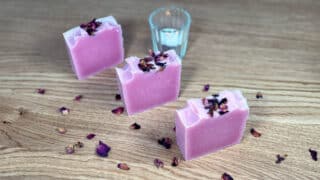
- 1 tbsp Nettle LeafAfter adding the essential oil, give the soap batter a good stir with the spatula or a few more blasts with the blender to ensure that it is fully dispersed. If you are adding a herbal powder you can also add and blend this in now. For half plain and half herbal, you will need to pour the plain ones first before blending in the herbs.
- Carefully pour the batter into your chosen mold. If you are using silicone molds like the ones we are using, remember to stand the mold on something solid so that you can move it if necessary. A chopping board or book usually works well. Give it a few light taps down to even the soap batter, or use a silicone spatula to level it out if needed. You can leave the top of the soap flat or add some texture with a spoon. Adding texture is a great way to conceal any uneven flaws and can make the soap interesting.
- We now need to leave this to saponify for at least 48 hours before we can remove it from the mold. I like to keep it well insulated during this period, so the gel phase is efficient. I do this by cutting a piece of cardboard to sit on top of the mold and then covering it with an old towel.
- Once our soap has fully saponified, and the sides of the mold come away easily from the soap, it’s okay to remove it from the mold. We find that castile soap takes longer to harden than most soaps, so be patient and don't panic if it takes a bit longer.If you have used a loaf mold, cut the soap into bars using a stainless steel knife or a soap cutter. You should be able to get between 6 bars from this batch, depending on the desired thickness.
- Leave the soap bars to cure for at least six weeks in a cool, dry place. The longer you leave castile soap to cure, it will produce a harder and longer lasting bar.Always check the PH before using it.


Notes
New to DIY skincare?
If you’re enjoying making your own products, you might like Radiance, my free email course where I teach the foundations of DIY skincare step by step!The Bastile Soap Recipe
Ingredients For a Full Soap Loaf

Lye Solution
- 171g Distilled water
- 114g Sodium hydroxide crystals/caustic soda
Oils and Butters
- 35.5g Essential Oil
- 765g Olive Oil
- 135g Shea Butter
Notes on ingredients
As I said earlier, bastile soap is much more versatile due to the inclusion of other oils besides olive. When substituting the shea butter, you can use any cosmetic butter you prefer. Cocoa, mango and illipe are all good alternatives to shea. If you like, you can substitute some of the shea for various base oils that you enjoy or want to try. Be careful to make sure that you have no less than 80% of your oils and butter mix to be olive oil, as otherwise you’re not really making bastile soap at all.
Important note! If you do intend to sub some of the ingredients, keep in mind that you will need to run it through the sap calculator in order to make sure you’re using the right amount of lye. Nonetheless, I would stick to the amount of water I suggest and always check the PH before using it.
Like with Castile, feel free to experiment with whatever essential oil blends that take your fancy. However, remember that if this is intended for young children, make sure not to use certain essential oils. If this soap is for a baby, you may want to avoid using any essential oil at all and keep it scent/fragrance-free for their super sensitive skin.
Method
Follow all the steps I’ve listed above for DIY castile soap, although you will need to melt the shea butter. You can do this by simply combining the shea and the olive oil in step 3. Ensure that the shea is fully melted, and the oil/butter and lye solution are at a balanced temperature of between 90-140F before combining.

Final Thoughts
So there we have it, how to make castile soap in two ways, that will cost you very little to make! This particular recipe is a great one to learn, simply because the ingredients are so easy to get your hands on and is always my go-to if I’m low on certain ingredients.
I’ve been perfecting how to make castile soap for years now, and I’ve only recently started using significantly less water. I have to say, I’ll never go back to the amount of water I was using before. If like me, you make a lot of soap, it’s really annoying having to wait around for liquidy batter to harden in the mold.
When I have a million and one different recipes I want to try, I just don’t want to wait around to use one of my molds again. I guess if you had a ton of molds it wouldn’t be so bad, but for someone who doesn’t make this to sell buying lots of molds is not a great investment.
My family absolutely loves this castile soap (which is great considering how it’s a lot cheaper to make than any other). I’ve absolutely committed it to memory now, and I encourage you to do so as well.
If you give this recipe a go, totally let me know how you got on. I love to hear all of your soaping stories, especially when something goes wrong so I can try and help you out. I also love hearing what fragrance and essential oil blends you use, it’s fun to experiment and find new amazing aromas!

Good morning, I am wondering what the ground nettle leaf adds to the soap? Is it just an abrasive or does it add medicinal properties for the skin?
What type of olive oil is best for this recipe, I use pomace for my other soaps. Can you use coconut oil instead of Shea butter? Thank you!
Hi Beth,
Great question! We’re actually working on updating this page as we speak, filling in any bits we feel might be missing, including the ones you’re asking about here.
The simple answer is yes, you can use pomace or any other olive oil. I swap and change all the time. Coconut oil can be substituted for the butter, but you’ll need to run it through our soap calculator beforehand, just in-case the lye needs adjusting.
Hope this helps,
Angela x
Angela …. Can you make the bastille recipe printable?
Hi, yes, this recipe makes around 8 good size bath bombs.
Angela x
Hi Angela. Thank you for your nice Soap instructions and Recipes.
I did Castile Soap with the same percentage of Lye: Water ( 1:1.5), however the soap bars are still sticky and melt quickly once I start to use them even after 6 months curing time. I am using a soap sieve as well.
Is there any way to get the castile soap cured as quickly as the other recipes?
Hi Safa,
Yeah, this is usually a problem I experience with castile soaps too. I have known some fellow soap makers who will cure their castile soap for as long as 12 months. Sounds crazy I know, but curing is the only way to make them any harder other than using my lye to water ratio.
Although, you could focus more on bastille soaps. Use some oils you know will increase hardness, alongside your olive oil. As long as your olive oil is more than 75% of your fat, then you can still call it bastille.
Hi I like the looks of your recipe, can I substitute goat milk for the water?
Hi Debbie,
That would be a little challenging for this recipe. I’ve lowered the amount of water here because Castile takes so so long to cure and harden. I don’t see why it wouldn’t work, but I haven’t tried it myself. Consider putting all of the ingredients into a soap calculator and see how much water it tells you to use – then I’d use that amount. Milk behaves differently in soap than water, and can burn easily.
Also, if you haven’t worked with goats milk in soap before (you probably have) take a look at my goat milk soap recipe, as it gives some good tips for working with milk in your soaps for the first time.
Hi Angela, your recipes are very easy to follow. I have been making the olive oil one (as I am from Cyprus and we have our own olive oil) and it comes out perfect. Only I never put any essential oils not to desterb the olive oil. I would love to though. Can ylu sugest what I can use. Thanks Vasoula
Hi Vasoula.
That sounds absolutely lovely! Using ingredients so close to home! As for essential oils, you can use whatever you like. Olive oil is pretty stable in soap recipes, so you shouldn’t have any trouble using essential oils you like the smell of. I would start with something like Lavender, or perhaps Sweet Orange. Those are lovely essential oils to start off with.