

If you enjoy making your own skincare products lotion bar recipes are one of the easiest and most rewarding natural products to make. One big advantage is that they contain zero water, this means you wont need preservatives and they naturally have a long shelf life.
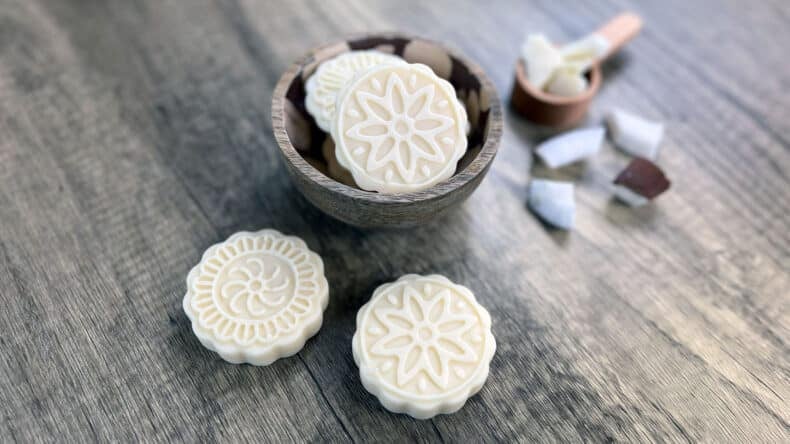
A DIY lotion bar is simply a solid moisturizer made from nourishing oils, butters and wax. Instead of your DIY liquid lotion being stored in a bottle, the ingredients are combined to create a firm bar that melts gently when it touches warm skin.
These solid moisturizers are especially useful for dry areas such as your hands, elbows, knees and heels. As the bar glides across the skin a small amount melts and leaves behind a protective layer of those nourishing oils that helps lock in some moisture.
Benefits Of DIY Lotion Bars
- Simple DIY lotion bar recipe made with natural oils, butters, and wax.
- A solid moisturizer that melts gently on contact with your warm skin.
- Deeply nourishes dry areas such as hands, elbows, knees and heels.
- Recipe contains no water, so no preservative is required.
- Long shelf life thanks to stable oils, butters and waxes.
- Travel-friendly and a spill-proof alternative to the usual bottled lotions.
- Easy to customize with different oils, butters and essential oils.
- Perfect beginner project for anyone getting started with natural skincare formulation.
Introduction

So my homemade lotion bar is one of those simple recipes that more people need to be aware of. It’s a wonderfully moisturizing bar for absolutely anybody, and the recipe is easy to remember.
First I will show you how to make a lotion bar, then we will move on to see how we change up the oils and butter, and I’ll finish off by covering a few other variations like my vegan lotion bars or purple passion.
Watch The Video

As an Amazon Associate, I earn from qualifying purchases. If you buy via the links here I may earn a small affiliate commission at no cost to you, please read my affiliate disclosure.
Ingredients
Equipment
Method
- 49 grams Beeswax, 48 grams Coconut Oil, 25 grams Cocoa Butter, 24 grams Shea ButterWeigh out and your Place the beeswax, coconut oil, cocoa butter and shea butter into a clean heatproof container.

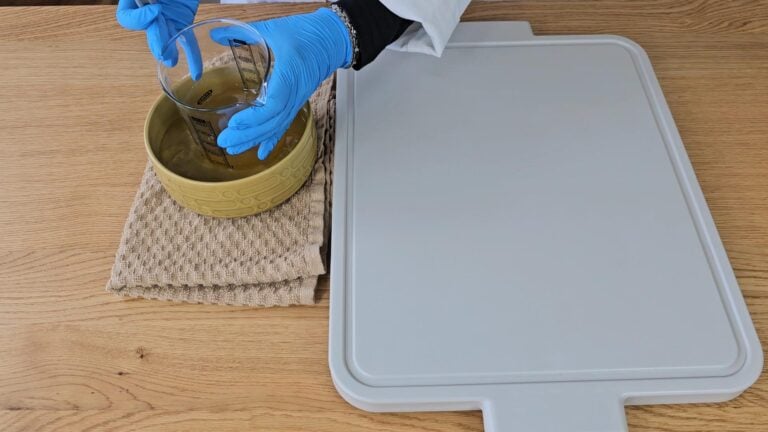
- Fill a pan with a few inches of water and allow to reach a simmering temperature. Once hot, place your heatproof container in the pan to melt your ingredients together.

- Give the oils a stir every now and again as they melt. You can also use a microwave on a low heat setting using 30 second bursts, stirring in between blasts. The beaker will be hot so take care when handling it.

- 2.5 grams Essential Oil or Fragrance Oil, 1.5 grams Vitamin E OilOnce melted remove the beaker from the water and stir well. Stir the melted oils until they have cooled to around room temperature.

- You can quicken the cooling by placing the beaker into a bowl with a small amount of water and ice. If you do choose this method, allow the beaker to adjust in temperature so that you don't shock the glass. Keep popping the beaker in and out of the water so that it doesn't solidify.
- When the oils are around room temperature it's time to add the vitamin E and the fragrance/essential oil. Stir them in so they are fully combined.

- Pour the oils into the mold. If you find that the oils have started to harden, pop them back into the heat and gently to re-melt them. Once they have started to skin over, transfer to a refrigerator for an hour until fully hardened.

- When they are solid, the lotion bars can be removed from the mold.

New to DIY skincare?
If you’re enjoying making your own products, you might like Radiance, my free email course where I teach the foundations of DIY skincare step by step!
Creating Custom Lotion Bar Recipes
Don’t be scared to experiment with your lotion bars by using more than one oil or butter, then lacing it with a few drops of essential oil you can create a very personal and therapeutic bar.
You can make up a big batch of these bars using inexpensive oils and butters and a popular fragrance oil. Place them in the freezer and pop them out whenever there’s a birthday or gift needed.
To work out how long these bars are going to last you must look at the shelf life of the actual oil you are using (most are at least 6 months). But you can also freeze them or add a little vitamin E to further prolong the shelf life.
These are only my suggestions, you can use almost any of the natural carrier oils any of the natural butters for these bars.
Carrier Oils
- Dry and sensitive skin; Apricot kernel – Avocado – Olive – Sunflower oil – Sweet almond oil
- All skin types; Fractionated coconut – Hemp seed – Rice bran oil – safflower oil – Sesame oil – Soy bean oil- sunflower
- Greasy skin; Hemp seed – Jojoba
Butters
A quick guide to hardness is included in brackets, 1 being melts easily, 10 being incredibly hard.
- Aloe; A soft butter that’s great for dry skin, (4)
- Cocoa; A very hard butter that traps moisture into the skin, suitable for all skin types, (10)
- Mango butter; Less greasy than most butter’s so good for greasy skin (8)
- Shea butter; Sinks deep into the skin to repair damage (7)
Essential Oils In Lotion Bars
Whenever possible I use essential oils in my products, not because I have anything against using fragrance oils; most are well priced, completely safe and come in every possible scent imaginable.
I just feel that if I’ve gone to the trouble of choosing my oils and butter to suit my skin type why not go the whole hog for maximum benefit!
Unfortunately, there are a few precautions’ when using essential oils. Firstly they don’t like daylight so you will need to keep any products that contain them in a colored container or cupboard.
Secondly, you need to make sure the containers you are using are made from a compatible material, glass, PET plastic or Aluminum jars/bottles that have been EPA (Epoxy Phenolic) lined are all suitable. You can find some nice tins on my recommended packaging & containers page.
Recommended Essential Oils for the Lotion Bars
Carrot Seed, Cedarwood, Chamomile, Clary Sage, Cypress, Frankincense, Geranium, Jasmine, Lavender, Lemon, Neroli, Peppermint, Rose, Rosemary, Sandalwood, Tea Tree, Ylang-Ylang.
A Vanilla & Avocado Lotion Bar

This gorgeous homemade lotion bar is packed full of avocado goodness, as well as a dose of skin-loving beeswax to keep that healthy glow to your skin no matter where you are. A small but potent amount of oat oil is also in this bar.
Rich with vitamins A, E and B as well as packed with calcium, zinc, and iron, this oil is perfect for deep moisturizing and enriching our skin. I’ve also scented it with vanilla fragrance oil, but you can use whatever you like!
Supplies
- 50g Avocado Butter
- 50g Beeswax
- 42g Sweet Almond Oil
- 5g Oat Oil
- 3g Vanilla Fragrance Oil
Method
This method is identical to the lotion bar above, so treat it the same as that.
Final Thoughts
Making your own DIY lotion bars is a wonderful way to simplify your natural skincare routines. With just a few ingredients you can create a rich and nourishing moisturizer that’s easy to use & lasts for months.
This recipe is also very flexible. You can experiment with different carrier oils depending on your skin type, you can try different butters to adjust its firmness, or blend essential oils to create your own lovely signature scent.
Another lovely thing about lotion bars is how practical they can be with your travels, and they make thoughtful handmade gifts when placed in small tins or jars.
Once you’ve made your first batch you’ll quickly see why solid moisturizers have become such a popular part of natural home skincare. Simple ingredients, beautiful results and wonderfully soft skin.


Hi, Thank you so much for all the information. I have made lip balm and am ready to experiment with ingredients for lotion bars. I like your white chocolate recipe but I don’t understand what you mean by hard next to the coconut.
Hi Debbie
I’m just making sure you are using solid hard coconut oil. It’s easy to make the mistake of using fractionated coconut oil which is not suitable as its a liquid.