

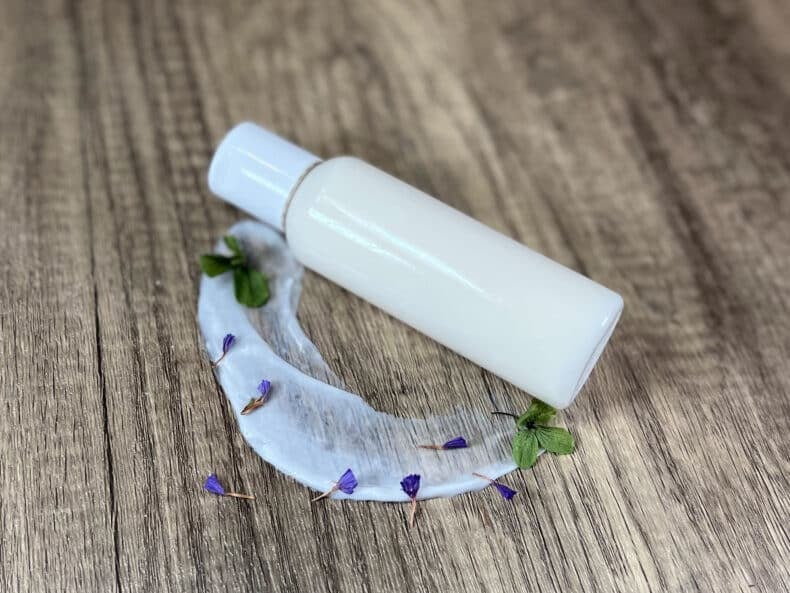
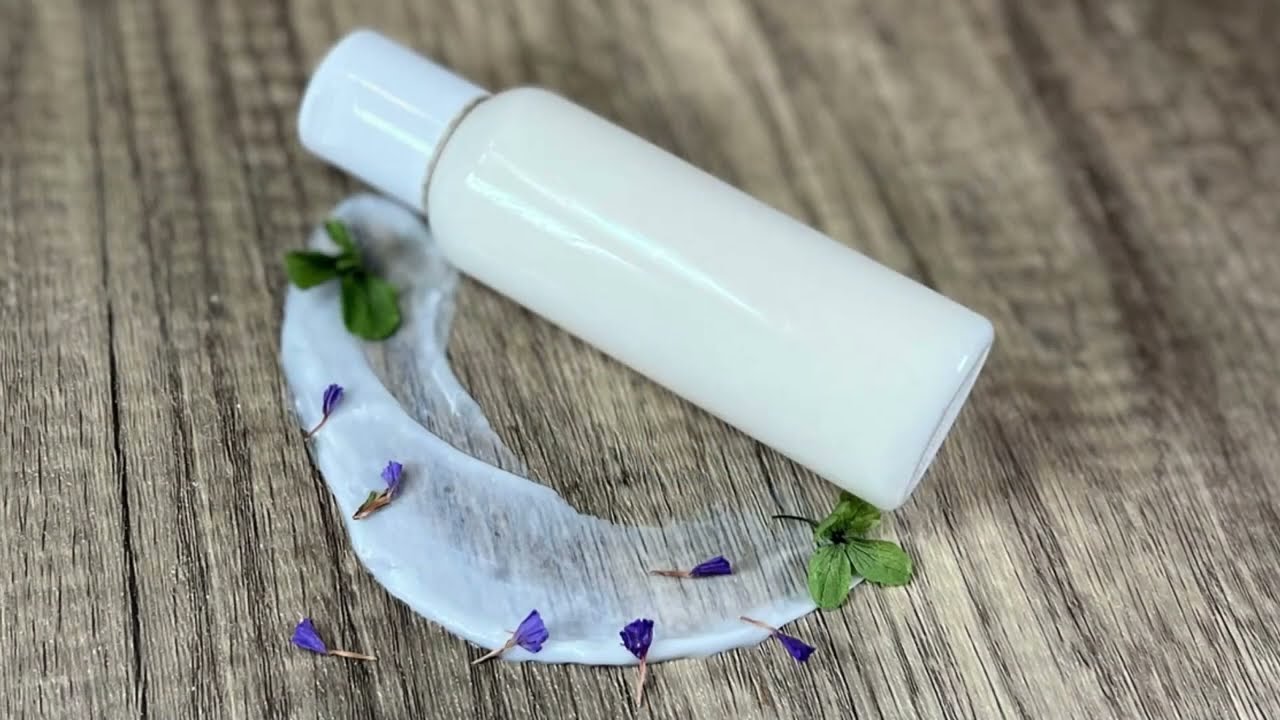
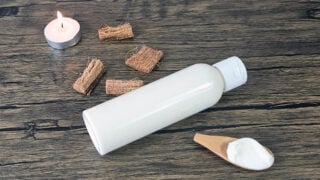
A few weeks ago, I shared my go-to lotion bar recipe, it’s always a winner. But sometimes, nothing compares to a rich, silky body lotion that sinks into the skin and feels like pure luxury. Today, I’m taking things to the next level and showing you how to make body lotion using a beautiful blend of natural oils.
Making your own lotion is one of those little luxuries that feels far more complicated than it really is. This simple recipe combines lightweight oils with rich shea butter to create a smooth, creamy homemade lotion that rivals many shop-bought brands, without the hefty price tag.
Once you see how quickly this body lotion recipe comes together, you’ll realise just how easy it is to customise with different oils or essential oil blends. I’ll walk you through each step calmly, so you can make it with confidence even if this is your first time.
If you enjoy making this body lotion, you might also like my other body lotion recipes.
DIY Body Lotion Can Save Money

Yes, you can actually save money! Luxury skincare is very expensive and depending on your supplier, it’s possible to save a lot of money buying the ingredients and making them yourself.
When big industries make cosmetics for the market, they have to cost certain things like overhead. Beyond the base price of ingredients, they need somewhere to mix their ingredients into a product, and to pay for the equipment and the staff to actually do it. You don’t need to worry about that so much.
You Can Control Recipe Ingredients
Another key takeaway from this is that you have complete control over your product. When you go into your local drugstore, you have to pick a product that has been formulated for a target market. Every one of us has our own unique skin, with its own needs, preferences, and tolerances.
By making homemade lotion, you have complete control over what goes into the formula. You’re technically making bespoke skin care products – a service that is usually reserved for the ultra-rich!
Sustainability
If that isn’t reason enough, consider your impact on the planet. The cosmetics industry has a serious impact on our climate and environment. They’re one of the big polluters. By cutting them out, and purchasing sustainably sourced ingredients, you are helping to turn the tide on climate change.
Water Content For Homemade Lotion

The main thing that differentiates a DIY lotion from other diy body creams is its high water content. This means a lotion should be relatively thin in consistency and will be absorbed by the skin very quickly. While lotion is good for pretty much any skin type, it’s especially good for normal or slightly dry skin.
Measuring Your Ingredients
When measuring your ingredients, make sure you use a scale. Volume measurements, such as teaspoons, tablespoons, and cups are not suitable for such small quantities, and you’ll never know exactly how much you’re actually using.
For preservative measurements, always consult the instructions that come in the box or on the label.
Preservatives, What You Need To Know

Using a preservative is quite important for this recipe. While you could make this body lotion without it, it’s really not recommended. When adding water to any kind of health and beauty product, microbial growth is always going to be a problem. You’re giving it everything it needs to grow, which is where a preservative comes in.
The risk of unpreserved cosmetics is not worth taking. Nasty skin infections, blindness, and even death are potential consequences. Do yourself a favor and make use of one! There are natural options for this, including Geogard ECT or Preservative Eco. These are broad-spectrum preservatives that are derived from naturally occurring chemicals.
Ultimately what you do is your choice, but if you must go without one, expect to be making your lotions weekly. This is because an unpreserved homemade lotion will last no longer than 5-7 days. Also, avoid touching the lotion at all costs – a pump bottle will be essential here. Otherwise, you reduce its shelf life even further.

As an Amazon Associate, I earn from qualifying purchases. If you buy via the links here I may earn a small affiliate commission at no cost to you, please read my affiliate disclosure.
Ingredients
Equipment
Method
- 140 g Distilled Water, 6 g Glycerine, 10 g Shea Butter, 12 g Sweet Almond Oil, 10 g Emulsifying Wax NFCombine your water part ingredients, including the distilled water and glycerine in a pyrex or heatproof beaker/jug and then put to one side. This is our ‘water part’.

- Combine your oil part ingredients, including the e-wax, cetyl alcohol, shea butter, sweet almond oil, and jojoba oil in another separate heatproof or pyrex beaker/jug. This is the 'oil part'.
- Now place the 'water part' and the 'oil part' in a water bath or double boiler. You can set up a water bath by simply pouring a few inches of water into a pan and leaving it on the stove to warm. You don’t want it to boil, keep the heat very low.
- Let your oils and waxes melt together. Depending on the temperature you’ve set your stove, this can take about 20 mins. If it’s still not melting, turn the temperature up and keep a close eye on it.Once everything has melted, add your water part to your oils part.
- Remove your pyrex jug/beaker from the water bath and give it a good vigorous stir while it cools. I find it easier to use a stick blender for this but it's optional. But keep the beater as close to the base of the jug as possible as not to add too much air. You don’t want bubbles, you want thick lotion.Depending on the emulsifying wax used this could take a while, it may not fully thicken right away, so persevere with it.We need to wait for our mixture to cool to 40C (104F) before we can add our cooldown ingredients. You can use an ice bath to speed this process up. As this will also speed up the thickening process, you will need to stir continually. You dont have to use an ice bath, you can just stir for a couple of minutes then pause for a minute and repeat until it has cooled.
- 2 g PreservativeMeasure out your preservative following directions for your chosen preservative. And also add your vitamin e and lavender essential oil. A pipette really comes in handy here, as we’re using such small quantities. I find the best method for this is placing your jug onto a scale, set it to zero and then add your preservative a drop at a time until you have enough. This will make sure no preservative gets left in a cup or ramekin.Then stir thoroughly.
- 1 Pump BottleDecant your mixture into your chosen storage container. If you’re using a jar with a wide lip you can use a spatula or spoon. If you’re using a bottle, you can make use of a funnel. Your container must come with a lid, and must be made of glass, PET plastic or aluminium.


New to DIY skincare?
If you’re enjoying making your own products, you might like Radiance, my free email course where I teach the foundations of DIY skincare step by step!Why Is Shea Butter So Good For The Skin?

So, what makes shea butter so good? You can totally make a lotion without any cosmetic butter at all. But by using this ingredient, we can make our lotion even more skin loving.
Shea butter is a solid, fatty ingredient that is derived from the nuts of the shea tree. It’s a powerful moisturizer, helping to replenish and seal it into the skin.
But it’s also packed full of vitamins and nutrients our skin craves, including vitamins A, E & F. It’s also very high in antioxidants, meaning there could be some good anti-aging benefit too.
Some ingredients cannot be used on sensitive skin, but don’t worry, shea is not one of them. In fact, shea is actually deeply soothing and anti-inflammatory for the skin, and great for all skin types.
All in all, this ingredient will help restore some of that lost radiance to your skin. It’s fantastic in this recipe, but you could happily substitute it if you really wanted to. I would go for mango, as it’s the closest substitute and you shouldn’t see too many variations in product consistency (e.g., not any thicker or thinner).
Other Body Lotion Ingredients
Liquid Carrier Oils
Shea isn’t the only lovely ingredient we’re using here, so let’s take a look at what else you’ll need for this homemade lotion.
The sweet almond and jojoba oils are excellent here. They synergize with the shea, allowing for extra powerful skin softening goodness. Furthermore, they’re easy to get hold of and relatively inexpensive, a bonus for any formula.
Sweet almond oil is great for reducing dark circles and improving the overall health of the skin. Jojoba, however, provides deep and long lasting moisturization. It’s also great for all skin types, but extra good for sensitive skin.
However, anyone with a nut allergy will want to swap the sweet almond for apricot kernel oil. They are relatively similar oils. Jojoba oil can be substituted for Rosehip oil, which would be just as lovely (although more expensive).
Essential Oils
The essential oil we have selected for this lotion is lavender. Lavender is the queen of all essential oils. It’s one of the cheapest, easiest to get hold of, and has some of the best skin benefits of them all.
Lavender is deeply soothing for the skin, as well as reparative too. If you have any skin problems that take a long time to heal, this EO will clear them up much faster.
It’s also very easily tolerated by the skin. All skin types will have no problems here, even the most sensitive of skin. In fact, lavender is one of the few essential oils I would recommend using on children’s skin.
Lavender EO is very high in antioxidants. While more research needs to be done here, we can identify lavender as a potential super ingredient for anti-aging.
Lastly, lavender has a gorgeously floral aroma, with a slight herbaceousness to it. It’s a heady, beautiful aroma that many find deeply soothing.
If lavender isn’t to your liking, you can swap this out for any essential oil you wish to use. As this lotion is intended for the body, you could also use a fragrance oil if you wish.
How to Store, Use and Gift Your Lotion
Storing this DIY body lotion is pretty simple. If you’ve used a preservative, it sits happily at ambient temperature. Try to keep it out of direct sunlight if you’re using a fully transparent jar or bottle. You can store it in the fridge if you like, which will extend the lifespan of your lotion. If you’re not using a preservative, this is a requirement, not a suggestion.
To apply this, treat it like you would any lotion. Apply to large areas of the skin and rub it in using a circular motion.

This makes an absolutely fantastic gift, especially as it’s homemade. If you’re planning to gift, think about the different essential oils you can use to tailor it just for them. Maybe they like a specific fragrance, or have dry skin and could use something with an extra punch.
Take a look at our oils guide to get a better understanding of how to tailor your essential oils for a variety of different ailments.
FAQ & Troubleshooting
Can beginners make homemade body lotion?
Yes, this body lotion is very beginner friendly. As long as you follow the steps carefully and measure accurately, it is a great first lotion to try.
Why did my lotion turn out thin?
This usually means the emulsion did not fully form or the ingredients were not heated evenly. Make sure both phases are hot enough before combining and blend thoroughly.
Do I need a preservative in homemade body lotion?
Yes. Because this recipe contains water, a broad-spectrum cosmetic preservative is essential to prevent mold and bacteria.
Can I change the oils in this lotion recipe?
Absolutely. Sweet almond and jojoba oils can be swapped for similar lightweight carrier oils, as long as you keep the overall percentages the same.
How long does DIY body lotion last?
With a proper preservative and clean storage, lotion typically lasts up to 6–12 months. Always discard it if you notice any change in smell, texture, or color.
Final Thoughts
I keep a bottle of this magical formula topped up as often as I can. And you can, too, with my fabulous DIY lotion with shea butter!
Today, we learned how to combine water and oils to produce a lotion, as well as how to make use of a preservative and store it well.
I hope you’ve enjoyed reading this recipe. I can’t say this enough, a preservative is very important for this recipe. However, if you’re going to make do without it, then you must store it properly and throw it away after two weeks.
When you’re confident in your skills, you should absolutely consider gifting. This is a fabulous present to receive, and I have had nothing but beaming smiles from my giftees when they open one of these homemade lotions.
I would love to hear what you all think, including your questions. I’ll do my best to answer you in the comments section below.


Simplicity in directions.
Angela,
I have made the body lotion 3 times. I follow the directions to the letter. Twice the lotion has been too runny. One time it was perfect. I don’t know what I am doing to cause it to become runny and solidify. I even put the jars in the refrigerator for 24 hours after I make the lotions. What can I do to make my latest lotions more solid. Can I add more e wax at this point? I love the products and appreciate your recipes. I just need how to make it consistent each time.
thank you,
Terri
Hi Terri,
Sure! Sometimes, because of variations in humidity and temperature, its possible for formulations to sometimes vary from batch to batch. Providing you’re using a good quality set of weighing scales (for small batches, it’s important to use jewellery scales to get accurate measurements in grams), it might be a good idea to up that e-wax.
You could alternatively increase the cetyl alochol by a 1 or 2 grams and see if that does the trick. While adding more e-wax will thicken an emulsion, it can also make it feel heavier on the skin. The cetyl alcohol will provide a thicker product without adding any weight or soapy feeling to the formulation.
Thank you so much for sharing your recipe, Angela. I’m still quite new to the lotion/cream-making world, so I am still researching and reading a lot before diving in. I have gotten most of the necessary ingredients, with more on their way. My question is . . . if I choose the 1/2 recipe button, what should be the final quantity of lotion that the recipe makes? I do apologize if you noted that earlier in your post and I missed it. I just want to be sure I have enough of the right size containers if/when I make it – and definitely want to start with small “test” batches.
Again, thank you so much for sharing your knowledge and recipes. Oh, and . . . can I swap the distilled water with equal amounts of magnesium oil (diluted 50/50 – distilled water/magnesium chloride flakes)? I also plan to reduce one of the liquid oils and replace that with CBD oil and see how that comes out. Anyway . . . please let me know about the batch size and what you think about the magnesium oil.
Thanks so much!
Hi Sheila,
So this recipe comes out at around 200g, so if you halved the recipe you’d get about 100g (which is probably good for a start, when you’re just testing your changes). You could even half it again if you’re worried, and go for 50g to make sure you don’t waste much at all if things go wrong.
As for the the magnesium chloride, I don’t have any experience with this, but I don’t see why you couldn’t in theory. You call it an ‘oil’, and a quick google search tells me that while this is common phase for it, it’s actually an aqueous solution. Therefore, it would just replace your water part. How it will interact with your other ingredients is hard to tell, and you’ll need to experiment to make sure it’s okay. You’ll also want to do some pH testing prior to adding your preservative, to make sure the product will sit within the pH tolerance range of your preservative (usually around 3-7, but will vary depending on your preservative).
Hope this helps.
Hi Angela,
I just made my lotion but twice the original recipe size and it turned out super liquid. I put in the fridge with the hope to thicken a little so let’s see. It feels great on the skin thou.
I wonder what went wrong as I used the exact measurement with all ingredients.
I used emulsifying wax C049EW.
Hi Dima,
I can’t say for sure what’s happened as I haven’t worked with this e-wax before. However, I would take a look at the usage for it (should be something that the supplier or manufacturer can tell you. It sounds like you need a little more of that e-wax.
However, for now, you could just transfer your cream to a sterilized pump bottle. It makes it low viscosity emulsions much easier to apply.
Hope this helps and so happy to hear it feels great on your skin! 😀
this recipe is ????
thanks for sharing with us. I used only emulsifying wax and I’m glad with the outcome.
Wonderful!! I just finished! I used ewax and am wondering how it compares to BTMS25 (I don’t have 50) any noticeable difference or not worth the price difference??
Thank you so much! I’m just getting to know emulsifiers!
Hi Laura,
You should be fine with BTMS25. It’s essentially the same thing, except it has a lower concentration of the active emulsifying compound. So it may mean that you need to add a little more if you get separation issues. I have had a lot of success using BTMS25 in my hair conditioners, and find it actually provides better skin and hair conditioning power. So you might find that your cream feels better on the skin!
I am a major fan of lotion, I but crazy amounts and I never ever thought I could make my own and use essential oils to make a scent I not only would love but that would add some benifits to my body! I dont know how I was happy with the store bought lotion now. Thank you so much!
Hi Millie,
I’m so glad you’ve found the wonders of making your own lotion! It’s really an amazing skill to have. I hope you enjoy making your own homemade things!
Hi there,
I love this recipe and love your site. can’t wait to make my own lotions.
I have a question – what else can I use as a preservative? The two that you mentioned are not available where I live.
Thank you in advance.
Regards,
Dima
Hi Dima,
Anything broad spectrum and soluble in water would be fine. It’s a little difficult to suggest a brand as I’m not sure what will be available in your region (or what region you’re from), so this is all the advice I can really offer. I would contact a supplier in your region to discuss with them. Hope this helps!