
Let’s take a look at how to make a homemade necklace. It’s an inexpensive homemade gift compared to buying jewelry, and it enables you to exercise your imagination to create something truly original.
You can choose from a myriad of beads and pendants to create a very personal and unique piece of homemade jewelry. But before you try necklace DIY, take some time to run through the basics of how to make a necklace below, and use it as a reference guide for any necklace project you want to take on.

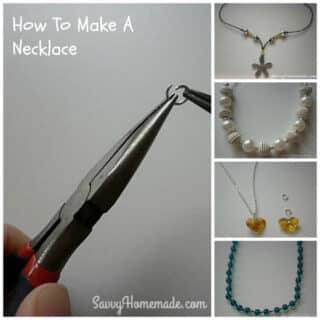
Some jewelry findings can be quite small, and it’s sometimes difficult to see how a technique has been created. For this reason, I’ve given a mixture of real photos along with some drawings to make the technique more visible.
Hanging a Pendant

Pendants may be fixed on your threads in several ways. Many pendants have a loop at the top and some contain a hole going through them either front to back or side to side. Some even have a hole running through from top to bottom and they’re know as drops.
There are various ways to fix your pendant to threads of any thickness. With large-holed pendants, the thread itself can be looped so that the pendant hangs correctly without needing a finding.
On pendants with small holes or loops running from front to back, use either a jump ring or a bail and loop. The thread can pass through this, leaving the pendant hanging properly so that it rests flat upon the neck.
Using Jump Rings

If the hole is fairly deep set or runs from side to side, two jump rings may be used for the pendant to hang properly.
Use This Method To Open And Close Jump Rings
To open a jump ring it’s advisable to use two pairs of jewelry pliers. Don’t attempt to open a jump ring by pulling the ends apart, because this may distort the shape and it’ll become hard to get it back into a perfect circle.
- Hold a pair of pliers on both sides of the slit and twist the pliers slightly in opposite directions, opening up a gap.
- To close the ring, repeat the twisting motion in reverse to get the ends back together again.


Bail & Loop
If using a ‘bail and loop’ on your homemade necklace, make sure that the size of the loop is large enough for the thread. Squeeze the bail firmly shut with the prongs through each side of the hole on the pendant.

Hanging Drops
To hang drops you will have to create a loop for the thread to run through. To get this done you will have to make use of a headpin.
In the event that the opening through the drop (from top to bottom) is too big for the pinhead to hold it, you will need a cup or small bead at the bottom to prevent the pin from falling through.
- Position the cup or bead at the bottom of the pinhead and add the drop.
- Using your wire cutters, cut a generous ½ inch above the top of the drop.
- Bend the pin immediately above the bead at a right angle, then curl the top up and around itself into a loop using the round-nosed pliers. Ensure there’s no gap in the loop.


With large-holed pendants, the thread itself can be looped so that the pendant hangs correctly without needing a finding.
Using A Crimp Bead
A crimp bead can be used to attach a finding – Often as a jump ring to the end of a length of bead stringing wire, and also to hold individual beads in position and stop them moving around.
- Thread the crimp to the beading wire.
- Press the crimp shut using the hole close to the pliers’ handle. This will give the crimp a fold in the center.
- Now flatten the crimp with the hole closest to the pliers tip for a neat finish.
- Add your bead and then a crimp again on the other side to hold it in place.

Featuring Beads
- First, consider the length of the necklace and whether you want the thread or wire to be covered entirely.
- A smaller DIY necklace or choker typically has a big bead or pendant as the centerpiece. A favorite style is usually to leave a percentage of the cord or leather thong on view.
- Should you be filling the thread with beads of the same dimension you can work out the number you’ll need after you have determined the length. Use a tape-measure around your neck to get an idea, after that divide the measurement by the length of a bead (hole to hole). So, for a filled choker of 40cm you will want 50 8mm round beads.
- Experiment with various sized beads. Probably the most typical strategy is to use smaller beads at the back where the necklace must be comfortable to wear, and bigger beads in front, on prominent display.
Think about using spacer beads between bigger beads. Select a color to tone or contrast, or a neutral, such as gold or silver.

You may knot the thread in between every bead. It can be pretty effective to knot groups of beads along the thread.

For more info How To String A Necklace With Thread is an ideal project to familiarize yourself with traditional stringing using a needle and thread.
Finishing Your DIY Necklace
There are many ways to complete your DIY necklace, depending on the thread you’ve selected and your individual taste.
Points to consider will be the thickness of the thread, the length of the item you’re making, and the ease with which you’ll want to put on and take off your jewelry.
Waxed Thread
Waxed thread is a great combination with a clasp with loops, a bolt and ring or trigger clasp are amongst the most widely used. A calotte is then used to attach the thread to the clasp. The calotte covers unsightly knots and incorporates a loop onto which you may attach your clasp. To give your knot some extra body simply pass the end of the thread back through the knot another time.
Lay the knot inside the hollow of the calotte and squeeze it tightly closed. Trim the loose strands that stick out at the very top. Open the loop on the calotte and fix it to the clasp.

Beading Wire
Beading wire can be unhappy when knotted. Use a small crimp, squeezed firmly with the half-round/flat nosed pliers. A crimp cover will improve the finish (see using a crimp bead above).

Leather or Cotton Thong
A leather cord necklace can be finished in many ways. Leather crimps combined with a hook are the most typical. There’s two basic kinds of leather crimp, round and flat.
For round crimps ensure a tight fit, double the cord if needed. Grip the end coil and squeeze gently but firmly with the half-round/flat- nosed pliers until the spring has tightened on the cord and is secure. It can help if you keep the end of the spring facing you. Squeeze the end coil only.
Attach a hook to one loop. This will attach to the loop on the opposite crimp.

For flat crimps fold the end of the cord double if it won’t fit comfortably and place it inside the crimp. Fold each side down in turn and squeeze tight with the half-round/ flat nosed pliers.

Add a hook to one crimp loop and a jump ring (split ring) to the other. A clasp can be substituted for the hook.
You might prefer to join the ends with a simple knot, a hook can be knotted to one side of the cord, catching on to a knotted loop or jump ring on the other.

Tying a slip knot
A leather or cotton thong necklace can be finished using simple slip knots, enabling the necklace to be worn at various lengths.
Step1. With the necklace laying flat curve the length of leather on the right over to the left then curve the leather on the left on top of it and over to the right.

Step2. Take the end of the leather that’s been curved to the right and pass it over then under the other piece of leather.

Step3. Loop it around and over itself, then back through the loop you have just created.

Step4. Pull the leather on both sides of the knot to tighten.

Step5. Repeat the process on the other side.

Now, let’s look at some examples of how to make a necklace.
Quick And Easy Necklace DIY
Here’s a quick and easy way to make a necklace using cotton cord with pretty beads and simple jump rings, it makes for another wonderfully unique gift idea.

Of course, if you prefer making necklaces using a leather thong or cotton thong with ribbon, then go ahead, the main thing here is to check that your cord or leather will fit through the beads and that the leather ends are compatible with your chosen cord.
Materials You Will Need:
- 6 or 7 beads with good size holes
- Cotton cord)
- 34 x 7 mm jump rings
- 2 x 5mm jump rings
- 2 Leather ends
- Necklace clasp or toggle

Method:
Step 1. To make a necklace start with placing the cotton cord around your neck to get an idea of what length you would like make the necklace. The cord is easily trimmed later so leave it just a little longer than needed, just in case the cord begins to fray at the ends whilst threading on the beads.
Step 2. Thread 5 jump rings onto the cotton, followed by one bead.
Step 3. After the first bead, thread four jump rings onto the cotton, followed by one bead.

Step 4. Repeat step 3 (4 jump rings to 1 bead )until you have used all your beads, and finish with five jump rings.
Step 5. Trim the cotton ends to make them neat and tidy, or remove the extra length you left on.

Step 6. Place the cotton into the leather ends and squeeze the ends closed. I find it easier to hold the leather end and a tiny bit of cotton cord with one pair of pliers while squeezing the leather end closed with a second pair.

Step 7. Open the jump ring and hook it through the clasp and leather end.

Step 8. Close the jump ring and repeat with the other side.


Making A Silver Pendant Necklace
This stunning silver pendant necklace is one of my favorites. It can be adjusted to any length, so it looks great with just about any outfit.
You don’t need any special jewelry-making tools for this, and best of all, it can be put together in a matter of minutes.

The most important thing when making this homemade necklace is to ensure the holes in the beads are big enough. The silver aluminum beads will need to have a hole of at least 1.5mm.
Some of the gold ridge spacer beads need to be threaded on to double the thickness of cotton thong so they will need to have a hole of about 3mm, this should give them a nice snug but movable fit.
What You Will Need:
- A length of 1.5mm Cotton Thong
- 1 Silver color aluminum Pendant (around 45mm in size)
- 2 Silver color aluminum Round Jewelry beads (13mm)
- 2 silver color aluminum Round Jewelry beads (16mm)
- 8 gold-plated, brass ridge spacer Jewelry beads (6mm)
Method:
Step1. Thread the cotton thong through the silver aluminum pendant.
Step2. Then add two of the gold spacer beads to the top of the pendant as shown, this not only looks good but keeps the pendant in place.

Step3. Leave about 1 1/2 inches of the cotton thong showing before tying a knot in the thong.
Then add one of the smaller 13mm silver beads, three of the gold spacer beads, and one of the larger 16mm silver beads. Secure with another knot.

Step4. Repeat the sequence on the other side.
Step 5. Thread both ends of the cotton thong through the last gold spacer bead and then knot the ends together. This last gold spacer bead should be a nice snug fit but still slide up and down the cotton thong with ease, allowing the size of the necklace to be altered to any length.

I hope you enjoy making this homemade necklace as much as I did.

One of the easiest ways to make a quick and stunning homemade necklace is to add an attractive pendant to a length of leather thong or cotton cord. Let’s take a look.
An Attractive Homemade Pendant Necklace
This is one of the simplest methods for making a necklace; it can give a striking effect and can make an excellent last-minute homemade gift for someone at minimal cost.

Simply add an attractive pendant to a length of leather thong or cotton cord. When knotted, the thong or cord can look quite attractive.
There are also some wonderful large-holed beads available, so you can give each necklace DIY a different look and feel simply by adding one or two extra beads.
What You Will Need:
- Cotton thread or cord (I’ve used 1.5mm)
- Pendant
Method:
The pendant I’ve used here is a large-holed pendant, but most pendants can be hung similarly (see notes on how to hang a pendant above).
Step1. Hold the thong or cord in half and pass the folded half through the hole of the pendant and then pass the loose ends through the loop that you have just produced. Pull until the pendant hangs straight.
Step2. If you are not quite sure what length of necklace you want, slip knots are very useful as they allow the length of the homemade necklace to be altered (see above for how to tye a slip knot).

Step 3. Finishing the necklace with a leather crimp gives it a more permanent and neat finish. To do this, push the cotton thong or cord into a round leather crimp, ensuring a tight fit (double the cord if necessary). Grip the end coil only and squeeze firmly but gently with the flat/round nose pliers until the coil has tightened on the thong and feels secure.

Step4. Then, add a hook to one of the crimps.

Tip
For an interesting look, why not try using two or three thinner strands of cotton or leather thong? Or, for an ultra-quick DIY necklace, you can pick up some preformed metal or rubber chokers, and a single pendant piece will thread onto it in an instant.
How To Make A Clustered Necklace
It’s really easy to make a homemade clustered necklace, I find this to be ‘anything goes’ type of jewelry making, you can literally grab a handful of beads and make a necklace or earrings up as you go.
As an example, last week, I made a clustered lariat necklace. I used a few silver charms (which can be substituted for silver beads), and a handful of those glass bead mixes that you can order online, the ones where you never rarely know what shape or size will turn up.

The matching clustered earrings were pretty much an afterthought made from the leftovers of the necklaces, but to my surprise, they’ve become one of my favorite pairs of earrings!
Let’s begin by showing you step-by-step how I made this clustered lariat necklace.
What You Will Need:
- A collection of Beads
- 6 Jump Rings, some Head Pins, Eye pins and Bead Caps
- Leather or Cotton Thong
- Jewelry Wire cutters, pliers, and round-nosed pliers
Method:
Step1. Open all the jump rings, then put them to one side, ready for use. Then decide on how many beads you would like your cluster to have. I will be using 16 beads and 4 charms, the charms are optional so if I wasn’t using them I would probably use around 20 beads.
Step2. Thread a bead onto a headpin.

If the hole in the bead you are using is too large for the headpin, you will need to use a bead cap or a small bead to stop it from slipping off.

Charms will need to be hung on an eye pin rather than a head pin. Using the pliers open the eye of the eye pin slightly, then slip the charm on and close it back up again. Once the charm has been attached to the eye pin it can be treated in the same way as the bead on the head pin.

Step3. Trim the headpin, leaving a ½ inch protruding from the top of the bead.

Step4. Using the round-nosed pliers, bend the headpin over to a right angle directly above the bead. Now grab the end of the wire with the pliers and twist it up and over to make a loop at the top of the bead, making sure you don’t leave a gap (see notes above on hanging drops and beads on head pins). Repeat this process with all of the beads and charms.

Step5. Once all of the beads have been looped, separate them into four groups (this will give me four lots of 5 beads).

Step6. Now take one of the open jump rings and thread on 5 beads (one group) then close it up.

Step7. Repeat the processes with the other three sets of beads until you have four clusters, each containing five beads.
Step8. Thread a jump ring through the jump rings of 2 of the clusters you have just made.

Step9. Close the jump ring up making sure you don’t leave any gaps.

Step10. Repeat the processes with the other two clusters.

Step11. You are now left with two large clusters and all you need to do now is attach them to the leather thong. The length of cotton or leather you need is dependent on how long you want to make your clustered necklace. It’s best to air on the side of caution here as the clusters can easily be taken off again to trim it if need be.
Thread the cotton through the jump rings and secure with a knot. To prevent the knot from slipping undone, leave a small amount of thong after the knot. Weave it through the jump rings within the cluster a bit and then trim it to tidy it up. Repeat with the other side.


Tie a knot in the leather a few inches above the clusters to wear as a lariat-style necklace.

More Traditional Clustered Necklace
You can make a clustered necklace that’s more traditional. Thread the jump ring through all four clusters and close the jump ring up, making sure you don’t leave any gaps.

Thread the cotton or leather thong through the jump ring and add a leather crimp and fastener or tie with slip knots which will enable you to adjust the length of the necklace. (See above for how to tie a slip knot).

How To Make Simple Bootlace Necklaces
There are no rules when making a bootlace necklace; it’s all about trial and error. However, if you are not sure where to start, let me show you how I make mine.
First, think about the length of the necklace and how you would like to fasten it (see notes above on finishing your homemade necklace).
A favorite bootlace style is to hang a large bead or pendant as the centerpiece, but as I said before there are no rules and I’ve seen some wonderful necklaces that have been almost entirely covered with beads leaving very little of the leather bootlace on view.

Try experimenting with different-sized beads or think about using spacer beads between bigger beads. You may want to knot the bootlace between each bead or knot groups of beads along the bootlace.
You can also experiment with different thicknesses and textures. Cotton, wax, and leather all make good DIY necklaces, and they come in an array of colors.
Another interesting look is to use more than one lace, or why not try using two colors?
The bootlace necklaces I have created below have no permanent fixings or finishing, so they can be taken apart, rearranged, and remade at the drop of a hat.
Making A Double Lace Necklace

What you will need:
- Jewelry Pendant
- A Jump ring
- Jewelry Beads – Wide holed (I’ve used metal barrel spacer beads)
- Leather or Cotton Thong 68 inch (5 1/2 foot) Length and (1.5mm thick)
Metod:
The pendant I am using for this homemade bootlace necklace has a small hole running from front to back, I will need to use a jump ring so that the bootlace can go through this and leave the pendant hanging correctly, it rests flat upon the chest/neck.
Step1. Open the jump ring with two pairs of pliers, one on each side of the split, and twist the pliers slightly in opposite directions. Slip the jump ring through the hole of the pendant, then close it by repeating the twisting motion in reverse to reattach the ends.

Step 2: Fold the bootlace in half and thread it through the jump ring on the pendant. Then, cut the bootlace in half, leaving two separate lengths of bootlace threaded through the pendant.
Step3. Thread three or four spacer beads onto each side of the pendant.

Step 4. Overlap the ends of the bootlace and tie a slipknot at each end; this will allow the necklace to be altered to its desired length just by sliding the slip knots back and forth.

A Bone Bead Necklace

What you will need:
- A Jump ring
- Jewelry Beads – 2 wide-holed bone beads and 1 spacer bead
- Leather or Cotton Thong 34 inch (5 1/2 foot) Length and (1.5mm – 2.0mm thick)
Method:
As with the DIY bootlace necklace above, the pendant I am using has a small hole running from front to back, so I will need to use a jump ring so that the bootlace can pass through this easily.
- Open the jump ring using two pairs of pliers, one on each side of the split, and twist the pliers slightly in opposite directions. Slip the jump ring through the hole of the pendant, then close by repeating the twisting motion in reverse to reunite the ends.
- Thread the bootlace through the jump ring on the pendant.
- Thread both ends of the bootlace through the spacer bead, followed by one wide-holed bead. If the beads are a nice, snug fit, you should be able to suspend them in any position you want. If not, pull the beads down the bootlace so they rest neatly at the top of the pendant.
- Place the last wide-holed bead onto the bootlace and tie a knot at each end. Once again, this last bead should be a nice snug fit but still slide up and down the bootlace with ease, allowing the size of the necklace to be altered to any length.
- If the last bead is too loose, you may prefer to omit it and finish the bootlace necklace with a couple of slip knots. To do this, overlap the ends of the bootlace and then tie a slipknot at each end; this method also allows you to alter the length of the necklace.
Matching Homemade Necklace and Earrings

This classic homemade necklace and earrings set are ideal for anyone just starting out in jewelry making and will make a lovely, unique homemade gift.
Although I’ve used round glass beads for this particular project, it will also work well with other bead styles. Using two different colored threads knotted together also makes for a very interesting look.
The Matching Necklace
What You Will Need:
- Jewelry Beads – 6mm round glass beads; for a 27inch necklace, you need approx 72
- Jewelry Findings – 2 calottes, 1 Necklace clasp, 1 Jump ring
- Silk thread – 0.7mm
- G-S Hypo Cement or strong glue
- Jewelry pliers
- Flexible beading needle
Method:
Step1. First, think about the length you would like your homemade necklace to be, then double it.
Step2. Thread a beading needle with the required length of thread and tie a knot in the end.
Step3. String on a glass bead, then tie a slip knot in the thread getting the knot as close to the bead as possible. You may find it easier to ease the knot into place using a thin object such as an eye pin or beading awl.

Step4. Add another glass bead followed by another knot. Repeat this process until your necklace reaches your desired length finishing with the knot.
Step5. Dab the two end knots with a little strong glue and leave to dry. This gives your end knots a little more strength.

Step6. Lay the glued knot inside the hollow of the calotte and squeeze it tightly closed. Trim the loose strands that stick out at the very top.

Step7. Open one of the loops on the calotte and fix it to the clasp. Open the other loop on the calotte and add a jump ring.

The Matching Earrings
These long, dangly earrings have a gothic look due to the black antique chain that has been used for them.
By substituting the black antique chain with a gold or silver-plated chain and maybe pale pink or blue beads, they become very pretty and feminine.

What You Will Need:
- Jewelry Beads – 14/16 Round glass 6mm beads
- Jewelry Findings – 14/16 Headpins in black antique, two earring wires, two jump rings
- Jewelry Making Chains – Lightweight chain in black antique
- Flat/round-nosed pliers
- Wire cutters
Method:
Step1. Cut the chain into 2 x 2 1/2 inch pieces and 4 x 2inch pieces, then set aside.
Step2. Slide one of the glass beads onto a headpin. With the round-nosed pliers bend the pin directly above the bead at a right angle and then bend the headpin back over the top jaw of the pliers with your thumb and forefinger, as it meets the bead remove the loop from the top jaw of the pliers and place it onto the bottom jaw.

Continue to bend the headpin until you have a completed loop, then trim any excess wire with the wire cutters. Your first attempts may appear a little rugged, this is absolutely normal and really isn’t that important.

Step3. Repeat steps 2/3 until you have 14 to 16 finished beads (7/8 for each earring).
If needed slightly open the loops on the beads with the round/flat nosed pliers and hook one onto the bottom link of each chain then tightly close each loop back up to secure them.
Hook the reaming beads to the chains in various places until you are happy with the arrangements.

Step4. Open a jump ring and slide on one of the shorter chains, followed by the longer chain, and another shorter one, then close up the jump ring. Repeat this step for the other earring.

Step 5. Open the loops on the ear wires and slip the jump rings with the chains attached to them. Reclose the loops with the flat/round-nosed pliers.
You can add as many beads as you like, so if you think you’d like to see a few more, go for it.
When learning the basics of how to make homemade earrings, size and weight need to be considered, but apart from that, anything goes.
Conclusion
Well, that’s all I have for you today on necklaces DIY. I hope you enjoyed the post, and I hope you make some lovely gifts for your friends and family!


My favorite pearl necklace came un-threaded the other day, and I am looking to find a way to repair it. It is good to know that one should first, consider the length you would like the necklace. I also like what was mentioned about deciding whether or not you would like the thread or wire to be covered entirely. I will have to think about this before re-threading my pearls, thanks.
Such a nice necklace. Will give it a try.