
DIY face moisturizer is often the point where homemade skincare starts to feel truly satisfying.
You are no longer just cleansing the skin. You are supporting it, protecting it, and influencing how it feels throughout the day.
In this lesson, you will learn what a face cream actually is, how emulsions work, and how to make a safe, effective moisturizer at home using a clear and reliable method.
This tutorial walks you through the structure of a cream, the role of each ingredient, and the practical steps involved. It is designed to help you understand how face creams are built, not just follow a recipe.
Part of the Radiance Email Course
This lesson is part of Radiance, my free email course that teaches the foundations of DIY skincare in a clear, structured way. If you would like to receive the full course by email, including the surrounding lessons that explain how products behave and why formulation questions start to appear, you can register here.
What Are Facial Emulsions?
An emulsion, more commonly referred to as a cream or lotion, is a moisturizer that is massively popular with consumers across the globe. It’s perhaps the most recognised skin care product, and one that definitely deserves a place in your repertoire.
Emulsions are a combination of two skin care ingredients, water and oil. But as you may know, these two ingredients will not come together on their own.
Let’s go back to middle school science class. We’ve all done that experiment. You have a bowl of regular tap water, and you’re instructed to add a little liquid oil. When you do, we see that the oil just pools on top in greasy puddles.
No matter how much you stir or swirl or whisk, there’s no way to get these two substances to combine on their own. This is where emulsifying wax comes in to do the hard work for us, and force water and oil to come together.
Both water and oil have important applications in skin care. Water is light and cleansing, and oil is heavy and moisturising. But sometimes oil alone can be a little too heavy or greasy.
By combining both water and oil together in a cream using emulsifying wax, we get a lighter moisturizer that feels silky and creamy on the skin. This is the magic of the emulsion.
Furthermore, unlike with our all water and no oil micellar waters, we can use both water and oil soluble ingredients here. The emulsion is a highly versatile product, and perhaps the best vehicle providing therapeutic and cosmetic benefits for the skin.
The Ingredients
Carrier Oils

Carrier oils, also known as base oils, are our liquid oils. They’re the natural expressions of various plants, nuts, seeds, fruits and resins and are the most important ingredient in our oil part. While they aren’t the only type of oil we can use, they usually make up the bulk of it.
We call them carrier oils because they’re traditional role is to ‘carry’ essential oils and active botanicals onto the skin. We need this because many of these concentrated ingredients cannot be used directly on the skin without causing harm.
The principle is similar in an emulsion, to allow us to use other ingredients that really make our products high performance. While carrier oils have many therapeutic and cosmetic benefits of their own, these benefits are usually more gentle and subtle.
Furthermore, carrier oils are great at moisturising the skin. Not the best, as we’ll come onto next, but still fantastic. But much like our essential oils and botanicals, the ingredients that are better at moisturising can’t really be used directly on the skin.
Cosmetic butters and waxes, for example, are too stiff to use on their own. In fact, you might bruise or tear the skin if you try to. Again, they must be ‘carried’ onto the skin.
Cosmetic Butters

Another oily ingredient we can use in our emulsions are cosmetic butters. Much like carrier oils, they’re naturally sourced from various plants, and provide unparalleled natural hydration for the skin.
Many cosmetic butters leave a very thin film on the skin. You won’t notice it’s there, but you will notice the effects. This film actively prevents moisture being lost from the skin, locking it in and keeping the skin softer and more supple for longer.
Furthermore, many cosmetic butters also possess therapeutic benefits beyond this, much like our carrier oils. They’re full of vitamins, minerals and other compounds that can bring about positive change in the skin.
Lastly, it’s worth mentioning that butters also provide some functional roles in our emulsions. They help provide some viscosity (stiffening power) for the lotion, and also help to make it feel creamier and more luxurious.
Emulsifying Waxes

Emulsifying wax, commonly referred to as e-wax, is the backbone of our creams. Not only do water and oil not mix together, but they actively repel one another. This is due to the shape of oil and water molecules, which makes them unable to latch on to molecules other than their own.
Emulsifying wax provides a thin barrier between our oil and water molecules, allowing them to sit together without all that repelling they like to do.
This is a very reductive explanation, but we don’t need to know exactly what’s going on. The main takeaway here is that without the e-wax, we have no cream.
You’ll also notice that we’re including an ingredient alongside our emulsifying wax called cetyl alcohol. This is a thickening agent that we use to bring further viscosity to our product. While we could increase our e-wax, this would make our product heavier. Cetyl alcohol keeps it feeling light and thick at the same time.
Don’t worry, cetyl alcohol’s name is deceiving. There is no alcohol in this ingredient, at least not in the way we would expect. Cetyl alcohol is 100% kosher and halal.
Essential Oils

It’s time to break out those lovely smelling oils! Yes, you can use them in all of your creams! Because we’re combining both oil and water together, we do not have the same solubility problems for this one.
Essential oils, commonly abbreviated as ‘EOs’, are aromaceuticals, meaning they combine gorgeous aromas with therapeutic and cosmetic benefits. They’re the concentrated expressions or distilled product of various plants, nuts, seeds, fruits and resins. They smell just like the source they come from.
EOs have powerful benefits for our skin. They have been proven to penetrate deeper than any other cosmetic ingredient, delivering hydration to the very core of our skin.
Furthermore, EOs have the power to bring about amazing positive changes to the skin. Some will brighten and condition, others are cleansing and detoxifying. There are EOs that are wonderfully balancing, and a few even have the power to turn back the clock and rejuvenate skin.
Because essential oils are very concentrated, they cannot be applied directly to the skin. Skin that comes into contact with undiluted EO is at risk of a nasty skin reaction. Then, as skin is subjected to repeated exposure, the risk of a skin reaction becomes more and more likely.
As we like to make our own cosmetics from scratch, exposure to undiluted essential oil is much more likely for us. Therefore we must take precautions to protect ourselves, such as wearing gloves and protective eye goggles when making our products. See your health and safety lesson for more guidance.
Do We Need A Preservative?

As we discussed in one of your previous lessons, all products that contain water MUST be preserved. So therefore we must once again use a preservative here. It doesn’t matter that we’re combining water and oil together. In fact, that makes the problem worse.
We’re giving microbial life everything they need to survive when we add water. By adding oils and other lovely ingredients as well, we’re actually feeding the bacteria and mold so it can grow at optimum levels.
By using a preservative system that is broad spectrum, we eliminate the risk of microbial growth and mitigate the chance of a dermal bacterial infection. You wouldn’t play with fire, after all. Protect yourself and those around you.
What About Extracts?

Absolutely, you can include lots of different kinds of extracts. Furthermore, by making an emulsion, we open the door to many different oil soluble botanical extracts!
The chief oil soluble botanical extracts are the macerates, also known as ‘infused oils’. These are carrier oils, namely sunflower oil, that have had plant matter steeped in it for long periods of time.
As plant matter is steeped, it is actively infused with the oil. Tiny, oil soluble molecules are drawn from the plant and transform our ordinary carrier oil into something a bit more special.
As you learned in your previous lessons, extracts carry the properties and benefits of the plants they are made with. They’re such a wonderful way of packing benefits into a product, and if synergized properly can help make a product much more high performance.
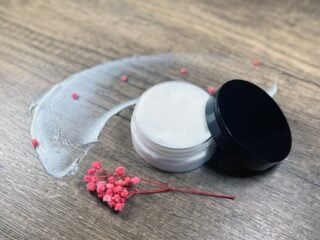
DIY Rose & Lavender Face Moisturizer

This rose and lavender face cream incorporates some of the ingredients we used in the micellar water. In a cream, they synergize for a wonderfully moisturising emulsion that provides some great anti-aging benefit.
Furthermore, it has a gorgeous aroma of lavender, with a subtle hint of rose. When combining two strong smelling ingredients, it’s important that they smell good together. This combination is lovely and will smell fantastic on the skin.
We have reused the rose hydrosol, d-panthenol powder and AHA fruit acid extract. It provides excellent hydration to the skin, as well as being intensely soothing and healing also.
This emulsion is ideal for anyone with mature or dry skin. Furthermore, anyone with mature skin will notice that it provides excellent rejuvenating power.
If used alongside the rose micellar water, you will get some fantastic synergy going as both are intended for dry or mature skin types.
Ingredients
| Ingredient | Percentage (formula) | Weight |
|---|---|---|
| Rose Hydrosol | 40% | 40g |
| Distilled Water | 20% | 20g |
| Glycerin | 5% | 5g |
| D Panthenol Powder | 1% | 1g |
| Emulsifying Wax | 7% | 7g |
| Cetyl Alcohol | 3% | 3g |
| Shea Butter | 4% | 4g |
| Sweet Almond | 15% | 15g |
| Vitamin E | 1% | 1g |
| AHA fruit acid extract | 2% | 2g |
| Water soluble preservative (US – Geogard ECT / UK -Preservative Eco) | 1% | 1g |
| Lavender Essential Oil | 1% | 1g |
| Totals | 100% | 100g (full batch weight) |
- Cosmetic jar 4oz (100g)
Equipment:
- Digital Weighing Scales
- 2 x Beakers
- Double Boiler/ Bain Marie
- Stirrer or a Norpro Mini Mixer
Watch Video
Before we move on to our video and the method steps, it’s worth mentioning that the ingredients in an emulsion recipe are usually grouped into parts. The water part, oil part and cooldown part. Sometimes these parts are referred to as ‘phases’.
The first two groups are separated by solubility. The water part includes our water soluble ingredients and our oil part includes our oil soluble ingredients. Both of these parts are subjected to heat, so that solid ingredients are melted properly and both parts are balanced when they are mixed.
The final part are our heat sensitive ingredients. We call this our cooldown part, and we add them once our recipe drops to below 40C (104F).
Method & Steps
Water & Oil Phase
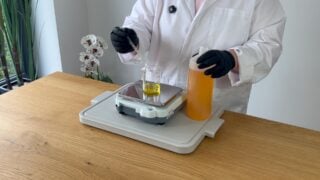
- Place one of the heat proof containers onto the digital scales and weigh the rose hydrosol, distilled water, glycerine, and D- panthenol into it. Giving them a good stir. We will be calling this our water phase.
- In the second heat proof container weigh your butter, emulsifying wax, cetyl Alcohol, and sweet almond oil. We will be calling this our oil phase.
- Make up a water bath by adding a few inches of hot water into a wide shallow pot. Sit both containers in the water and bring the water up to a gentle simmer. Leave both containers in the water until the water has been heated through and the wax and butter have fully melted.
- Once melted remove from the heat and pour the water into the oils. Use a spatula or stirrer to give them a quick blend together. You can continue using a stirrer or change to a milk whisk here. Stir or whisk the cream for around 15 seconds then let it stand for 15 seconds. As the cream starts to thicken the oil and water will become bound together, if the cream looks like it’s starting to separate at any point, a good stir/whisk should bring it back together.
- When the cream has cooled to under 40c (104f) it’s time to add the vitamin E, AHA, preservative, and lavender essential oil. This is called our cool-down phase. As these are such small amounts the best way to add them is to stand the cream on the digital scales and press the tare button before adding each ingredient. I also recommend stirring after each ingredient you add, so that you don’t shock the cream into separating. If the cream looks like it is separating, a good vigorous stirring should pull it back together.
- When the cool-down ingredients have been fully incorporated into the cream. It can be transferred into a cosmetic container, ready for use.
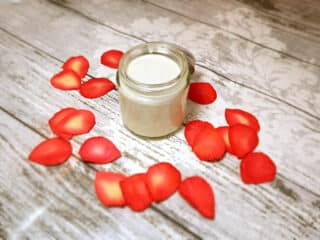
DIY Peppermint Face Cream

This peppermint face cream is the companion to the peppermint micellar water. We’ve again tried to reuse some of the ingredients, to further create synergy but also give you more bang for your buck.
Much like our micellar water, this recipe is synergised for oily skin, but would be great for just about any skin type. Because this is a moisturizing product, we have included d-panthenol in this recipe as well, to further aid hydrating the skin.
Aloe vera gel and seaweed together is a heavenly combination. Aloe is deeply healing, so great for fading out blemishes and minor wounds. Seaweed is deeply detoxifying. On contact with the skin, the cells absorb it’s nutrients which helps them expel waste and toxins more easily.
Lastly, the peppermint essential oil is super soothing and also very detoxifying for the skin. This is the perfect face cream for anyone that has trouble with oily, acne prone skin.
Ingredients
| Ingredient | Percentage (formula) | Weight |
|---|---|---|
| Mint Hydrosol | 40% | 40g |
| Aloe Vera Gel | 30% | 30g |
| Glycerin | 4% | 4g |
| D-Panthenol | 1% | 1g |
| Emulsifying Wax | 7% | 7g |
| Cetyl Alcohol | 3% | 3g |
| Shea Butter | 3% | 3g |
| Jojoba Oil | 9% | 9g |
| Vitamin E | 1% | 1g |
| Preservative | 1% | 1g |
| Peppermint Essential Oil | 1% | 1g |
| Totals | 100% | 100g (full batch weight) |
- Cosmetic jar 4oz (100g)
Equipment
- Digital Weighing Scales
- 2 x Beakers
- Double Boiler/ Bain Marie
- Stirrer or Norpro Mini Mixer
Method
As this recipe is also an emulsion, you can follow the method above and swap out the ingredients for this formula.
However, don’t be alarmed by the thick water part. This will be caused by the aloe, and shouldn’t make a difference. But you will need to scoop the water part into our oil part rather than pour. When you first mix them, it looks a little like frogspawn. But a bit of vigorous whisking should resolve this.


Hi, I have mango butter right now and not Shea ( I use a ton of shea) can I use the mango in this recipe with the same results?
Hello Jess,
Mango butter is a great substitute for Shea butter in this recipe.
Angela x
I made the rose and argan oil face cream on Sunday I didn’t have olive Squalene so used fractionated coconut oil the cream is so soft and silky my skin feels amazing.
I have done your face creams and serums course and learnt so much are you planning on developing any other courses,
Hi! I can’t get my mixture to thicken up. What am I doing wrong and how can I fix it
Dawna
San Diego, CA
Hi Dawna,
There are a few things that could have happened here, but the most common is the quality of the e-wax. However this recipe isn’t supposed to be extra thick, so it could be that you’re just not used to this consistency. I would increase the e-wax by a few grams to thicken it up, providing you are using a good quality e-wax like NF.
Hi Angela
What can you replace rice bran oil with?
Looking forward to trying your recipes
Hi Deborah,
I would swap it for anything that works well for your skin. It does not matter too much which oil you pick for this recipe.
Can I substitute argan with rosehip oil as I try to use what I have and not keeping too many carrier oils
Hi Esther,
Rosehip is a brilliant carrier oil and you can definitely substitute argan oil for this.
This is my favourite moisturizer. Thank you for sharing your recipe, and introducing me to olive Squalane.
Your welcome Shawna, I’m glad you liked the recipe!
Hi Angela thanks for your tips. I have malesma, do you have any tips for me.
Hi Mamoruti,
Melasma is similar to hyperpigmentation, right? If so, take a look at this response I gave to an email from someone asking about a similar problem a few weeks back. Hopefully, it’ll help you! 🙂
Hi there
Where would I buy the ingredients? Some.of them I recognize but.others not so much.
Hi Gina,
Each ingredient in my list of supplies should be linked to an area on the blog that gives you all the info you’ll need on where to buy them.
Hope this helps!
Dear Angela
Hope your well. I like what your doing with the site and keeping everything natural. I would like to ask! I have a hyperpigmented skin and it’s a bit dry. I would like you to recommend for me a homemade recipe for skin using oils.
Thanks
Hi Vanitah,
Thanks for your email, I love to hear that everyone is enjoying my recipes and content. As for a recipe for dry skin with hyperpigmentation, take a look at this post above, although I would definitely recommend a few substitutions to get the best results for your skin. You can use the same quantity of your substitutions as you would the original ingredients in my recipe.
Argan oil is great but I would recommend Evening Primrose Oil which should help tone your skin and reduce the noticeable signs of hyperpigmentation. It’s also amazing for dry skin and sinks in super quickly (so no greasiness at all!).
As for the essential oils, perhaps try substituting the Rose EO for Carrot Seed EO. It doesn’t have the most exciting of aromas, but it’s by far the best essential oil for hyperpigmentation. If you want to make it smell a bit better, you could try splitting the 10 drops (6/4 drops or 7/3 drops) across Carrot Seed and another essential oil such as Lemon, which is great at lifting dark spots. Although be careful using Lemon EO in a day cream, as you really don’t want to spend any amount of time in the sun while it’s on your skin. So if using Lemon, use it as a night cream and use no more than 3 drops (as it can be drying). Frankincense would be a good choice as well and less of an issue with the sun, but it’s much less sweet-smelling (more spicy and aromatic).
So, in sum, I’d definitely whip up a facial moisturiser with the Evening Primrose carrier oil and the Carrot Seed EO (or a combination of Carrot Seed and Lemon/Frankincense). You could also make up a nice whipped body butter using these ingredients alongside some gorgeous Shea butter for intense hydration. You can read more about body butters here if you haven’t seen my post on them yet.
Let me know how you get on. When you’re using your products, try to remember that it takes about 28 days for your skin to renew itself, and because of how skin cells form it can take this amount of time to fully see the results of your skincare formulations. So if you don’t immediately see results, don’t get disheartened. Just keep going because you’re on track to gorgeous skin that you can fall in love with again!
Hope this helps and good luck!
Hello! Is there any way to use more E-Wax instead of using cetyl alcohol? I have everything but the cetyl. The E-Wax I have is the Soft & Silky one.
Thanks for your help!
I wouldn’t up the amount of emulsifying wax, it’ll only make the finished product feel a bit waxy. The cetyl alcohol helps with thickening while also retaining a creamier consistency. I would experiment with adding a hard cosmetic butter, such as cocoa butter or shea butter instead of the cetyl alcohol. You’ll get much better results.
Hi Angela, Could I use rose water instead of distilled water and rose oilas I find the rose oil very expensive?
Mimi
Hi Mimi,
Yes, you absolutely can substitute the distilled water for rose floral water (hydrosol). However, if you’re planning to substitute the essential oil, I’d have a look at our Essential Oil Use Chart to find a good alternative. While floral waters are great, the essential oils have stronger active properties. But I do agree that Rose essential oil is a bit expensive. I often use Rose Absolute, which is much cheaper almost as good. Frankincense, Ylang Ylang and Rosewood are also excellent substitutes that are more reasonably priced.
I hope this helps and good luck making your cream!
Hi dear,
When I am making cream , always oils and water get separated, what’s the problem?
Hi Miriam
Are you using the emulsifying wax and using a mini blender to mix? This should prevent any separation issues?
Miriam,
Ta da!!!!!!! This is the THIRD time I have made the rose and argan oil cream and FINALLY it works!! I discovered the stick blender was one of my problems…I just used my whisk instead (gives the arms a workout but hey they need it!). I trickle the water in slowly and just keep whisking (reminds me of when I make cream of rice cereal). Also, I used a different brand of olive emulsifying wax and it was a nightmare! If I had read the reviews on it I wouldn’t have bought it so now don’t know what I will do with it. Well, try the whisk and I hope it works for you!!! The cream smells sooooo awesome!
April
Hi! How do rosehip oil and rosa moschata oil rate, compared?