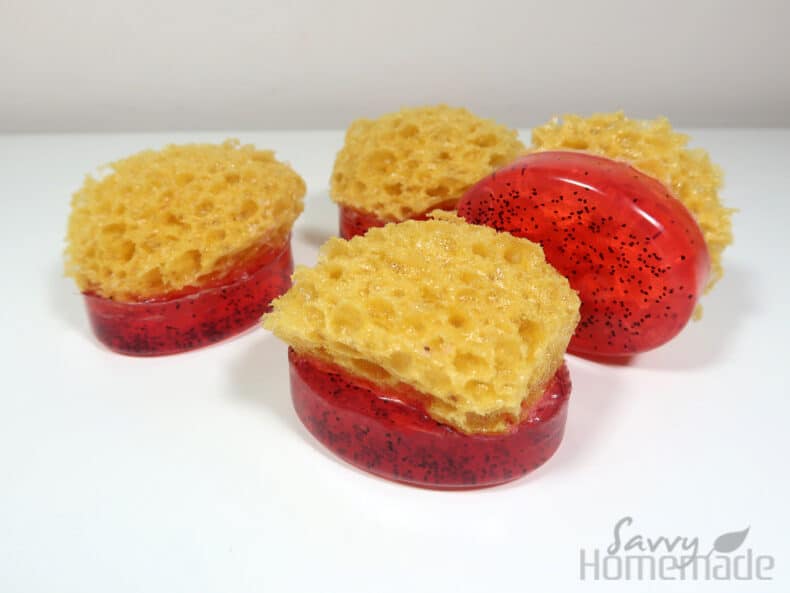
This is great fun to make and it’s so easy even the kids could help with this one. That’s because we’re not doing cold process or hot process soap today, but rather melt and pour!
I’ve added a teaspoon of poppy seeds to the soap base to imitate the strawberry’s seeds but feel free to add extra to give the soap a scrubby exfoliating base. While the seeds in the quantities I’ve used will do some exfoliating, adding more gives a nice contrast to the soft soapy sponge side. Of course the seeds or totally optional, so if you want to leave them out the soap still looks great on it’s own.

Introduction
I like to use the soap side first, just to exfoliate and cleanse the skin. I’ll then turn the soap around and go at it with the sponge, wiping away those dead skin cells and excess soap. Lets also not forget how great these look. I love how cute they are! They’d make amazing gifts, sitting nicely in just about anyone’s bathroom.
While of course, melt and pour soap methods are never going to give you as good of a product than if you were to make some cold or hot process soap, it doesn’t come with any of the trappings of CP or HP. It’s totally easy, completely safe and is ready to use the very day you make it! I know a lot of soap makers that poo-poo MP, but not everything has to be super complicated. Sometimes we just wanna have a bit of fun!
Notes
Natural sea sponges can be expensive but they don’t have to cost the earth as you can pick up some decently priced replicas in store or online. Or, if you really want to, go ahead and treat yourself to a luxury natural sponge. How big you cut the sponges is down to you, and although I’ve given a guid of pouring 75% of the soap before topping up you may need to adapt this to suit your sponge size.
Supplies
400g (12.5 oz.) Clear MP Soap Base
1 large or 2 small Natural Sponges
Red Soap Coloring
1 teaspoon Poppy Seeds
½ tsp Strawberry Fragrance Oil
99% Isopropyl Alcohol
Oval Soap Mold
Heatproof jug
How To Make Them
Step 1: Stand the mold on to something solid such as a chopping board or book now so that when we eventually come to pour the soap, we’ll have a better chance at moving the mold whilst the soap is still warm and liquidly later on. I like to do this first, just so I don’t forget and kick myself later on.
Step 2: Cut the sponges to fit the soap mold. See notes; the size of the sponge is totally up to you but they will need to be at least smaller or around the same width and length as the mold itself.

Once you’ve messed around with the sponges and you are completely happy with their shape and size, set them aside for later.

Step 3: Cut the soap into small manageable chunks and place them into a heat proof container. Melt the soap in a microwave using 30-second blasts.

Step 4: Once the soap has melted, gently stir in the color, fragrance oil and poppy seeds.


Step 5: pour the soap into the molds filling them up to around 75% and blitz with the alcohol to remove any bubbles. Leave the soap long enough to form a skin that will support the sponge.

Step 6: Reheat the soap remaining soap then give the soap in the mold another blitz with the alcohol to help the soap layers stick together. Top up the moulds leaving just enough space so that it doesn’t over flow when you place the sponges in.

Step 7: Once your sponges in place leave to stand overnight or place the soaps into the refrigerator for a couple of hours until they have completely cool and solidified before removing from the molds.
Step 8: Once removed from the molds wrap them in plastic wrap and store in a cool dry place.