If you’ve already tried my Simple Lavender Soap Recipe, you’ll know I love lavender. But I wanted to take that recipe to the next level. So my Lavender and Goat’s Milk Soap recipe builds on the same calming scent and nourishing formula, but with an extra layer of creativity. Literally!
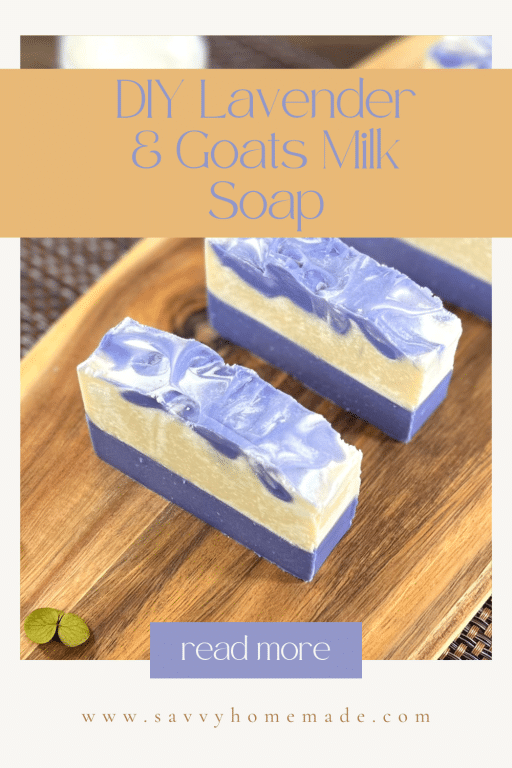
In this upgraded version, our soap is richer, has a creamier lather, and layers in colored mica to create a two-tone, gently textured finish. It’s totally still achievable at home, but does require a bit more attention to temperatures, layering, and texture. This makes it ideal for anyone looking to level up their skills a little.
Whether you’re making it as a gift or to enjoy yourself, this recipe is a brilliant way to explore color techniques while keeping the formula grounded in skin-loving, accessible ingredients.
Why You’ll Love This Recipe
With rich, creamy lather from goat’s milk and a beautiful layered design, it’s both nourishing and eye-catching. This soap is the perfect next step after our previous lavender soap recipe.
Goat’s milk powder gives the soap a silky, conditioning feel that’s especially kind to dry or sensitive skin. Paired with the calming scent of lavender and a gentle swirl of purple mica, the result is a bar that feels luxurious but still very achievable at home.
The two-tone pour and textured top offer just enough complexity to stretch your skills. There’s no fancy swirl tools needed. It’s a fun, creative project that results in a bar that looks as good as it feels.
Ingredients Specification

This soap is made with a carefully balanced blend of oils and additives to create a bar that’s nourishing, long-lasting, and gentle on the skin, all while looking and smelling beautiful.
One important note: I’ve kept the coconut oil content to just 20% of the total oils (180g of 900g). That’s significantly lower than many recipes that use 30% or more. Why? While coconut oil is excellent for cleansing and lather, it can be drying for some skin types in high amounts. This lower percentage still gives us bubbles and firmness, without stripping the skin.
Here’s how the rest of the ingredients work together:
- Olive Oil (465g): The backbone of this recipe. Olive oil is deeply conditioning and gentle, making it perfect for everyday use and especially good for sensitive or dry skin.
- Tallow (Lard) (150g): A traditional soapmaking fat that adds hardness and a creamy, stable lather. It also helps create a longer-lasting bar.
- Coconut Oil (180g): Provides excellent cleansing power and contributes to the bubbly lather. Used at 20% to keep things gentle.
- Castor Oil (45g): Enhances lather and gives the soap a slightly silky feel. Even in small amounts, it makes a big difference.
- Cocoa Butter (60g): Adds richness, hardness, and a luxurious feel to the bar. It also helps balance the cleansing oils with extra nourishment.
- Goat’s Milk Powder (2 tbsp): Known for its skin-softening and conditioning properties. It gives the soap a creamy, soothing lather and is especially beneficial for sensitive or mature skin.
- Lavender Essential Oil (28g): Naturally calming and floral, lavender is a timeless scent that promotes relaxation and self-care.
- Purple Mica (1 tsp): Adds soft, elegant color without staining the skin. Used sparingly for a beautiful contrast and artisan finish.

How Do I Substitute The Ingredients?
Whether you’re looking to tweak the ingredients to suit your skin, your pantry, or your principles, this recipe is flexible. However, it is vitally important you remember to recalculate your lye. Any time you swap oils, the amount of lye required to safely saponify your soap can change. To keep your batch safe and effective, you must run the modified formula through a trusted lye calculator. Our free lye calculator is available to all site users and makes this easy to do.
Here’s how to safely make adjustments:
- Tallow → Vegetable Shortening (Crisco): A great vegan swap. Vegetable shortening gives a similar firmness and creamy lather, though it’s slightly less conditioning than tallow.
- Olive Oil → High Oleic Sunflower Oil or Rice Bran Oil: Both are gentle and nourishing, with fatty acid profiles close to olive oil. They work well in cold process soap and are easy to find.
- Coconut Oil (20%) → Babassu Oil: If you’re avoiding coconut, babassu oil provides similar lather and cleansing properties. But like coconut, it can be drying in higher amounts. This is why this recipe keeps it at just 20% of the total oils, a gentle level suitable for most skin types.
- Castor Oil → Jojoba Oil: You can use jojoba oil in a pinch. It doesn’t boost lather like castor does, but it adds a silky, moisturising feel.
- Cocoa Butter → Shea or Mango Butter: These swaps will keep the bar hard and nourishing. They’re great for skin feel and help balance cleansing oils.
Can I Make It Vegan?
To make the entire recipe plant-based:
- Swap tallow for vegetable shortening (Crisco)
- Swap goat’s milk powder for coconut milk powder
Coconut milk powder gives a creamy lather and a gentle feel, though it won’t quite match the silkiness of goat’s milk. Still, it’s a lovely vegan alternative with wide availability.
Swapping tallow for vegetable shortening may increase the price of your soaps (depending on your region), but not significantly. There’s little difference in texture of the finished soap, too. However, you absolutely must use a lye calculator if you’re planning to do this.
If you enjoy making cold process soap and want more reliable results, you might also like my Natural Soap Making Course.
Inside the course I share tested recipes along with clear guidance on oils, lye, colors, and additives, so you can make beautiful, dependable, & natural soaps with confidence.
It’s 25% off this week. 👉 Explore the course here
Scent Options For Lavender & Goats Milk Soap
Lavender essential oil is classic and calming. While substituting this does eliminate the lavender theme, feel free to experiment:
- Try geranium, chamomile, or clary sage for a floral twist
- Use peppermint, eucalyptus, or tea tree for something fresh and herbal
- Add sweet orange, bergamot, or lemon for a bright, citrusy finish
Alternatively, consider combining lavender with other floral or citrus notes too for a more complex aroma that is still on theme.
Just be mindful: floral oils can accelerate trace, so always be ready to pour once added. Furthermore, some essential oils are more pigmented than others. You might end up with a more ivory or cream tone to the white layer of your soap if you substitute lavender for another EO. I don’t see this as a real problem myself, but may be an issue for you.
Equipment You’ll Need for Lavender & Goats Milk Soap
There is almost no difference between the equipment we used here, and the equipment used for our Simple Lavender Soap recipe. However, we do split the batter, so you’ll need an extra soaping jug/pitcher with spout.
Watch The Video

As an Amazon Associate, I earn from qualifying purchases. If you buy via the links here I may earn a small affiliate commission at no cost to you, please read my affiliate disclosure.
Ingredients
Equipment
Method
- Make sure you are making the soap in a well-ventilated area. Put on your gloves and eye protection, mask, apron, and long rubber gloves. Then, begin by weighing the distilled water into a clean container. Never use a glass container, as this will hold the lye water. Lye can weaken glass so it can easily break. In a separate container, weigh your sodium hydroxide/lye crystals.

- 126 grams Soapmaking Lye, 252 grams Distilled WaterWeigh the essential oils and place them in a small glass container, setting it aside for later use. Then, weigh and place the tsp of mica into a separate small container and pop that to one side, When you’re ready, carefully pour your lye crystals into the water, do not pour the water into the lye, as this can create a violent reaction.When the lye is in the water, start stirring it. Although you are wearing a mask, we still recommend turning your head and leaning away while stirring, so you do not breathe any of the fumes. As the water and lye mix, this will result in a chemical reaction, and the lye water will increase in temperature and release toxic fumes.

- Stir until the lye crystals have dissolved and the water looks fairly clear. Now, place it to one side, somewhere well-ventilated but safe so that it will not be knocked over. Allow it to cool to around 90°F (32 °C) as we get on with our other steps.


- 150 grams Lard, 180 grams Coconut Oil, 45 grams Cocoa ButterPlace the solid oils, coconut, tallow, and cocoa butter into a container for melting. The oils can be melted in a saucepan or the microwave using short bursts. Don't overheat them, you want them just melted.
- 465 grams Olive OilOnce the oils have melted, you can add the liquid oils to them. This would be the olive and caster oil. All your oils should now be together and in liquid form.
- 1 tsp Mica PowdersGrab the container holding the mica. Remove 1 tablespoon of the warm oils and add it to the mica. Mix thoroughly, then set it aside once again.
- 2 tbsp Goats MilkLet the warmed, melted oils cool to below 90°F (32°C), then add the powdered goat's milk. Stir until well blended. You can use a stick blender if desired.


- Once both your lye water and oils have cooled to around 90f to 80°F (32 to 26c) it's time to combine them, so go ahead and pour your lye solution into your oils.
- Before turning on the stick blender to mix the oils and lye, gently tap the stick blender against the bottom of your container. Continue tapping until all the air bubbles have been released.Then, turn on the stick blender and blend until the oils are fully emulsified into the lye solution. Then switch off the blender and check for trace. This is when you can drizzle a small amount of soap batter on top, leaving a visible trail or 'trace' on the surface.


- Now that we’re at trace, it’s time to add our essential oils to the soap batter. Once added, give it a good mix to make sure they are well combined.
- Divide the mixture into two jugs, making one slightly bigger than the other but not by much.
- Add the purple mica to the smaller jug of soap batter, and give both jugs a quick blend. The purple portion of the batter should be brought to a good, thick trace, as it will serve as the base layer. It needs to be firm enough to support the second layer that will be poured on top of it.


- Once you are satisfied with the viscosity of the batter, pour the purple mixture into the mold, giving it a tap to level it. Be sure to reserve a small amount, as this will be spooned over the top of the soap later to create an interesting finish.
- Carefully pour the second jug of uncoloured batter over the purple layer, leveling it out if needed.
- Spoon the remaining purple batter on top of the soap. It doesn't need to be uniform, simply dollop it in various spots.
- Use a skewer or the handle of a paintbrush to gently swirl the top, blending some of the purple topping with the uncoloured batter for a marbled effect.You can also create a waved texture on the surface using a spoon. This step is entirely optional and depends on your personal style preference.


- Goat’s milk can overheat and cause discoloration in the finished soap, so it’s important to keep it cool as it solidifies. Cover the soap with plastic wrap and place it in the refrigerator for 24 hours to help maintain a low temperature. After this period, remove the soap from the refrigerator and let it sit at room temperature for another 24 hours before unmolding.
- When the soap is ready, remove it from the mold and cut into bars. This can be done using a soap cutter or a sharp knife. You should get between 5 to 6 bars, depending on the thickness of the cut.


New to DIY skincare?
If you’re enjoying making your own products, you might like Radiance, my free email course where I teach the foundations of DIY skincare step by step!FAQ – Troubleshooting Lavender & Goat’s Milk Soap
- 1. Can I use fresh goat’s milk instead of powder?
Yes, but it requires more steps. Fresh goat’s milk must be frozen into ice cubes and used as the water part of our lye solution (instead of distilled water). Powdered goat’s milk is easier to work with and more beginner-friendly for this layered soap. For a better idea how this works, take a look at our other goat milk soap recipe. It doesn’t need to be fresh goats milk either, you can use liquid goats milk made from powder as well. - 2. Why does my soap smell a little different after curing?
It’s normal for the scent to mellow over time. However, overheating during saponification (especially with milk soaps) can slightly alter the aroma. To help preserve the scent, keep the soap cool during its initial 48 hours and use a well-measured essential oil amount. - 3. My soap batter thickened too quickly! What went wrong?
While lavender essential oil doesn’t usually accelerate trace, some florals can, especially when combined with milk or colorants. To prevent this, blend in short bursts and avoid overmixing once trace begins. - Can I leave out the purple mica or use a natural color instead?
Absolutely. The mica is just for visual effect. You can omit it entirely. Or use a natural alternative like Brazilian purple clay. Just note that natural colorants produce softer, more muted tones. - Do I have to refrigerate the soap?
Yes. Or at least keep it somewhere cool for the first 24 hours. Milk soaps are prone to overheating, which can cause discoloration, cracking, or a strong ammonia-like smell. Refrigeration helps maintain a creamy color and mild scent. - Can I still make this soap if I don’t want to layer it?
Of course! Simply combine the mica with the whole batch of soap, or leave it all uncolored. The layering is decorative. The soap will still work beautifully without it. - How do I know if my soap reached “trace”?
When you can drizzle the soap batter on top of itself and it leaves a visible trail (like a light custard), you’ve reached trace. For layering, you want one portion at a thicker trace so it can support the next layer. - Can I use a different essential oil or blend?
Definitely. Lavender pairs well with many oils; geranium, sweet orange, peppermint, and eucalyptus are lovely. Just avoid very strong oils that can overpower or irritate the skin. And remember: floral oils may accelerate trace. - My soap turned brown/yellow after unmolding, is that normal?
If it wasn’t kept cool during the first 24 hours, the goat’s milk may have scorched slightly. The soap is still safe to use, but future batches will look creamier if kept refrigerated or in a cool room. - Can I make this recipe vegan?
Yes, substitute the tallow for vegetable shortening (like Crisco), and swap the goat’s milk powder for coconut milk powder. But remember: recalculate your lye with a lye calculator if you make any substitutions. - What if my layers have bled together too much? If your layers have blended more than you’d like, don’t worry, the soap is still perfectly usable. You can try swirling the layers together with a skewer or spoon to create a marbled look and turn the mistake into a feature. For next time, make sure you’re pouring at the right temperature (around 90°F or 32°C), and that your soap has definitely reached a medium trace before pouring. You can also let the first layer sit in the mold for a minute or two to firm up slightly before adding the next layer, which will help keep the colors separate and defined.
Storage & Shelf Life
- Once your lavender and goat’s milk soap has cured for 4 to 6 weeks, it’s ready to use, store, or gift. Never forget that curing is essential! It allows the excess water in our soap to evaporate, resulting in a harder bar with better lather, longer shelf life, and better for sensitive skin types.
- To cure, place the bars upright in a cool, dry area with good air circulation. Turn them every few days during the first couple of weeks to ensure even drying. Avoid curing in airtight containers or humid spaces, as this can trap moisture and prevent proper hardening.
- I actually love to cure my soaps. It makes whatever room I’m keeping them in smell AMAZING!
- After curing, store your soap in a well-ventilated box, drawer, or basket, away from direct sunlight, moisture, and heat. If wrapping for gifts or selling, choose breathable materials like paper or cardboard. Avoid plastic wrapping unless the soap is fully cured and has had time to off-gas.
- Because this is a milk-based soap, it’s best used within 9 to 12 months. Over time, the scent may fade and the color may soften slightly, but the bar will remain safe to use. For the best lavender aroma, that will stay on your skin all day, use within the first 6 to 9 months.
Final Thoughts
This lavender and goat’s milk soap is one of those recipes that feels like a little upgrade. It builds beautifully on the Simple Lavender Soap Recipe, introducing you to layering, colorwork, and working with milk, all while keeping things approachable. It’s the best of both worlds!
Remember: this soap will need to cure for 4 to 6 weeks to reach its full potential. It may be tempting to use it early (it smells amazing!), but giving it time will reward you with a bar that lasts longer, lathers better, and feels gentler on the skin.
If you plan to substitute any oils or swap the goat’s milk powder for something like coconut milk powder (or tallow for vegetable shortening), don’t forget to run the adjusted recipe through a lye calculator. The balance of lye is what keeps your soap safe and successful. Our free calculator makes it easy!
In the end, this is a beautiful bar of soap. It’s nourishing, calming, and also creative enough to feel special. Whether you make it as a treat for yourself or as a thoughtful gift, I hope you enjoy the process as much as I do.