

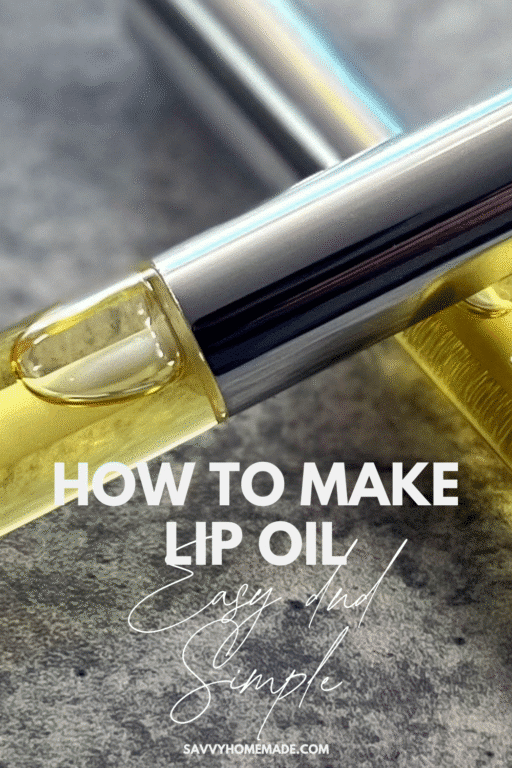
If you’ve been wondering how to make lip oil at home without a mile-long ingredient list, you’re in the right place. I’m sharing a featherlight, plant-based glossy lip oil recipe that actually nourishes while it shines. It’s quick.
It’s beginner friendly. And it’s flexible enough to tweak for your lips and your budget.
I’ve made this exact batch many times now, including a silky “no-thickener” version for a gloss tube and a softly gelled variation for a squeezy bottle. I’ll walk you through what to expect, the why behind the ingredients, and the little things that make the difference between a nice DIY lip oil and one you keep in your pocket all day.
And just to set the stage, we’ll also sort out the jargon. What’s a lip oil compared to a balm or a serum, which one does what, and when to use each. Once you see the differences, learning how to make lip oil becomes almost effortless.
DIY Lip Oil At a Glance
- Difficulty: beginner friendly. If you can warm a small beaker of oil in a pan of hot water, you’ve got this.
- Active time: just a few minutes of measuring and melting, then a quick stir and pour.
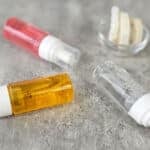
- What you’ll make: a glossy oil for a wand-style tube or dropper bottle; plus options to create a softly gelled cushiony version for a squeezy tube or a velvety pot.
- Who it suits: dry, chapped, or easily dehydrated lips; anyone who wants gloss without a sticky balm feel; lipstick lovers who like a conditioning topper.
- Safety nudge: this is an anhydrous formula, so no traditional preservative is needed. An antioxidant is still a smart move. Keep tools bone-dry. If you use essential oils, stay conservative and check IFRA guidance.
- Recipe card: you’ll find the exact amounts, temperatures, and the short step sequence in the recipe card below. I’ll keep things high level here so we can focus on technique and options.
Lip Oil, Lip Balm, Lip Serum? What’s the difference really
It helps to know the family tree before you start deciding how to make lip oil for your routine.
- Lip balm is solid. Think waxes and butters blended with oils. Balm sits on the surface and forms a protective coat. DIY Lip balms are great for wind and cold, although it can wear away faster and usually needs regular reapplication.
- Lip serum is a targeted treatment. It can be oil based, water based, or an emulsion. Homemade serums often carry high-performance extracts or actives to address a specific concern, like stubborn dryness, fine lines, or uneven tone. They feel lighter, sometimes almost weightless, and they’re meant to deliver an effect rather than a glossy look.
- Lip oil lands in the middle. It’s a fluid blend of nourishing oils that sinks in while leaving a soft, glassy sheen. A good DIY lip oil absorbs, conditions, and doubles as a topcoat over lipstick. You can keep it simple with a few plant oils, or nudge it toward serum territory by including antioxidant-rich picks such as jojoba, almond, argan, oat, or raspberry seed.
That’s why I like making my own lip oils. I can switch the feel from silky to plush and keep the ingredient list clean.
Why Bother With Homemade Lip Oil?

Control, customization, and nourishment. When you learn how to make lip oil yourself, you choose every component, skip fillers, and get a formula that actually suits your lips.
Prefer a vegan gel structure, or a completely fragrance-free glide, or a subtle golden tint that flatters olive skin? Easy.
Want something featherlight for daytime and a cocooning version for bedtime, using the same base method? Also easy.
Natural oils bring the good stuff by default: essential fatty acids, vitamin-rich profiles, and a comforting slip that makes lips look and feel smoother. And you get to choose which oils to spotlight based on what your lips love, not what fit a factory line.
Ingredient Spotlight
Let’s talk through the backbone of this recipe. No giant lists here, just the stars, what they do, and how you can substitute without stress.
Castor Oil

If you’ve ever wondered why some lip oils feel thin and disappear, it’s usually because they skipped castor castor oil. Castor brings cushion and a mirror-like shine. It’s thicker than most plant oils, which helps your blend cling to the lips instead of running off the moment you talk or sip coffee.
Simple swaps: If you absolutely can’t use castor, try a thicker oil like ricinus alternative blends or even a touch of lanolin for body (although this will render the recipe unsuitable for vegans). The feel will change, so consider blending with a little cera bellina or a plant wax to make up for lost viscosity. You could also experiment with using only plant based waxes to keep this recipe vegan!
Jojoba Oil

Jojoba isn’t a true oil, it’s a liquid wax ester, which is a fancy way of saying it mimics the skin’s natural sebum. That biomimetic nature means it absorbs beautifully and helps the whole formula feel more like care than just gloss. It also plays well with every other oil in this recipe.
Simple swaps: Meadowfoam seed oil is a lovely stand-in with similar stability and glide. Argan can work if you prefer a slightly richer afterfeel.
Sunflower Oil

Sunflower oil adds lightweight slip, has great spreadability, and adds natural vitamin E content. It keeps the blend from feeling heavy, especially if you’re layering over lipstick.
Simple swaps: High-oleic sunflower, sweet almond, or even grapeseed if you use an antioxidant and plan to finish the bottle within a few months. Raspberry seed or oat oil can replace part of it for an antioxidant boost and a softer finish.
Coconut Oil

Coconut oil adds glide and a bit of body when it’s just barely melted. It creates that smooth glide-on moment that feels like your lips suddenly remembered how to be soft.
Simple swaps: Fractionated coconut (MCT) if your room runs cool and you want a consistently fluid texture. If coconut isn’t your friend, try a balanced blend of jojoba and almond to keep slip without the coconut profile.
Vitamin E (mixed tocopherols)

Vitamin E is your oil-soluble antioxidant. It won’t preserve against microbes, since there’s no water here, but it will slow down oxidation so your lip oil smells and feels fresh for longer.
Simple swaps: A different mixed tocopherol product is fine. Just stick with conservative levels beyond the recipe’s guidance, since more isn’t always better for texture.
Optional Structure and Extras
- If you like a thicker, plush feel, cera bellina wax can gel the oils into a silky cushion.
- For a vegan option, berry wax or olive-derived gellants can work, although they may feel slightly tackier or thinner.
- A touch of lanolin adds that classic occlusive comfort, especially for night use.
- And if you want a warm tint, sea buckthorn oil brings a gorgeous golden hue along with antioxidants. Just, a heads up, it can stain fabric and some plastics if you get enthusiastic. Ask me how I know.
Watch The Video

As an Amazon Associate, I earn from qualifying purchases. If you buy via the links here I may earn a small affiliate commission at no cost to you, please read my affiliate disclosure.
Ingredients
Equipment
Method
- 8 grams Coconut OilWeigh the coconut oil into a heat-safe container. Place the container into a hot water bath. This is a shallow pan with about an inch of water. Heat until the coconut oil has melted.

- Once the coconut oil has melted, remove it from the water, place it back onto the weighing scales, and press the tare button.
- 7 grams Sunflower Oil, 5 grams Castor Oil, 4.5 grams Jojoba Oil, 0.5 grams Vitamin E OilWeigh the sunflower oil into the coconut oil, followed by the caster bean oil, and jojoba oil, then finally the vitamin E.
- 2 Lip Gloss BottlesMix the oils to combine them. and transfer to a suitable container.


Notes
New to DIY skincare?
If you’re enjoying making your own products, you might like Radiance, my free email course where I teach the foundations of DIY skincare step by step!Tips and Mistakes to Avoid
- Keep every tool bone-dry. Anhydrous formulas don’t welcome water. Even one drop can invite cloudiness or contamination over time. I dry my funnel with a paper towel, then let it air out for a minute.
- Melt just enough. If you use coconut or a gelling wax, warm only until the mixture turns fully clear, then take it off the heat. Overheating can darken color, dull delicate oils, and make the texture feel flat.
- Add scent wisely. If you choose essential oils for flavor, add at the warm stage, never hot. Stay conservative for leave-on lip use, and always check allergens as well as IFRA limits. A little goes a very long way here.
- Avoid phototoxic citrus. Steam-distilled citrus is generally safer for lips, but expressed oils like bergamot and cold-pressed lime can be phototoxic. Sweet orange is often considered gentle, yet still confirm current guidance and your own tolerance.
- Pour while fluid. Especially for a gelled version. Once it starts to thicken in the beaker, you’ll fight bubbles and uneven texture.
- Label your bottle. Write the date and main oils. Future you will thank present you when you’re deciding whether to remake or tweak.
- Wand tubes versus droppers. Wand tubes feel glamorous and precise; droppers are quick and mess-free. Squeezy bottles are great for gelled oil. Pots are perfect for the almost-balm version.
- Patch test. If you’re new to lanolin, coconut, or any essential oil, swipe a tiny amount along the outer lip line first and wait.
Substitutions and Variations
There’s more than one way to approach how to make lip oil. Below are a few creative paths that stay faithful to the structure of the base formula.
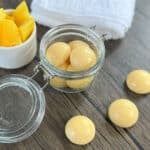
Soft and Shine Gelled LiP Oil

If you love a cushiony swipe, introduce a small amount of cera bellina wax and gently melt it with your oils. As the blend cools, it takes on a silk-gel texture.
I like a hint of sea buckthorn here for a warm golden tint and antioxidant kick, plus a tiny breath of sweet citrus for that freshly peeled orange moment.
Keep levels very conservative for leave-on use and stay within safety guidelines. This version pours best into a squeezy tube.
Ingredients
Makes 50g (Small, squeezy bottle or tube)
- 20g Castor oil
- 17g Jojoba oil
- 2.5g Cera Bellina wax
- 10g Sea Buckthorn
- 0.25g Vitamin E
- 0.25g Orange Essential Oil
Method
- Place the Castor oil, Jojoba oil, and Cera Bellina wax into a heat-safe container. Place the container into a hot water bath. This is a shallow pan with about an inch of water. Heat until the wax has melted.
- Once melted, remove from the heat. Add the Sea buckthorn oil, vitamin E, and then stir.
- The oils should now be cool enough for the lavender essential oil, so this can be added now.
- Stir well and transfer to a suitable container before it becomes too thick. To avoid condensation.
- leave the lid off the container until it’s completely cool.
Notes
- For vegan vegan-friendly you could use berry wax. This may make it slightly thinner and stickier, however, it will still result a great lip oil.
- We have used 20% of Sea buckthorn in this recipe. Although it’s safe to use a 100% solution, any more than 20% can stain the skin, so we advise against going any higher.
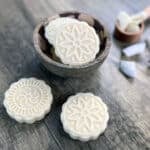
Lavender Glow Lip Oil

For evening, I go richer with a little lanolin and oat oil, still based on castor and jojoba for shine and glide. The final texture is almost balm-like in a pot, still a flowable gel rather than a hard set.
A whisper of lavender adds a cozy, familiar feel at bedtime. If you’re sensitive to lanolin or lavender, skip one or both and keep the structure with your gelling agent. I’ve also added a tiny pinch of pink mica to give it a pink blush.
This one’s super nourishing, almost like a balm but not quite as thick. We’ve added a small pinch of blush pink mica to give it a slight shimmer, which is optional. Without the mica, it has a creamy, opaque look.
- Castor Oil – Gives a rich, glossy finish while sealing in moisture so lips stay soft for longer.
- Jojoba Oil – Lightweight and skin-friendly, helping to balance and condition lips without feeling sticky.
- Oat Oil – Naturally soothing and packed with ceramides, it helps calm irritation and support the skin barrier.
- Lanolin – A powerful natural occlusive that locks in hydration and helps protect against dryness.
- Cera Bellina Wax – Adds a smooth, gel-like consistency so the oil glides on evenly and stays blended.
- Vitamin E – Protects the delicate lip skin from free radical damage and extends the life of the oils.
- Lavender Essential Oil – Brings a calming, subtle floral scent with gentle skin-soothing properties.
This mix makes for a nourishing, protective lip oil that’s especially good for dry or chapped lips, with a silky glide and a soft lavender aroma.
Ingredients
Makes 50g (used a small 50g pot)
- 20g Castor Oil
- 10g Jojoba Oil
- 3g Cera Bellina wax
- 11.25g Oat Oil
- 5g Lanolin
- 0.5g vitamin E
- 0.25 lavender Essential Oil
- Pink mica (optional)
Method
- Place the Castor oil, Jojoba oil, and Cera Bellina wax into a heat-safe container. Place the container into a hot water bath. This is a shallow pan with about an inch of water. Heat until the wax has melted.
- Once melted, remove from the heat. Add the oat oil, lanolin, and vitamin E. Give the oils a good mix so they are fully combined and the lanolin has fully dissolved.
- We can now incorporate our lavender essential oil and a pinch of mica (if using).
- Mix again, then transfer to a container.
Other Interesting Ideas:
Tint and Shimmer
A tiny pinch of lip-safe mica can add a soft shimmer to the gelled versions. Stir it in gently while the blend is fluid but off heat. Sea buckthorn can lend a true golden tint. Just remember, darker tints can stain fabrics or pale masks. Learned that after a hurried hug.
Vegan Structure
If you prefer to avoid cera bellina, try berry wax or an olive-based gelling wax. Expect a slightly lighter set and a touch more tack. It can be lovely, especially in warm weather.
Troubleshooting
Things happen. Here’s how to fix the most common hiccups when you’re figuring out how to make lip oil that behaves.
- It’s too thin, feels like it vanishes. Increase the percentage of a higher-viscosity oil such as castor next time, or introduce a small amount of gelling wax. In the moment, you can layer it under a dab of balm to extend wear.
- Cloudy or streaky after cooling. That’s often from under-melted coconut or gelling wax. Rewarm the filled container gently in a warm water bath, uncap first and keep water out. Once everything looks clear, let it cool again undisturbed.
- Little pellets or grainy bits. Partial melting can create micro-crystals, especially if you rushed the warm phase. Reheat gently until fully clear and stir longer. Cool at room temperature rather than the fridge to avoid shock crystallization.
- Separation or soft lumps with lanolin. Lanolin needs patience. Warm to dissolve thoroughly, then stir longer off heat. If a few soft flecks remain, rewarm a touch and stir again.
- Scent is too strong. You can dilute by decanting half the bottle into a spare container and topping both with unscented base oil from the same blend, then stir. For the next batch, reduce essential oil significantly. Lips are sensitive skin.
- Tint is staining. Sea buckthorn and bold micas can stain packaging and fabrics. Reduce the amount next time and consider using a pot or opaque tube. Wipe the wand before inserting to avoid ring stains on the neck.
- Condensation on the cap. You probably capped too soon. Uncap and let it sit in a clean area until moisture evaporates. Wipe the cap with a dry tissue before replacing.
Storage and Shelf Life
Anhydrous products are pretty low maintenance, which is one of the joys of learning how to make lip oil. Store your bottle in a cool, dry spot away from direct sunlight. Heat and light speed up oxidation, which leads to off smells and a thicker, sticky texture over time.
Shelf life depends on your freshest oil. Stable oils like jojoba and meadowfoam last well, while delicate options like grapeseed or some raspberry seed oils ask for a quicker turnaround. Vitamin E helps slow oxidation but isn’t a preservative. If you accidentally introduce water, the clock accelerates. Keep an eye on scent and clarity. If it smells paint-like or looks hazy without any wax in the formula, it’s probably time to retire the bottle and make a fresh one.
As a practical rule, I make small batches and use them within a season. It’s the perfect excuse to tweak color or feel for spring versus winter.
How to Use
Swipe a thin layer over bare lips for a soft glassy finish, or dot a tiny amount over lipstick to revive color and add shine. I like to press my lips together gently instead of rubbing, which keeps the pigment from moving outside the lines.
For overnight care, the gelled or lanolin-kissed version does wonders, especially in dry climates.
If you’ve added a tint, test it on the back of your hand first to see how it plays with your undertone. Warmer tints flatter olive and golden skin beautifully, cool pinks bring freshness to neutral and fair tones.
And yes, if you go heavy on sea buckthorn, it can leave a faint golden cast. Some people love that. Some prefer a whisper. Have fun figuring out which camp you’re in.
Scaling and Cost Notes
Percent-based formulas are your best friend. They make scaling painless, whether you’re filling one gloss tube or a handful for friends.
Decide how much you want to make, scan the recipe card for the percentages, and multiply. Since you’re measuring in grams, your precision scale does the heavy lifting.
No mental gymnastics.
In terms of cost, the base oils are usually affordable, especially sunflower and castor. Jojoba sits in the slightly higher tier but brings performance and shelf life.
The price climbs when you add specialty oils like raspberry seed or sea buckthorn, or when you include gelling agents and high-end packaging.
My approach is simple. Keep the base blend cost-effective, then splurge on one elevating oil for a small percentage. That way your DIY lip oil feels luxe without turning into a couture project.
And one more real-life note. I once tried to save a few pennies with a budget gloss tube. The stopper scratched the wand and it started to fray. Spend a touch more on good packaging and you’ll enjoy the product so much more every time you use it.

Final Thoughts
Keep it minimalist, choose a few well-behaved plant oils, add an antioxidant, and mind your melt and pour. Decide whether you want fluid shine for a tube or plush comfort for a pot, then tweak with a small amount of structure or a hint of tint.
That’s really it. Learning how to make lip oil is about feel and intention, not chasing twenty ingredients.
Ready to mix your first batch, or try the gelled variation with that beautiful golden hue I mentioned earlier? Scroll to the recipe for the exact quantities, temperatures, and short step sequence.
Print it if you like to have a paper guide next to your hot water bath. Then come back and tell me which version won your heart.

So easy and fun to make! My lips like to get chapped and dry during the fall season, not to mention I’m a lip biter. This simple lip oil stops my biting in its tracks and helps my lips heal at the same time. A HUGE difference in just 2 days! So glad I decided to make this, I give them to all my friends and family <3
Hi Stephanie, its great to hear this recipe has helped YOU, thanks for sharing!