

You may have noticed that I’ve been on quite the DIY makeup kick lately, and I’m loving every minute of it! There’s something so satisfying about creating makeup that’s completely customized to your skin and style.
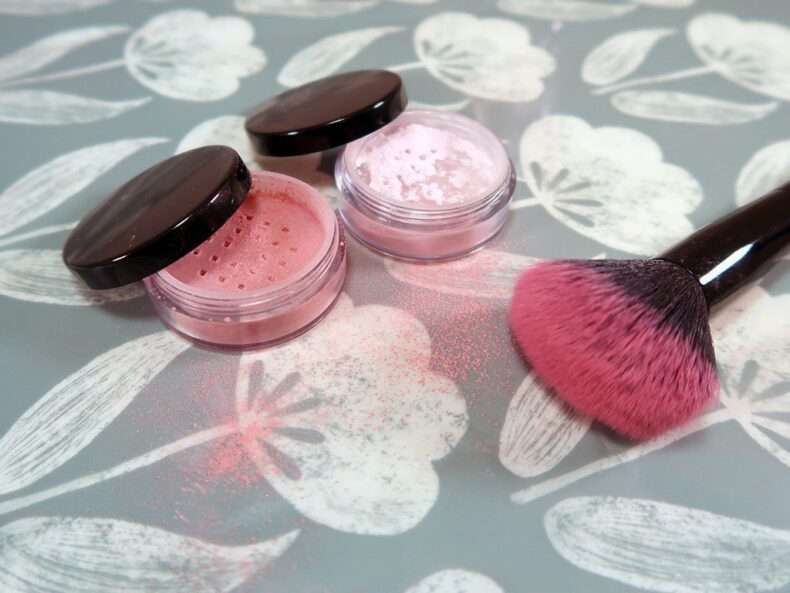
Today, I’m sharing my latest favorite: a simple, natural DIY blush powder you can make right at home. I’ll walk you through how to create it from scratch and tailor the shade perfectly for your complexion.
I used to think making blush would be complicated, with too many ingredients and tricky steps, but it’s surprisingly easy once you know the basics. Follow my recipe and you’ll have a soft, blendable blush that looks gorgeous on every skin tone.
What’s In This DIY Blush Recipe
Let’s take a look at what goes into my gorgeous blush recipe.
A Familiar Base

So did you see my eye shadow palette recipe from last week? You might recognize some of the ingredients in this recipe!
I use the exact same base for this, so if you already have some stored away then you’re going to find these recipes an absolute breeze.
You’ll also have a lot of the technique of mixing micas and oxides down, and you’ll likely already have a blade grinder which will help a lot.
The point of the base is to be a lovely, soft and glidable bulking agent for our blush. Micas on their own are much too strong to apply to our skin, and you can’t apply them evenly, either.
This is where the base comes in. It’s a combination of white powders that will carry the micas and oxides onto your cheeks without clumping, as well as tempering that vibrancy a little.
Micas and Oxides

The shade of our blush is produced by the micas and oxides we can add. They bring a vibrancy of color to our product.
While you can experiment by using whatever micas you like the look of, I would suggest starting with a selection of reds, pinks and bronzes.
If you have a darker skin tone, you can make use of the oxides as well. This will give you a deeper, richer color. But be careful, as you will need to add a lot less than you would of the mica.
We all have unique skin. Your skin tone is different from my skin tone. This is why there are so many options when you visit your local Sephora or Ulta. You’ll also find that you probably won’t be able to get your hands on the exact shades of micas I have. But that’s fine, because you can reach a nice shade of blush with any red, pink, and bronze micas you do have.
While I have given you measurements in my recipe card below, keep in mind that these are not set in stone. They just can’t be, as there are too many variables here.
So, to achieve a color that is right for you, you will need to experiment. Begin with the measurements I’ve given below as a starting point. If it’s too vibrant and you’re starting to look a little like a clown! Tone back all of your micas.
Not bright enough? Up everything! If the shade doesn’t look right on your skin, or just isn’t to your liking, try adding different amounts of the micas. Adding more bronze will make it richer, adding more red will give you a more vibrant rouge.
Use An Electric Blade Grinder

Using a blade grinder is kinda important here. It’s good to use one with almost all of your powdered makeup crafts. So investing in a dedicated blade grinder might not be a bad idea.
Nevertheless, you can get away with a mortar and pestle. Although be prepared to spend a lot more time on these projects.
The blade grinder will seamlessly mix your powdered micas with your base ingredient. You end up with a completely even consistency, with a good mix of color.
This is especially important if you have any plans to substitute some of the micas for oxides. Oxides are much harder to incorporate into your base, and a blade grinder is essential for this.
Watch The Video

As an Amazon Associate, I earn from qualifying purchases. If you buy via the links here I may earn a small affiliate commission at no cost to you, please read my affiliate disclosure.
Ingredients
Equipment
Method
- 11.5 grams Zinc Oxide, 2.7 grams Magnesium Stearate, 3.3 grams Sericite Mica, 1.3 grams Kaolin ClayCombine all of your base ingredients in a blade coffee grinder, and then blend together for 30 seconds. Spoon into a pot to store. Technically, this is a lot more base than we need for this craft, but I usually make it in bulk so I have some to hand when I need it. I use it in all of my blush and eye shadow recipes.

- 2.7 grams Powdered BaseMeasure out 2.75 grams of your base.
- 0.4 grams Bronze Shimmer Mica, 0.3 grams Red Mica, 0.3 grams Pink MicaAdd your micas to the base.
- Put it all in the blade grinder and blend for 30 seconds. Then check to see if it is a color that you like the look of. The measurements of mica are just a suggestion, and if you don’t like the look of it on your skin, we can fix that. Finding the right shade depends on the micas you have and your own skin tone. Experiment with your 3 chosen micas until you reach a shade to your liking.
- Sifter ContainerOnce you reach a suitable shade, spoon it out into your sifter container.


New to DIY skincare?
If you’re enjoying making your own products, you might like Radiance, my free email course where I teach the foundations of DIY skincare step by step!Experimentation and Substitution
As I have already said, it’s a good idea to just use measurements here as a guide. We have unique skin, so you’ll need a unique DIY blush to go on it.
You can also experiment with this recipe to make highlight and contour as well. By adding some glittery silver or gold, you can achieve this quite easily.
When putting together this recipe, I actually came up with 4 shades total, so I’ll share the extra recipes with you.
You will need the same amount of base as you have used in the blush recipe above.
Cocoa Delicious Blush
A deeper blush with more of a brownish tint to it. Would be great as a blush on ladies with darker skin tones, or use it sparingly as a contour.
- 0.4 grams Titan Maroon Mica
- 0.4 grams Pink Mica
- 0.1 grams Brown Oxide
Golden Coast Highlight
A great all round highlight that would look nice on many skin types. The shimmer is achieved with a glittery gold mica.
- 0.1 grams Sericite Mica (white)
- 0.5 grams Bronze Shimmer Mica
- 0.1 grams Golden Shimmer Mica
Pink Passion Highlight
This is a very bright highlight, so use it very sparingly and only by people with light skin tones. It goes quite well with a pink or red blush, but I wouldn’t use it with a bronzer.
I know it seems like very little mica is going into this one, but as it’s a highlight we don’t want the color to be too strong, otherwise it will compete with your blush.
- 0.03 grams Silver Shimmer Mica
- 0.19 grams Sericite Mica (white)
- 0.03 grams Vibrant Pink Mica
Conclusion
I think my favorite part of this craft is how easy it is to customize it for your own skin. We all have preferences as well, and so two people of the same skin type might want a completely different shade on their cheeks.
So I encourage you to experiment with all your micas. But I would suggest is to stick to reds, pinks, browns and maybe some silver and gold as well.
I mean, you probably don’t want green or blue cheeks! But hey, do you?
That’s all I have time for today, but I do hope you enjoy making your own DIY blush. If you want to be the first to hear about our latest recipes, consider joining our newsletter. I also include some exclusive deals I come across from time to time.
You can also like and follow us on social media. Check us out on Facebook, Instagram, YouTube, Pinterest, and Twitter!


