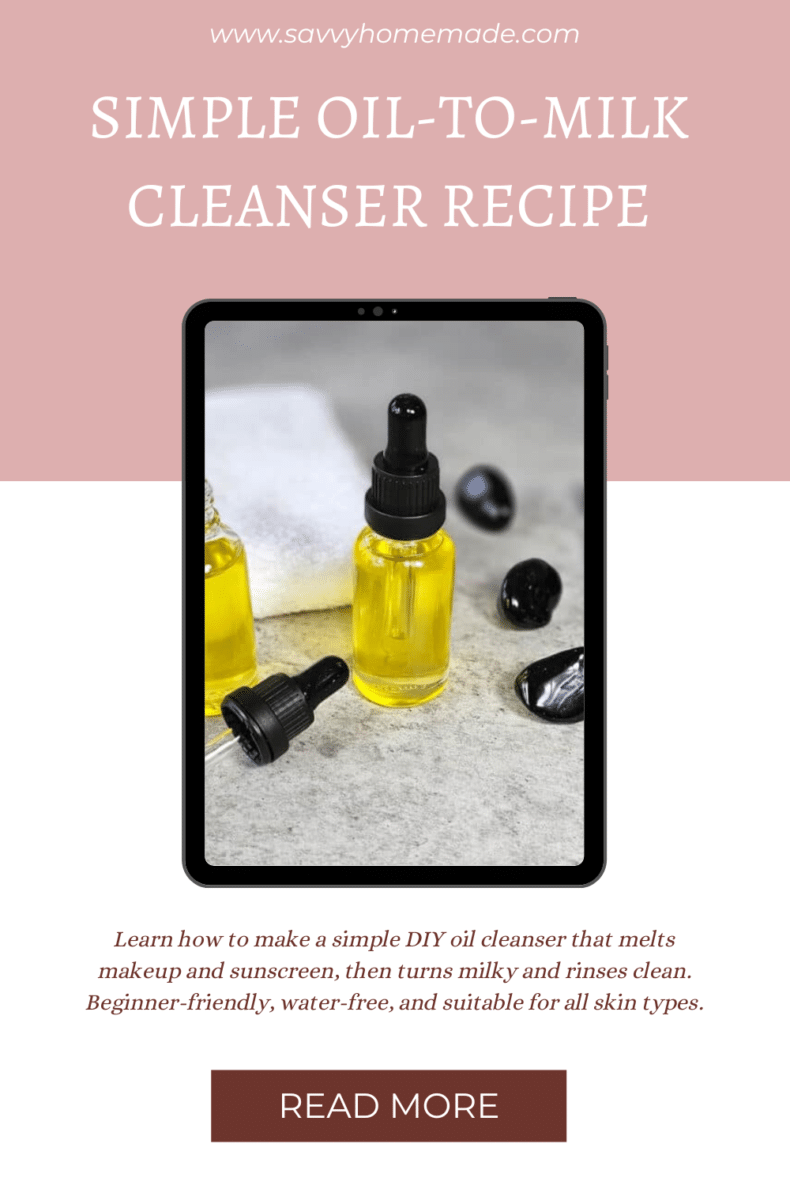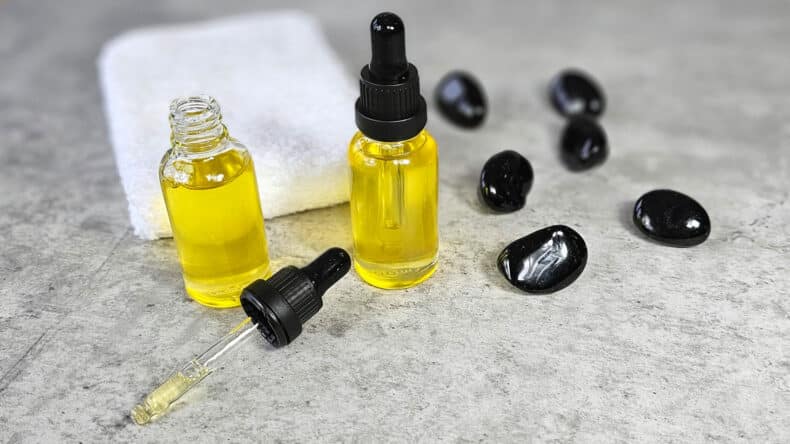
Oil cleansing is one of my favorite ways to cleanse the skin gently without stripping it of its natural oils. This simple DIY oil cleanser is designed to melt away makeup, sunscreen, and daily grim while leaving the skin soft, comfortable, and well balanced.
I designed this diy cleansing oil using a selection of stable lightweight oil. They all have a decent shelf life and the ability to cleanse effectively without feeling so heavy or greasy.
With the addition of an oil soluble emulsifier, these oils transform into a milky cleanser when you add water, allowing everything to rinse away simply and cleanly. For a bright citrus scent I’m using a mix of lemon and lime essential oils in this cleanser, equal parts of both. You can of course choose your own.
If you want a more traditional cleansing approach? This recipe can also act as a simple wipe-off oil cleanser. You just have to remove that emulsifier, and increase the oil content a little bit, then just cleanse using a warm cloth.
What is an oil-to-milk cleanser?
At its core, a homemade oil cleanser is exactly what it sounds like. It’s a blend of simple oils designed to dissolve makeup, excess sebum, and sunscreen.
But here’s the part that makes this recipe so very special.
When you add water, the formula emulsifies. It turns from clear oil into a soft, milky liquid that rinses off clean. This transformation is all thanks to a liquid emulsifier that allows oil and water to mix together.
Without it, you’d have a traditional oil cleanser that needs to be wiped away with a warm cloth. With it, you get that satisfying rinse off finish.
Benefits of this oil cleanser
- Effectively removes makeup, sunscreen, and daily impurities.
- Emulsifies and rinses clean with no greasy residue.
- Cleanses without stripping the skin.
- Quick and easy to make using minimal equipment.
- Can be used as a wash-off or wipe-off cleanser.
- Water-free formula with no preservative required.
Key ingredients I’m using & why

Fractionated Coconut Oil
This is a very light and fast-absorbing oil that provides the much needed slip without feeling too greasy. Chosen for its long shelf life and stability, it helps dissolve makeup and grime while leaving the skin soft and comfortable.
Jojoba Oil
Technically this is a liquid wax. Jojoba closely mimics the skin’s natural sebum, making it suitable for most skin types, helping to balance the skin while supporting gentle yet effective cleansing.
Apricot Kernel Oil
A soft, nourishing oil that adds glide and skin-conditioning benefits. It helps keep the cleanser gentle and comfortable, particularly for drier or more sensitive skin types.
Castor Oil
Used in a small amount to boost cleansing power. Castor oil is especially good at breaking down makeup, sunscreen, and heavier oils, helping the cleanser work more effectively without stripping the skin.
Polysorbate 80
An oil-soluble liquid emulsifier that allows the oils to mix with water. When water is added, the oil cleanser transforms into a milky texture that rinses away cleanly, leaving no oily residue behind.This is non-negotiable if you want that milk effect.
Vitamin E
This is added as an antioxidant to help slow oil oxidation and support product freshness. While not essential, it helps extend shelf life and maintain the quality of the oils.
Substitutions
Before going deeply into the substitutions, you could make this with 88% Fractionated Coconut Oil and 12% polysorbate 80. This would still give you a decent DIY oil cleanser. Dont over think it, light oils with a long shelf life are the key. Don’t get too hung up on expensive ingredients, this is a wash off product which will ultimately be washed down the sink.
- Fractionated Coconut Oil, Caprylic/Capric Triglycerides would be the closest match here. Olive squalane would be great but pricey.
- Jojoba Oil, camellia seed oil would be my first choice
- Apricot kernel Oil, peach kernel or sweet almond
- Castor Oil, leave it out and up the jojoba oil
- Polysorbate 80 olivem 300 would be great, it would also give you a totally natural product
- Vitamin E, you could leave this out but the shelf life of the balm will be more like 6 months
- Essential Oil, any oil you have to hand. Just make sure you follow usage recommendations for the one you choose.
Watch The Video

As an Amazon Associate, I earn from qualifying purchases. If you buy via the links here I may earn a small affiliate commission at no cost to you, please read my affiliate disclosure.
Ingredients
Equipment
Method
- 22 grams Fractionated Coconut Oil, 12 grams Jojoba Oil, 7 grams Apricot Kernel Oil, 2.5 grams Castor Oil, 6 grams Polysorbate 80, 0.25 grams Vitamin E Oil, 0.25 gram Lavender Essential OilIn order of appearance, weigh the oils into a small jug or container.

- Stir well to make sure they are fully combined.

- 1 2oz Dropper BottleUsing a funnel or a steady hand, pour the oils into a small bottle. Then, pop the lid on and you are done.

Notes
- For a more natural option, the polysorbate can be replaced with Olivem 300.
- If the polysorbate is left out completely, the cleanser will remain an oil based cleanser rather than an oil-to-milk cleanser. It will still cleanse the skin effectively but will need to be wiped away with a warm cloth instead of rinsing clean.
New to DIY skincare?
If you’re enjoying making your own products, you might like Radiance, my free email course where I teach the foundations of DIY skincare step by step!
Troubleshooting
- If your DIY cleansing oil feels greasy after rinsing, you may need a slightly higher emulsifier ratio.
- If it separates, stir thoroughly and make sure the emulsifier is fully incorporated.
- If it feels too thin, that’s normal. Oil cleansers are fluid by design. A thicker texture usually means a different formulation style entirely.
- And if your skin feels stripped, reduce castor oil and increase a softer oil like jojoba. Small tweaks make a big difference.
How to use this oil cleanser
- Pour a small amount onto dry hands, use sparingly as little goes a long way.
- Massage over the face using gentle circular motions, taking extra time over makeup, SPF, and areas of congestion.
- Wet your hands and massage again. The cleanser will turn milky as it emulsifies, allowing the oils to lift away dirt and impurities.
- Rinse thoroughly with warm water, any remaining oil can be removed with a soft, damp cloth.
Skin should be left feeling clean, soft, and comfortable with no greasy residue. - Can be used on its own or as the first step in a double cleanse.
Storage
- Store in a cool, dry place away from direct sunlight.
- Keep the container closed when not in use.
- Use within 6 to 9 months.
Final thoughts
There’s something so satisfying about massaging lovely oils into your face at the end of the day and watching it dissolve everything, then turn a milky color and rinse away clean. No tightness, and no stripped feeling.
I also love how flexible this recipe formula is. You can keep it ultra-minimalistic and budget friendly, or you can tweak it a bit with different light-weight oils and scents to suit your wallet or mood.
And maybe this is just me, but once you realize how easy this is to make, those expensive shop bought bottles start to look a little less inviting.
So, give this recipe a try and see how your skin responds over a few weeks. Also pay attention to how it feels to you after rinsing away, how your makeup melts away, and whether your skin seems calmer or more balanced.
Then adjust to suit.
That’s the beauty of making your own DIY skincare. You’re not stuck with someone else’s recipe or formula.