Radiance DIY Micellar Water Lesson

Angela Wills - Savvy Homemade

Updated Feb 6, 2026

This post may contain affiliate links. Please see our disclosure policy

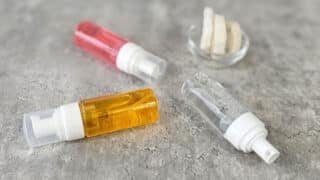
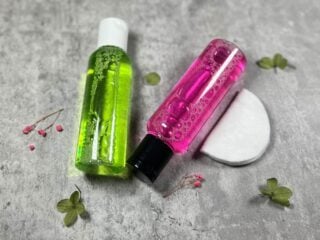
DIY Micellar water is often the first skincare product people make that feels both simple and slightly mysterious. It looks like water, it feels gentle, and yet it cleanses effectively without rinsing.

In this lesson, you will learn what micellar water actually is, why it works, and how to make it safely at home using a clear, reliable method.

This tutorial walks you through the ingredients, the structure of the formula, and the practical steps involved. It is designed to help you understand what you are making, not just follow instructions.

Part of the Radiance Email Course

This lesson is part of Radiance, a free email course that teaches the foundations of DIY skincare in a clear, structured way.

If you would like to receive the full course by email, including the surrounding lessons that explain how products behave and why formulation questions start to appear, you can register here.

Click here to join the Radiance email course

diy micellar water

What are micellar waters?

A micellar water is a wonderfully multifunctional skin care product that can both cleanse and tone at the same time. Over the last few years, this product has become massively popular with consumers across the globe, and today you will learn how to make it at home.

DIY Micellar waters are made from a combination of hydrosols, herbal infusions and surfactants. They are formulated to remove both water and oil soluble dirt and grime from the skin.

However, due to the presence of hydrosols and other botanicals, they also work as a toner to help really clear out your pores. And with a few other added ingredients, micellar waters can also provide some great moisturising benefit too. It’s very much a 2 or even 3 in 1 product!

The ingredients

Hydrosols & Distilled Water

Hydrosols and distilled water make up the bulk of our homemade micellar water recipe. It’s the reason we call them ‘waters’, after all. Hydrosols, also referred to as hydrolats or floral waters, are a by-product of essential oil manufacturing. 

When we steam distil various plant based materials we can extract beautiful essential oils. The steam acts almost like a solvent, drawing the oil from the plant material and is collected for use in many different purposes. The spent water is also collected, and sold as hydrosols.

Hydrosols possess many of the therapeutic benefits of their essential oil counterparts. However, they are not as strong and can be used neat on the skin. 

They also possess a subtle fragrance of whatever it is derived from. Orange hydrosol, for example, has a subtle sweet aroma that smells like oranges. 

However, because hydrosols can be expensive, we ordinarily use a combination of hydrosols with ordinary distilled water. But this choice is totally yours to make, and the ratio is totally up to you. We will discuss this more in your next lesson. 

hydrosols

Surfactants

Surfactants are what give our micellar water its cleaning power. Without them, this product wouldn’t be a cleanser at all, but rather just a toner. 

Surfactants are compounds that contain molecules that can latch on to both water and oil soluble particles. So our surfactant molecules have the power to latch on the grime or make-up that builds up on, in and around the pores. 

This is important because as make up and grime are oil soluble, they create chains of oil molecules that are hydrophobic, meaning they rappel water. So water alone is not gonna do anything to it. 

So, once our surfactant molecules latch on to these oily chains, we can break them apart by simply working the product on the skin. And once the chains are torn apart, the grime can be easily removed by a light cotton pad. 

While all of this sounds complicated, the main takeaway is that the surfactant adds the cleaning functionality to our product. And don’t worry, all the surfactants we’ll use for this course are accepted in natural skin care. These are Coco Glucoside and Cocamidopropyl Betaine.

Botanical Extracts & Other Therapeutic Ingredients

This category of ingredients are totally optional, but really make our product high performance. Much like hydrosols and essential oils, botanical extracts are the product of various plants. They possess many therapeutic benefits that you may really benefit from. 

The most important thing to remember when selecting botanical extracts for your micellar waters is that they MUST be water soluble. More on this in your next lesson. 

But there are plenty of non-botanical ingredients that can also add therapeutic benefit to your DIY Micellar waters, many of which are also natural. Again, if it’s water soluble, you can use it! We will discuss your options in more detail in your next lesson. 

botanical extracts

Preservatives

I know what you’re probably thinking, I don’t want to use a preservative. I know, I don’t either! But we have to use one here. Don’t worry, they’re really easy to get your hands on and even easier to use.  

Any skin care product that contains any amount of water requires a preservative. Without it,  you will have unchecked microbial growth. Within a week your lovely micellar water will turn into a weird science experiment. 

All jokes aside, unpreserved skin care products are no joke at all. In fact, they can cause life threatening infections and serious skin conditions. People have lost their sight and even their lives to unpreserved cosmetics. 

Don’t play with fire. Where necessary, preserve your products for your own safety and those around you. And don’t worry, there are water soluble preservatives accepted in natural skin care – we’ll be using Preservative Eco. 

Something else worth mentioning about preservatives is that they are sensitive to extremes in PH. This is a common problem for micellar waters, as surfactants tend to increase the PH of a product. Therefore, you may need to balance the PH of your product before you add your preservative. 

If you don’t do this, your preservative will stop working very quickly, and your product will have microbial growth similar to as if you hadn’t even added one. But don’t worry, we’ll teach you how to do this. 

preservative for face moisturizer

What About Essential Oils?

You’ll notice in both the formula below, and the two micellar water recipes that we haven’t included any essential oils. That’s because we can’t really use them here. 

Essential oils are, for all intents and purposes, oils. As all oils are hydrophobic, meaning they will not mix with water, it would be impossible to include them as is in your micellar water formulas. 

While surfactants do have some ability to solubilize, they may not be efficient enough to keep your product stable. You’ll get separation issues, and this is unacceptable for products that contain essential oils which can be harmful when applied directly to the skin. 

Therefore, we recommend saving your gorgeous essential oils for the facial creams chapter of this course.

DIY Peppermint Micellar Water

DIY peppermint micellar water

This peppermint micellar water recipe is formulated with aromatic peppermint hydrosol for a deeply soothing, calming and bacteria fighting 3 in 1 product that will cleanse, tone and moisturize. 

We’ve added some d-panthenol to this product to help improve its moisturising benefit, and sits in the extracts category of our formula (it is commonly derived from compounds found in natural honey). 

On contact with the skin, it converts to vitamin B5, which is intensely hydrating for the skin. It also works to actively make the skin softer and smoother, and also helps to repair the skin’s natural barrier.

Beyond these therapeutic and cosmetic benefits, this product will remove make-up, pollution, general grime and other toxins from the skin with ease. 

Ingredients

Full Disclosure: Many of the links below are affiliate links. If you buy via these links we may earn a commission at no cost to you. This simply helps us maintain our courses, and get them to you free or at the lowest possible price.

You will also need:

Equipment:

Note on scales: We recommend using a digital weighing scale that is designed for weighing jewellery and can display measurements in grams. This is because jewellery scales and grams will be more precise for measuring very small amounts. 

You want to be able to see at least 2 digits after the decimal point minimum, otherwise you will find it very difficult to scale up and scale down or measure your ingredients in quantities less than 1g (which is more common than you might think).  

Method

This method has been tried and tested many times. If you have any problems with it, or need clarifications, do not hesitate to let us know in the comments section of this lesson. 

  1. Place the beaker onto the scales and press the tear button. This will reset the scales so that you can begin from 0. Do this after adding each ingredient.
  2. Weigh the peppermint hydrosol into the beaker, followed by the distilled water.
  3. Add the d-panthenol and stir until fully dissolved.
  4. Add the glycerine and then stir once more to ensure it combines well.
  5. Now it’s time to add our coco glucoside, which is our surfactant. We need to be more careful here when stirring, as stirring too quickly or harshly can cause the surfactant to become extremely foamy. Expect some bubbles, though.
  6. Before adding our preservative we need to check the PH of our micellar water. You can do this by using PH testing strips found on Amazon. We have to do this for two reasons. One, so that the product isn’t too harsh for our skin and two, so that it’s within safe range for our preservative. We are looking for a PH of around 4 to 6. When we made this micellar water, we found the PH was too high, so we had to reduce it using a PH modifier. (see how below). If your micellar water is already within safe level for your preservative, you can move on without using a PH modifier.
  7. Once we are at a safe level it is time to add the preservative. Stir it in carefully so as not to foam up the surfactant.
  8. Now for the fun part, time to add some color. We are using natural, water-based food coloring. The intensity of food coloring can vary immensely so I’d recommend starting with just 1 drop, adding more if needed.
  9. Transfer to a suitable cosmetic bottle ready for use. The micellar water can be used immediately. 

Lowering The PH

The best way to lower PH is by using an acidic PH modifier. We use citric acid (the same stuff you use for making bath bombs), in a ratio of 10% citric acid to 90% distilled water.

So, simply combine 1g citric acid to 9g distilled water. Then add 5 drops to the micellar water, mix slowly, then test with a fresh PH strip. Repeat until your PH is within safe levels for your preservative (usually 4-6, but always check with manufacturer guidelines).

It is very unlikely you will ever encounter the problem of your micellar waters being too acidic, meaning the PH is too low for your preservative.

DIY Rose Micellar Water

diy rose micellar water

Here’s another micellar water formula for your portfolio. Instead of mint, we’re using gorgeous rose hydrosol. We love to use this ingredient as much as we can. It shares many of the same benefits of the coveted rose essential oil, except without the price tag! 

It’s absolutely great for mature skin, and will help to slow down the natural process of aging – although admittedly not as well as it’s EO cousin. 

We’ve also paired it with some lovely AHA fruit acid extract, to synergize with the rose hydrosol. AHA is also fantastic for mature skin, and has some amazing anti-aging benefits. This ingredient was almost unheard of until only a few years ago, and is fast becoming trendy and is found in many luxury, high-end cosmetics.

And because it just looks awesome, we’re using a drop of all-natural pink food coloring for a beautiful finish. We absolutely love this one!  

Ingredients

You will also need:

  • PH Testing Strips
  • 100g (3.5-4oz) Cosmetic Pouring/Spritz Bottle

Equipment:

  • Digital Weighing Scales
  • Beaker
  • Stirrer
  • Funnel (optional)
  • Pipettes (optional)

Method

As this is also a recipe for micellar water, you can follow the method above. You can add the AHA extract at the same point you would the d-panthenol.

Don’t forget to check the PH of your product before adding the preservative. 

Photo of author

Angela Wills

Angela is the founder and driving force behind Savvy Homemade. With over fifteen years experience in DIY home crafts, and a Diploma in skincare formulation, Angela brings a wealth of knowledge and dedication to every post she writes. She is fearlessly dedicated to creating tried, tested recipes & products that will work for everyone, and she infuses each DIY product with her passion and expertise.

When you’re ready to go a step further, Angela also teaches self paced online courses that help you move from following recipes to creating your own with confidence.

Angela Wills - Savvy Homemade

Hi, I’m Angela Wills, founder of SavvyHomemade.com. For two decades I’ve been creating natural skincare, soaps, and DIY recipes that are easy, affordable, and fun to make. My mission is to help you craft products you’ll love – straight from your own home.

When you’re ready to go a step further, I also teach self paced online courses that help you move from following recipes to creating your own with confidence.

Leave a Comment