
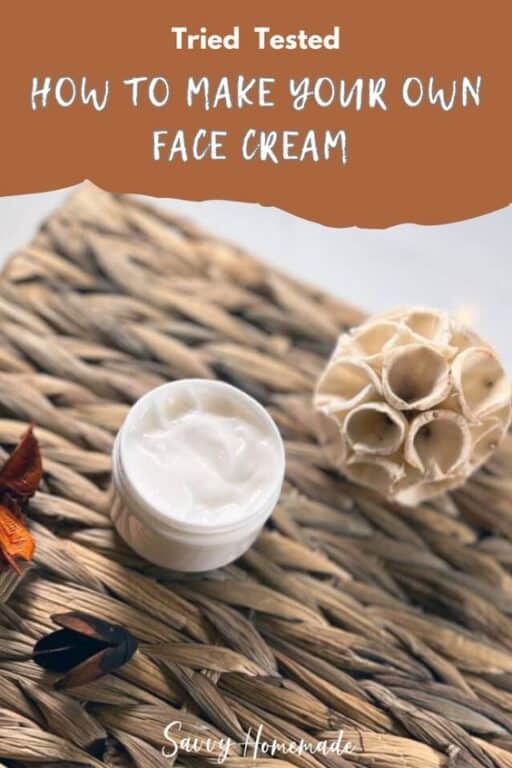
I’ve refreshed this homemade face cream a few times over the years, each update making it a touch smoother and more nourishing. This version is my favorite so far, it absorbs beautifully, feels silky on the skin, and gives a healthy, hydrated look without any heaviness. If you’re new to making skincare, it’s a lovely, confidence-building formula to start with.
This version is my rose anti aging cream for mature skin, a lovely beginner friendly recipe if you are new to making skincare. The recipe blends gentle hydrators with lightweight oils for lasting moisture and a smooth finish.
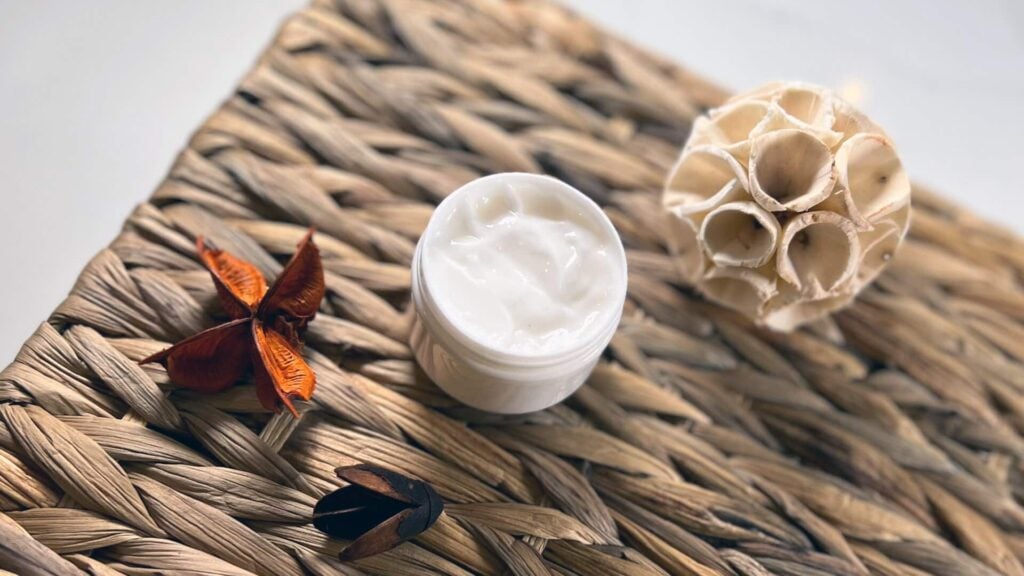
Rose hydrosol, squalane, argan oil, shea butter, and a hint of hyaluronic acid all play a clear role in the texture and feel of this homemade face moisturizer. Once you see how the phases come together, you can easily adjust it to suit your own skin.
About My Homemade Face Cream
Just like my popular DIY wrinkle cream, this updated DIY face cream helps reduce and prevent fine lines. It’s beautifully non-greasy, absorbs quickly, and leaves your skin silky soft. I like to apply it after my homemade anti-aging serum, it helps the serum absorb faster and balances any leftover oiliness.

If you’d like to explore more creams and moisturizers, I cover this in much more depth inside my Fabulous Face Creams & Moisturizers Course.
Inside the course I share a wide range of tested recipes for creams, gels, oils, and balms, along with clear guidance on how these products are built and how ingredients work together. This makes it much easier to adapt recipes or start creating your own when you’re ready.
It’s 25% off this week. 👉 Explore the course here
This DIY face moisturizer is designed for dry, mature, or dehydrated skin that needs a little more support than a basic moisturiser can give. It has a soft, silky texture that absorbs well without leaving the skin greasy, and it layers beautifully with serums or heavier night creams.
The formula uses a blend of rose hydrosol, shea butter, squalane, and hyaluronic acid to hydrate, soothe, and smooth the skin. I’ve kept the ingredients simple, gentle, and effective, the same approach I use for all my everyday moisturisers at home.
What’s In This Face Cream Recipe?
I’ve formulated this homemade face moisturizer for aging skin, however, it includes a blend of gorgeous natural ingredients that will nourish all skin types. Let’s take a look.
Carrier Oils and Butters
I didn’t want to overcomplicate this formula, so I’ve gone for just the one carrier oil and cosmetic butter. For these, I’ve selected Argan Oil and Shea Butter.
You may have seen it as an ingredient listed on many different hair treatments, but Argan oil is also fantastic for dry skin. It’s intensely hydrating, packed with nutrients, and high in antioxidants. So kiss goodbye to dry, dull, and damaged skin.
And I’ve paired this with shea butter, perhaps one of my favorite cosmetic ingredients. It’s even more nourishing and hydrating than the argan oil.
It also helps to soften the skin, leaving it feeling silky, soft, and supple. You’ll be surprised how much dry skin can bounce back with care and the right ingredients.

Humectants and Olive Squalane
Because no emulsion is complete without a humectant, I’ve decided to really treat myself. And so should you! Humectants are ingredients that draw moisture to a product. It helps keep them from going dry in between uses but also helps to keep the skin more supple.
That’s right, humectants will draw moisture from the atmosphere and impart it to the skin when applied. Therefore, this formulation will continue to hydrate your skin long after you have applied it.
Glycerine is perhaps the most universal humectant, and just about anyone should be able to get hold of it. But I’ve paired it with d-Panethol, which is fantastic at soothing skin, reducing inflammation, and delivering hydration to deeper levels of our skin.
Hyaluronic Acid
However, my favorite humectant of all is hyaluronic acid. It’s such a strong humectant that the plumping effect can actually help to ease fine lines and wrinkles. It’s also one of those trendy ingredients, so your friends will be impressed that you’re using it in your own formulations!
Making Hyaluronic Acid Gel
Sometimes I can’t find premixed hyaluronic acid gel, so I make my own using hyaluronic acid powder. It’s super simple and a great way to have it ready for your formulations. I’m including the basic steps below, however, more info on this can be found in my Luxury Serums Course.
- Weigh out 1g of hyaluronic acid powder, 1g of a water-based preservative such as Plantaserve P (Saliguard PCG), and 98g of distilled water.
- Sprinkle the HA powder over the water without stirring, add your preservative, and then cover the container.
- Let it sit undisturbed for several hours. How long depends on the molecular weight of your HA, but basically until the powder is fully hydrated and there’s no dry residue. Once it’s all absorbed, stir well to get a smooth, uniform gel.
- Bottle it up, label it, and you’re good to go! It stores well and is super handy for quick use in serums or lotions.

Aromaceuticals
Now, we come to our essential oils. Not only do they smell amazing, but they also provide therapeutic benefits. I’ve selected rose geranium and ylang-ylang essential oils. They both have beautiful floral aromas that will pair well but about those benefits for our skin?
Rose geranium is great for balancing the skin’s oil production. While this might sound like it’ll make the skin drier, which is true if you have oily skin, it does the opposite on dry skin. It’s magic stuff, really!
The ylang-ylang is also deeply hydrating, penetrating deep to provide moisture at the very core of our skin. Furthermore, it synergizes with our rose geranium to help boost the production of natural oil in the skin.

Squalane
Squalane naturally exists in our skin and has many important functions in our body, too. It’s one of the skin’s natural lubricators, keeping skin feeling soft and moisturized on its own.
However, as we age, production diminishes, and by 30, we probably won’t be producing any in our skin anymore. The body actively redistributes away, leaving the skin lacking.
But we can replenish these levels by using a supplement in the form of olive squalane. It’s basically the same thing but derived from olives. And boy, does it sink in fast! It really is a magic oil.
Making Your Own Floral Infusions
To give your DIY face moisturizer that little extra, you can substitute all of the distilled water in the recipe with floral waters (also known as distillates, hydrolats, and hydrosols).
The recipe already calls for some rose hydrosol. Still, you can, if you wish, substitute all the distilled water for this ingredient.
Alternatively, you can make your own floral infusion by steeping dried flower petals or herbs in boiling water for 10 minutes, then straining through a fine strainer or piece of muslin.
For a more in-depth look at how to make your own herbal and floral infusions, please take a look at my post, which shows you exactly how to brew one up in your own home!
Preservatives In DIY Face Moisturizers
The homemade face cream below can be kept for a couple of days without preservatives and for 12 months with preservatives added. We don’t, however, recommend omitting it. Who wants to have to make their own face cream every week?
This is particularly important if you go down the ‘making your own floral infusion’ route. You must use a preservative, or it will only stay fresh for a limited time. Even with the preservative in it, you will still have to reduce the cream’s lifespan to 4 months (12 months with purchased flower water/distilled water).
That’s not to say that I wouldn’t recommend making floral infusions; I definitely would; make sure you use a preservative to get your four months.
Adding The Preservative
When it states to add the preservative, you will notice I give a choice of when to add it. When buying your preservative, the packaging should always give a guideline of when it can be added, along with a maximum temperature limit.
Most can now be added at the cooldown phase; this is my preferred method as it eliminates the chance of overheating and destroying it. But always check the recommended usage guide before buying it. Unless otherwise stated, these homemade face creams keep for about one week without preservatives and 12 months with preservatives added.
Ok, let’s make my not-so-basic face cream recipe!
Quick Ingredient Substitution Guide
- Rose Hydrosol: You could choose a hydrosol of your choice or replace it with more distilled water.
- D Panthenol Powder: If you use the hydrated (liquid panthenol), this is not heat stable, so you will need to add it with your cool-down ingredients. If you choose to leave it out altogether, up the glycerin by 1g.
- Argon Oil: Sweet Almond Oil or Jojoba Oil would be good but you could use any that you have to hand.
- Shea Butter: Cocoa butter or Mango would work well.
- Olivem1000: Another emulsifying wax of your choice, but this may affect the thickness of the finished product.
- Cetyl Alcohol: Cetearyl alcohol would be my first choice if I had no cetyl alcohol.
- Hyaluronic Acid Gel: As this is the star of the cream, it isn’t easy to substitute. Replace it with more glycerin, or maybe try sodium lactate.
- Rose Geranium and Ylang Ylan Essential Oils: You can use any essential oil of your choice.
Watch The Video

How To Make Face Cream For Glowing Skin
As an Amazon Associate, I earn from qualifying purchases. If you buy via the links here I may earn a small affiliate commission at no cost to you, please read my affiliate disclosure.
Ingredients
Equipment
Method
- 0.2 g Xanthan Gum, 4 g GlycerineMix the xanthan gum and glycerin in a small heatproof container until smooth.

- 34 g Distilled Water, 30 g Rose Hydrosol, 1 g D-Panthenol PowderAdd the distilled water, rose hydrosol, and panthenol. Stir well to form the water phase.

- 8 g Argan Oil, 5 g Olive Squalane, 2 g Cetyl Alcohol, 3 g Shea Butter, 5 g Olivem 1000In a second container, combine the argan oil, squalane, cetyl alcohol, shea butter, and Olivem 1000.

- Place both containers in a bain-marie (water bath) and heat gently until the waxes and butters have fully melted.

- Pour the water phase into the oil phase. Blend for 1–2 minutes, then switch to a spatula and stir until the cream thickens and cools to 40°C (104°F).

- 1 g Vitamin E Oil, 5 g Hyaluronic Acid GelAdd our cool-down ingredients. Start with the vitamin E, followed by the hyaluronic acid gel, stirring these in well.

- 0.4 g Rose Geranium Essential Oil, 0.4 g Ylang-Ylang Essential Oil, 1 g PreservativeAdd the essential oils, followed by the preservative and stir again to make sure everything is fully combined.

- 1 Cosmetic Jar 4 ozTransfer to a suitable container ready for use.

Notes
New to DIY skincare?
If you’re enjoying making your own products, you might like Radiance, my free email course where I teach the foundations of DIY skincare step by step!More Moisturizer Recipes
If you enjoy making your own skincare, you might also like some of the other DIY face moisturizer recipes we’ve shared on the blog. Each one uses slightly different oils, butters, or textures so you can experiment and find what works best for your skin.
- Natural Moisturizer – a course lesson on easy beginner-friendly creams
- Anti-Aging Face Cream – a richer moisturizer designed to support mature skin
- Aloe Vera Face Cream – a lightweight, soothing moisturizer that absorbs beautifully
- Rose Face Cream – a beautifully scented cream that feels luxurious and nourishing
Browse all skincare tutorials →
DIY Skincare Recipes

FAQ & Troubleshooting
How do I use this DIY face cream?
Apply a small amount to clean skin and massage in circular motions. Use a little extra on areas that feel dry, such as the cheeks or jawline. If you have particular areas of skin that suffer from dryness, you can apply more liberally here. The cheekbones can often be a little drier than the rest of the face, so applying more here can be very beneficial.
How long does this homemade face moisturizer last?
With a broad spectrum preservative at one percent, your cream should last up to 12 months when stored in a clean, cool place.
How often should I use it?
Studies have shown that after 8 hours, only 50% of your face cream remains on the skin surface. So, you should absolutely use your DIY face cream daily. Morning and evening work best. If your skin is very dry, pair it with a heavier moisturiser at night or layer it over a serum. If you have very dry skin, you can combine this with a heavier face moisturizer or a serum. You may also want to use this lighter cream in the morning and your heavy moisturizer in the evening for intense hydration overnight.
Why is my face cream recipe splitting?
This is likely a problem with your water-to-oil proportions or your e-wax is not up to scratch. Take another look at your e-wax and make sure it’s a good quality one. Polar wax, NF, BTMS-50 are all good choices and work fantastic.
If your e-wax is fine, then your emulsion is destabilizing because your oil and water parts have been measured incorrectly. Make sure to take care when measuring your ingredients, and always use a good digital scale to get accurate measurements. Furthermore, this formula and suggested e-wax is for oil-in-water emulsions only.
Why is my cream too runny?
If your face cream is too runny, there’s likely a problem with the emulsifying wax. Check to make sure it’s in date, and that you’re using a good quality e-wax, such as Emulsifying Wax NF, Polawax or BTMS-50.
If you do find that your cream is too runny, and wish to salvage it, you can gently melt it down and add a few more grams of e-wax. This should thicken up nicely. This is best done before you add your cooldown ingredients.
What preservative should I use?
Selecting the right preservative seems difficult but is actually pretty simple. You’re looking for something that is broad spectrum but can be soluble in either oil or water for an emulsion formula. I use either Geogard ECT, Preservative Eco, Germaben, or Saligaurd (Plantaserve P). Any of these will work just fine in your emulsions and should prevent any microbial growth for about 12 months.
You will notice that this formula also calls for an antioxidant, in the form of vitamin e. You can swap this out for Rosemary co2 extract if you prefer. However, it is not a preservative on its own. Antioxidants prevent oils and fats from oxidizing and becoming rancid. However, it will not prevent microbial growth in the form of bacteria and fungi.
Is vitamin E a preservative?
No. Vitamin E slows oxidation of oils but doesn’t prevent bacteria or mould. You’ll still need a broad-spectrum preservative.
Can I make this without a preservative?
Yes, but it will only keep for 2–3 days in the fridge. With preservative, it lasts up to 12 months.
Can I swap the essential oils?
Yes. Any skin-safe essential oil works, or you can leave them out entirely for an unscented cream. Keep within IFRA guidelines.
Can I make this homemade face cream without essential oils?
Yes. Essential oils are optional. The moisturizer will still perform well without them and is often gentler for sensitive skin.
Can I replace the emulsifier?
Only with another proper emulsifying wax. Beeswax or butters won’t create a stable emulsion.
What hydrosol can I use?
Any hydrosol works, rose, lavender, chamomile or orange blossom. Keep the total water-phase weight the same.
Can I add extra active ingredients?
Yes. Add water-soluble actives to the water phase and oil-soluble actives to the cool-down phase below 40°C.
Is this natural face moisturizer suitable for oily skin?
Yes. It absorbs quickly and uses lightweight oils. If you prefer an even lighter feel, reduce the shea butter slightly and increase the water phase.
Final Thoughts
I hope you enjoy making this DIY face cream. I know it works well as I use it myself. Let me know how you get on, and ask any questions in the comments below.

Hi Angela
Other than Rice Bran Oil, is there another alternative to Kukui Oil?
I forgot to heat up my water part. cream didn’t blend well and is runny. Can I still save it?
Hi Juliana,
Unfortnuately not, I would just start again.
Hi Angela,
If I wanted to add hyaluronic acid to the Mature skin recipe (! – lol, trying everything), at which stage should I add it? Or should I rather add it to a serum? Your thoughts on these would be greatly appreciated. Many thanks. Kind regards.
I’ve just brought ingredients to make the luxury skin boost for dry skin cream. I would like to use lavender and geranium essential oils l and potentially orange essential oil. I wondered if I would need to use orange essential or not because it already includes the orange blossom water. What would you recommend?
Hi Georgina,
I often use floral waters in combination with their partner essential oils. Orange blossom won’t necessarily have all the benefits of orange essential oil, and vice versa. The only issue you may have is that your finished product will smell more orange-like than you may want. But you can offset this by using a little less orange essential oil and make up the difference with your lavender and geranium essential oils.
Hope this helps!
Hello, Angela,
Thank you for these wonderful suggestions. I made one of your face creams twice, albeit at a year’s distance, so I did not remember the second time that it takes FOREVER for the emulsifying wax to melt! Even when the oils and wax looked completely liquefied and I mixed them with the waters, I found a few pellets in there! So I put it back on the stove, as you suggested.
I guess the pellets become transparent when they are almost melted and the mixture looks fully dissolved, but it is not? Is that the reason why I still find pellets after mixing? I did not want to keep the oils on the stove longer than necessary, but perhaps I should leave them there another 5-10 min after they look melted, just to be sure the pellet consistency is completely gone?
Or, am I doing something wrong? In general, have you ever timed the melting time? It would be good to know.
Many thanks in advance, Beatrice
Hi Beatrice,
Yeah, just leave it for a little longer. I like to stir mine as it sits in the water bath. Not continuously, just to get an idea of the texture of the e-wax. But if you’re struggling, you could use a microwave. Sometimes that does the job a little better. No more than 30 seconds at a time, though.
Hi Angela
Which perservative do you recommend sodium benzoate & potassium sorbate or phenoxyethanol & ethylhexylglycerin?
Hi Paula,
Honestly, either of these preservatives will work just fine and should provide the result you’re looking for. So shop around and see which one is cheaper to buy. I would also say that ultimately you would want to get experience using both, so you can decide for yourself which one you prefer. Perhaps start with one, use it until you run out and then next time buy the other. Because these two preservative systems can be used interchangeably (add at around 1%) you shouldn’t have much problem doing this.
Hi Angela
Is there an alternative to kukui nut oil?
Hi Paula,
I’d try substituting the Kuki Nut for something like Rice Bran Oil. It should give you a similar consistency and absorbency.
I LOVE this cream – finally someone who understands dry and/or mature skin! I have recently developed a love for oat oil and hemp oil. The oils in this recipe do not smell nearly as much as oat oil and hemp oil would! I am tempted to try substituting them in place to see how it turns out. Thank you for sharing this lovely recipe!
Hi Angela, do you sell finished products by any chance?
Hi Trish,
As much as I think it would be interesting to make these products to sell, with my current lab set up (which is basically a craft table in my kitchen) I just don’t have the resources. There’s also a lot of red tape involved with selling cosmetic products and I just don’t think I have the time to get into all of that, especially now that I’m a grandma. But I do hope my tutorials inspire you to give DIY skincare a try.
Excellent choice of ingredients and great recipes. Have heard a lot about the anti-aging and skin nurturing benefits of the kukui nut oil. Next one on my to-buy list.
Is the consistency smooth and thin enough to use in an airless pump type container?
Hi Sarah!
I find this cream is a little too thick for a pump container. A glass or PET plastic jar is your best bet.
Hope this helps!
any idea why your pictures make the cream look creamy white, while mine is as yellow as eggs. (I used Beeswax, will try Emulsifying wax next time- not sure if that makes a difference?). The Vit E oil and Wheatgerm oil are both yellowish, is that it? (But then why does yours look white and creamy?)
Hi Jolene!
I’m almost certain that beeswax is the culprit here. While you can get hold of white beeswax, if you give it another go with the emulsifying wax you should get a much lighter color. You’ll also find that your cream will be lighter in texture, and will absorb into your skin much more readily.
Hello. I was wondering if I can substitute the emulsifying wax with beeswax?
Hi Mark,
Interesting question. I’ve wondered myself in the past and I have given it a go. I found that it was much more difficult to get the oil and water to stay together, and had to use significantly more beeswax than I would normally use of the emulsifying wax. I also didn’t much like the consistancy of the cream as it was incredibly waxy and would take a very, very long time to sink in.
All in all, I really wouldn’t recommend it. If you’re looking for something to protect your skin from the elements, you’re better of making a balm (they aren’t just for lips and can be used pretty much everywhere!).
I’m disappointed to see this reply. I wondered the same when seeking to purchase my ingredients. When I click on your link for “Emulsifying Wax” in your DIY anti-aging skin cream, it takes me to a page that lists Beeswax, and you specifically say in your directions “Beeswax is my go-to”. Therefore, I ordered Beeswax, have used pricey ingredients to make this recipe, only to experience the same thing: separation, a thick waxy substance that does not seem very appealing.
I feel that your directions and recommendations are very misleading if you now indicate that Beeswax is not the recommended choice.
Hi Jolene,
I was sorry to read that you’ve had problems with this recipe. It’s important to read my recipes very carefully and follow the ingredients exactly as they are stated on the page. While I understand that you’ve click one of my links in the ingredients section, these pages can talk about ingredients more generally (as we direct people to these pages from all over out website) and it’s always best follow the instructions on my DIY blog post.
Beeswax is not suitable as a emulsifying agent. Like you said, you end up with a waxy mess that can separate. While beeswax is my go to for anything I can use it in (i.e. candles, balms, soaps etc.), it really isn’t suitable here.
I hope this clears things up. But don’t worry about having bought the beeswax, there will be plenty of uses for it and it really is a wonderful ingredient.
Hi Angela. I have been making creams and lotions for while about a year. Avocado oil is good for dry skin. When I make it for myself I still use it because it keeps the skin moisturized. I never heard of melon oil. Your ratio is as I have noticed 60% water 30 oil and 10 emulsifier. I usually use this type of formulation. At the cooling phase I add helichrysum , lavander, rose essential oil, carrot seed oil,and vitamin e. It kind thins out the cream turns out great ! Preservatives like Germall Plus is .5 to 1.0 rate . Thank you for sharing these wonderful recepies.
Can you use beeswax instead of emulsifying wax? I just made a batch, but wants to keep separating. Thanks.
Hi Margie
The emulsifying wax is the ingredient that binds everything together, so yes you will need this to stop the separation of oils and water. That’s not to say you cant have some beeswax as well which will produce a harder product.
This recipe is a must have …thank you for sharing ,a lot of my friends would like this.