
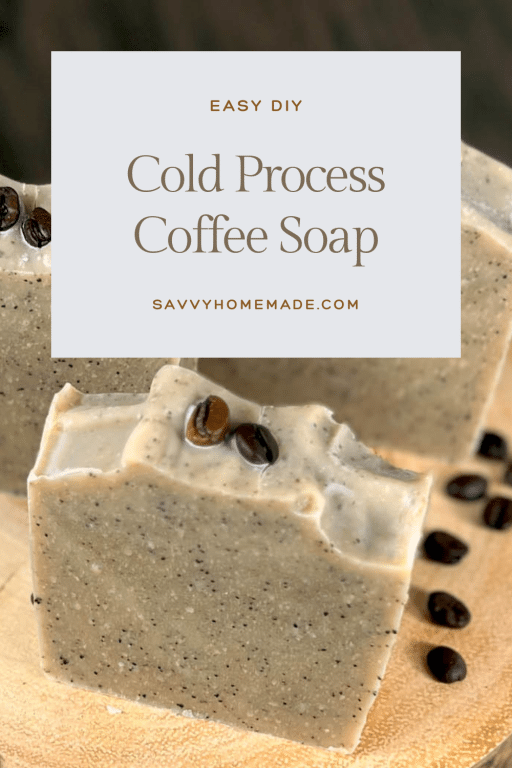
Are you a coffee lover? I know I am. And if you’re anything like me you’re going to love this homemade coffee soap!
Naturally exfoliating, beautifully speckled and fragranced with a warm and citrusy essential oil blend that lifts your senses without overwhelming them. It’s such a fun way to bring your favorite morning ritual into your skincare routine.
I’ve kept this recipe completely natural. We’re skipping those synthetic ‘coffee’ fragrance oils in favor of an invigorating mix of sweet orange, litsea cubeba, and cedarwood essential oils. While the coffee grounds don’t carry their scent through the soapmaking process, they still smell amazing. The aromatic blend we’re using is bright and comforting with a clean, uplifting aroma that complements the rustic look of the bar.

To make sure we sell that coffee theme, we’re using real used coffee grounds. So this soap offers gentle exfoliation and imparts a beautiful, citrusy aroma to the skin. It’s a perfect hand or body bar! So easy to make, beginner-friendly, and a great way to use up ingredients you likely already have at home.
So whether you’re brand new to cold process soap, or just want to try something a little different, this energising bar is a great project to work on at home and makes such a lovely gift for anyone who loves coffee. Let’s take a closer look.
Why You’ll Love This Coffee Soap Recipe

If any of you are used to my soap recipes, you know I prefer natural whenever possible. So, in line with my formulation ethos, this coffee soap is 100% natural. There’s synthetic fragrance oils, dyes, or additives. And I’ve packed it full of skin loving oils too. In fact, every ingredient in this bar has been carefully chosen to be gentle on the skin.
The soap is gently exfoliating, all thanks to our real used coffee grounds. They’ll help polish away dead skin cells, leaving your skin feeling smooth and looking radiant.
While most coffee soaps rely on artificial fragrance oils to mimic a coffee scent, I didn’t want to do that. Mostly because there isn’t currently enough research on the long term effects of using fragrance oils on the skin. But since coffee grounds lose their aroma during saponification, I’ve opted for a blend that I really enjoy. It’s a bright, warming blend of sweet orange, litsea cubeba, and cedarwood essential oils. And boy do they smell heavenly together!
It’s also made with a blend of plant oils and butters that I’ve tried and tested many times, and I just love it! We’ll be using olive, coconut, castor, and cocoa butter today. It’ll produce bars with creamy, long-lasting lather that cleans without drying. The perfect bar of soap!
- Exfoliating and refreshing: Used coffee grounds help slough away dead skin cells, leaving skin smoother and more radiant.
- Balanced oils: A blend of olive, coconut, castor, and cocoa butter gives this soap a perfect balance of cleansing and moisturising.
- Essential oil blend: A citrusy mix of sweet orange, litsea cubeba, and cedarwood brightens the bar and gives it a unique, uplifting scent.
- Perfect for gifting: With a stylish topping of coffee beans, this bar looks as luxurious as it feels.
- Beginner-friendly: Reliable cold process steps that are easy to follow.
- Naturally tinted: Coffee gives the soap a beautiful mocha tone without artificial colorants.
By the way, if you’re enjoying soapmaking but want a clearer foundation than recipes alone provide, my natural soapmaking course walks through the process step by step so you understand what actually matters. You can get started with tis course for free in the Savvy Homemade School, simply login or register here to get Module 1 and all the basics.
The Best Ingredients for Natural Coffee Soap
Let’s take a closer look at some of the ingredients we’re using in this recipe, and have a chat about why I’ve chosen them.
The base oils include olive oil, coconut oil, castor oil and cocoa butter. Together, they provide a luxurious lather with a fabulous balance of cleansing and moisturising. Olive oil, for example, brings skin-soothing properties and helps create a gentle bar that still has great conditioning power.
Coconut oil, however, adds firmness and cleansing power. Our castor oil will boosts lather, giving the soap that creamy, bubbly feel everyone loves. And finally our cocoa butter lends a velvety richness, as well as helping to harden the final bar. It’s my favourite, palm free blend of plant based oils.

As we’ve previously discussed, I’ve thrown in some used coffee grounds, which not only help reduce waste but also gently exfoliate the skin and add a beautiful natural speckle to the soap. I also like a few whole coffee beans on top. It gives the bars a handmade, artisanal look. But you can leave them out if you want (although you’re kinda losing the coffee there).
Instead of synthetic coffee fragrances, we’ve chosen a natural blend of essential oils. Sweet orange, litsea cubeba, and cedarwood. It’s one of my favorite blends, especially in soap. I smell it on my skin for hours after, and it’s pretty well behaved in the soap batter too.
- Olive Oil: Gentle and moisturising; perfect for dry or sensitive skin
- Coconut Oil: Cleansing and firming; helps bars last longer
- Castor Oil: Boosts lather and gives a silky finish
- Cocoa Butter: Rich, creamy feel and helps harden the bar
- Used Coffee Grounds: Naturally exfoliating and visually beautiful
- Coffee Beans (optional): Adds a decorative touch on top
- Essential Oils: A bright, natural blend of sweet orange, litsea cubeba, and cedarwood
Oil Substitution Guide
Stick to the base recipe if you can. It’s designed to be reliable and accessible, especially if you’re new to soap making. However, life happens, and sometimes you might not have a particular oil on hand. The good news is that many oils can be substituted, as long as you understand how they affect your recipe.
Here are a few safe swaps:
- Olive Oil: Try rice bran or high oleic sunflower oil for a similar mildness and conditioning feel.
- Coconut Oil: Babassu oil is a good alternative, offering comparable cleansing and lathering properties.
- Castor Oil: You can use jojoba oil if needed, though it won’t boost lather as much.
- Cocoa Butter: Swap with shea butter or mango butter to maintain hardness and luxury.
Important: When you substitute oils, you’re changing the fatty acid profile of the recipe, and that directly affects the amount of lye (and sometimes water) you’ll need. Always run your revised formula through a trusted lye calculator before making the batch. Each oil has a different saponification (SAP) value, and using the wrong lye amount can result in a bar that’s too harsh or too soft.
If you’re unsure, start with minor changes and use our free lye calculator to get accurate, safe measurements every time.
A Note On Equipment
You don’t really need anything unusual to make this soap, just your standard cold process soap making equipment. If you’ve made soap before, you’re likely already familiar with all of them. That includes a stick blender, digital scale, heat-safe mixing bowls, spatula and your preferred soap mold.
Since this isn’t a particularly advanced recipe, it’s a great opportunity to get comfortable with your gear if you’re still building confidence in the cold process method. However, if soap making is completely new to you, consider enrolling on my brand new Natural Soap Making course. There we go through the ins and outs of all the soaping equipment!
Watch The Video
As an Amazon Associate, I earn from qualifying purchases. If you buy via the links here I may earn a small affiliate commission at no cost to you, please read my affiliate disclosure.
Ingredients
Equipment
Method
- 130 grams Distilled WaterWeigh the essential oils into a small glass container and set it aside for later use. Prepare your coffee grinds and have them close to hand. Make sure you are making the soap in a well-ventilated area. Put on your gloves and eye protection, your mask, apron, and long rubber gloves.Weigh the distilled water into a clean container. Never use a glass container, as this is going to be holding the lye water. Lye can weaken glass so it can easily break. In a separate container, weigh your sodium hydroxide/lye crystals.

- 65 grams Soapmaking LyeWhen ready, carefully pour your lye crystals into the water; never pour the water into the lye as this can create an unstable reaction.Once the lye is in the water, start stirring it. Although you are wearing a mask, we still recommend turning your head and leaning away while stirring, so you do not breathe any of the fumes. As the water and lye mix, this will result in a chemical reaction, and the lye water will increase in temperature and release toxic fumes.
- Stir until the lye crystals have dissolved and the water looks fairly clear. Now place it to one side, somewhere well-ventilated but safe so that it will not be knocked over. Allow to cool between 115°F and 80f (46c – 27°C) whilst we get on with our other steps.


- 135 grams Coconut Oil, 50 grams Cocoa ButterWeigh the coconut oil and cocoa butter into a good-sized heatproof container. Melt in a microwave, using 30-second bursts.
- 245 grams Olive Oil, 20 grams Castor OilAdd the olive oil and castor oil, then give it a quick stir. You should now have all your oils in a liquid state, in one good-sized bowl/container.
- Check the temperature of the oils and the lye water. You can do this with a temperature laser gun or a jam thermometer. We want them both to fall between 115- 80°F (46- 27 °C). If they are still too hot, leave them to cool for a while longer. They do not need to be the same temperature, for example, the lye could be 90°F and oils 100°F, but it is best to keep them within 10 degrees of each other. Once you’re satisfied they’re balanced, pour your lye solution into your oils.


- Before turning on the stick blender to mix the oils and lye, gently tap the stick blender against the bottom of your container. Continue tapping until all the air bubbles have been released.Then, turn the stick blender on and blend until all the oils have been fully emulsified into the lye solution, switch off the blender, and check to see if the soap batter has reached trace. Trace is when you can drizzle a small amount of soap batter on top and it leaves a visible trail or 'trace' on the surface
- 5 grams Orange Essential Oil, 4 grams May Chang Essential Oil, 4 grams Cedarwood Essential Oil, 1 tbsp Used Coffee GroundsNow that we’re at trace, it’s time to add our essential oils. I always recommend getting the mold ready before adding the essential oils, as they can sometimes thicken the soap batter, meaning you have to work quickly to get it into the mold. After adding the essential oils, we can add the coffee grinds, give the soap batter a good stir with the spatula or a few more blasts with the blender to ensure the coffee is fully dispersed. You also need a good, thick trace so that the coffee grinds are suspended and do not sink to the bottom of the soap.


- Pour or spoon the batter into your loaf mold. Give it a couple of light taps down to even out the soap batter, and use a silicone spatula to level it out if needed.
- You can leave the top of the soap flat or add some texture with a spoon. Adding texture is a great way to conceal any uneven flaws and can make the soap interesting.
- 1 pinch Whole Coffee BeansFor a cool finish, top with coffee beans! This step is totally optional, but provides a beautiful finish for your soaps. We now need to leave this to saponify for 24-48 hours before we can remove it from the mold. I like to keep it well insulated during this period, so the gel phase is efficient. I do this by cutting a piece of cardboard to sit on top of the mold and then covering it with an old towel.


- Once our soap has fully saponified, and the sides of the mold come away easily from the soap, it’s okay to remove it from the mold.
- Cut the soap into bars using a stainless steel knife or a soap cutter. You should be able to get between 5 to 6 bars from this batch, depending on the desired thickness. Leave the soap bars to cure for four weeks in a cool, dry place. This allows excess water to evaporate, giving a harder, longer-lasting bar. Curing also improves lather and mildness.To cure the soap bars, place them in an upright position in a cool, dry area, and turn the bars occasionally to ensure even drying.


Tried this recipe?
Let us know How It Was!FAQ for Our Coffee Soap Recipe
- Can I use fresh coffee grounds instead of used?
Technically yes, but used grounds are gentler and less likely to bleed color or scratch. Fresh grounds may be too abrasive. - Will the coffee scent come through?
Not strongly. Most of the scent comes from the essential oils. Coffee grinds may lend a very subtle aroma. - Can I make this without a stick blender?
You could try, but it will take a very long time. A stick blender makes the process faster and more reliable. - Can I add milk instead of water?
Yes, but milk soaps are more advanced. Start with water if you’re new, then try coffee or milk once you’re confident. - What if my soap is crumbly?
It could be lye heavy. Double-check your measurements and always use a lye calculator if changing oils. - Can I use fragrance oil instead of essential oil?
You can, but make sure it’s skin-safe and specifically formulated for cold process soap. Just remember, fragrance oils are not classed as natural products. - Will the coffee grounds clog my drain?
In small amounts, no. But if you use a lot of soap with grinds, consider using a drain catcher just in case. - Can I skip the coffee beans on top?
Of course. They’re just decorative and totally optional. - Can I make this in individual molds?
Yes. Just keep in mind smaller molds might set faster and skip gel phase, leading to slightly different textures. - Is this safe for the face?
It may be too scrubby for facial use, especially for sensitive skin. Best used on body or hands.
Storage & Shelf Life For Natural Coffee Soap
Once your coffee soap has finished curing (around 4 to 6 weeks) it’s ready to use, store, or gift! Proper curing is absolutely essential, as it allows excess water to evaporate. This allows the bars to become harder and longer-lasting. It also improves lather and the mildness of the soap.
Then you can go ahead and stores your soap in a cool, dry, well-ventilated area. Avoid wrapping it in airtight plastic as trapped moisture can lead to softness or sweating. We absolutely don’t want this to happen, as it can lead to a very short shelf life. A cardboard box or paper wrap works beautifully, especially if you’re planning to give your bars as gifts to loved ones.
If you can get on top of storage and shelf life, your soap should stay fresh for up to 12 months. The citrusy scent may mellow after 6–9 months, but the bar will still be safe to use. For the most luxurious sensory experience, try to use or gift within the first 6 months while the aroma is still at its peak.
Some Helpful Tips!
There are several ways to incorporate coffee into your soap, each giving a slightly different effect:
- Add coffee grounds to the lye solution while it’s cooling. This will create a deeper, darker tone in the finished soap. You can even use freshly ground coffee here — it’s almost like brewing coffee in the lye water!
- Stirring coffee grounds into the warm oils is another great option. This method still darkens the soap slightly, but not as much as adding it to the lye.
- For a rich, earthy tone, try adding a small amount of instant coffee powder along with the grounds. This will give you a darker brown soap with a more rustic appearance.
- We have used 1 tbsp in our recipe, however, this is just a guide. For a super scrubby bar for hands and feet, use more; for a more gentle exfoliating bar, use less.
Final Thoughts
This energizing coffee soap recipe is all the proof you need that natural doesn’t have to mean boring! I get it, I understand why some might think this, because natural pigments tend to be more mellow and we’re limited with just essential oils. But if you think outside the box you can really come up with some amazing soaps!
Whether you’re making soap for just yourself, a thoughtful gift for those you love, or even to brighten up your soap stall. This is one recipe that always delivers. It’s such a rich lather and a bar you’ll be proud to share. I know I was.
Just remember that patience is key! Give your bars a good 4–6 weeks to cure. It’s worth the wait. And if you’ve already tried our Simple Lavender Soap Recipe, this coffee soap is the perfect next step. It’s a little more advanced, but just as satisfying to make… if not more so!
If you do give it a try, I’d love to hear how it turned out! Let me know in the comments below!

love it!