

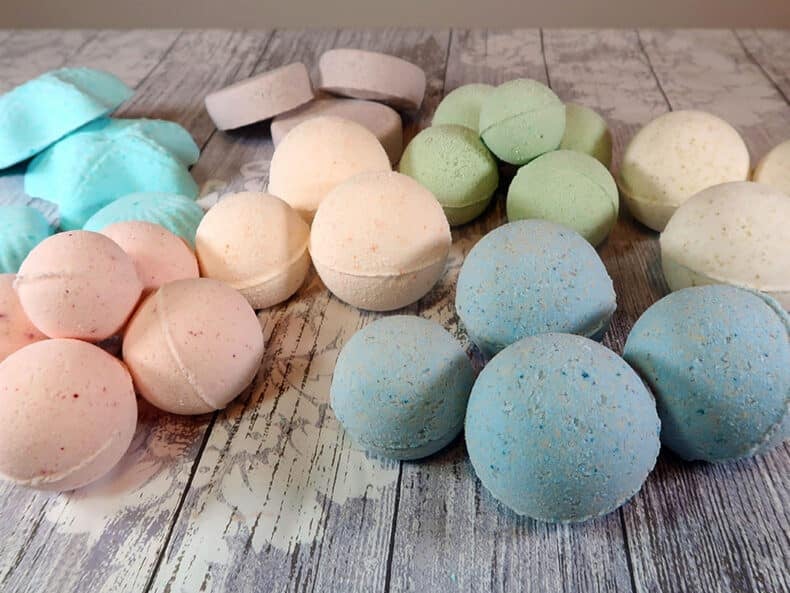
In this post, I’ll show you how to make bath bombs with luscious oils and wonderful exfoliating salts for your skin, along with citric acid for that fabulous fizz. After lots of research & experimenting. I can honestly say that this is my best homemade bath bomb recipe ever.
If you enjoyed my DIY bath salts, you will love these bath bombs. They are just the thing to turn boring baths into a luxury home spa treatment. You throw one of these into the bath, and it immediately fizzes, releasing gorgeous oils, salts, and fragrances into your bathwater for a wonderful relaxing soak.
About My DIY Bath Bomb Recipe

Store-bought bath bombs are popular for good reason, but they can be quite pricey. By making your own bath bombs, you can get all of the same luxurious benefits at a fraction of the cost. I have even added Epsom salts for that extra indulgence.
These homemade bath bombs can also make wonderful gifts, either on their own or paired with other DIY bath products. They are easy, fun, and endlessly customizable, so perfect for beginners and experienced makers alike.
Below you’ll find my full step-by-step bath bomb method, along with tips for getting a good fizz and avoiding common problems. And if you enjoy this bath bomb recipe, you might also like my other bath bomb projects.
If you enjoy making bath bombs but find they sometimes crumble, crack, or behave unpredictably, I cover this in detail inside my Bath Bomb Making Course.
You’ll learn reliable recipes along with the techniques and ingredient insights that help bath bombs hold together, fizz properly, and come out consistently every time.
It’s 25% off this week. 👉 Explore the course here
Coloring Homemade Bath Bombs

A big part of the bath bomb process is choosing your coloring agent carefully in order to get the bath bomb formula right, especially if you’re planning to gift or sell them.
As your homemade bath bombs fizz, whatever you’ve used to color them will mix with the water in the bath, along with all your other ingredients.
Liquid soap dyes and food coloring are both good choices for dye if you’re new to making your own bath bombs. But you’ll quickly want to find something a little stronger as your experience grows.
As you make your bath bombs you’ll notice that while liquid soap dye is very easy to use, it doesn’t provide a vivid color. You’re limited by how much you can put in because if you add too much the mixture will be too wet.
On the other hand, Mica provides a very very vibrant bath bomb. Over recent years, I have been experimenting with using micas more and more. In fact, I actually prefer it now.
Troubleshooting Your Bath Bombs

There’s a lot that can go wrong with your homemade bath bombs, especially considering there are usually so few ingredients! This can be frustrating, but it’s something we all have to deal with to get our beautiful bath bombs.
If you are having problems you can take a look at the FAQ and troubleshooting at the end of this post. But the most common problem you will find is getting the right moisture content into the mixture. Sometimes, on drier days, bath bombs need a little more moisture to hold together.
On the other hand, if it’s too wet or you add too much of the liquid ingredients, then you end up with a something that won’t come out of the mold in one piece! It just sticks in there and leaves a nasty residue on the mold.
Adding a little moisture to the mix is easy, and we show you how to do this below. However, you can’t exactly ‘take moisture out’ of a recipe easily. So to combat mixture being too wet, we need to be mindful.
I’ve found my mixture is sometimes too wet when I go to town on the liquid soap dye or food coloring. Sometimes you want a vibrant color, and you need a lot of dye to get it where you want it to be. So just be careful how much you add.
Why Am I Not Using Polysorbate 80?
Thousands of visitors have used the following recipe without having to use a drop of Polysorbate 80. This is the most basic bath bomb recipe I have, and it’s also the most natural recipe, so I like to teach people it first.
Having said that, I do use Polysorbate 80 in many recipes. For example, it is featured in my oat so simple bath bombs and my mini milk bath bombs. I find the benefits of using polysorbate 80 far outway any concerns I have about it not being a totally natural product.
Ok, let’s start making homemade bath bombs
Ingredients in the recipe below should get you anywhere from 8-10 bath bombs, depending on the size of your molds. Just keep going until you’ve used up all of your ingredients, you’ll find uses for them I’m sure. For colors & scents, you can use whatever essential oils, fragrance oils, or color dye you like. Although for the carrier oils I think almond oil and coconut oil work the best for bath bombs.
Watch The Video

As an Amazon Associate, I earn from qualifying purchases. If you buy via the links here I may earn a small affiliate commission at no cost to you, please read my affiliate disclosure.
Ingredients
Equipment
Method
- 2 cups Baking Soda, 1 cup Corn Starch, 1 cup Epsom SaltsBring together all of your dry ingredients in a mixing bowl, (baking soda, corn starch, Epsom salts) excluding your citric acid. We want to leave the citric acid until later, as adding it now can complicate things during the liquid pour step, just trust me.

- 4 tsp Sweet Almond Oil, 4 tsp Fragrance Oil, 2 tsp Distilled Water, A few drops of Liquid Soap DyeIn a separate container, you can go ahead and mix your wet ingredients as well, including any food color or soap dye you’re planning to use.
- Working slowly so as not to disturb the baking soda too much, add your wet ingredients to the dry ingredients a bit at a time and mixing thoroughly with your hands. (Adding your dye to the Epsom salts rather than your liquids is an interesting alternative worth trying at some point. Just mix thoroughly before adding the salts to the rest of your dry ingredients).
- As you work the bath bomb ingredients, you’re looking for a texture that is similar to that of damp, but no saturated, sand. You’ll notice that the mixture will begin to stick together at this stage, a bit like wet sand does in your sandcastle bucket.
- 1 cup Citric AcidOnce all of your liquid has been added and you’ve mixed thoroughly, add your citric acid and mix once more. It’s okay to use your hands but as citric acid can cause irritation and burns, make sure you’re using gloves.
- Now to get that orb-like shape we associate with a bath bomb. Take both halves of your mold and pack them with your mixture. You want it ever so slightly heaped so that your halves stick together well.
- When you’re ready, press the two halves together tightly so that the mixture bonds into an orb. After a few seconds, you should be able to remove one half of the mold.
- Lastly, gently set the exposed half onto a silicon cupcake case. You don’t have to use a cupcake case, some people use muffin tins for this, but I find it’s the best thing to rest these on without them falling apart. Hopefully, it should just pop out of your bath bomb mold, but if it doesn’t gently tap it to try and loosen it up. If this becomes a regular issue, take a look at how much liquid you’ve used. Also try working a bit quicker and don’t leave the mixture in the mold for more than a few seconds.
- You can use plastic bath bomb molds but prefer to use metal molds, and haven’t had a problem with them. If you’ve had problems with a mold made from a particular material (say plastic) let me know how it turned out. Otherwise, stick to metal. You'll then want to leave your bath bombs to dry for at least 24 hours, but usually a couple of days. Pop them somewhere they won't be disturbed easily, just reduce the chance of dents and imperfections.


Notes
New to DIY skincare?
If you’re enjoying making your own products, you might like Radiance, my free email course where I teach the foundations of DIY skincare step by step!More Bath Bomb Tutorials
Once you’ve mastered the basics of making bath bombs, you can start experimenting with different colors, scents, and skin-loving ingredients. Here are a few fun bath bomb ideas to try next.
- Oats So Simple Bath Bombs – looks great and the essential oils smell so lovely
- Shea Butter Bath Bombs – can fully emulsify into the bath without using surfactant
- Foaming Bubble Bath Bombs – the fizzing & bubbles are a wonderful combination
- Confetti Bath Bombs – great as party favors, birthday gifts, and special treats
Browse all bath product tutorials →
DIY Bath Products & Recipes
How To Use Your Bath Bombs
So now you have some great bath treats, let’s move on to how we use them which is totally easy.
The next time you run a hot bath, simply throw one into the water. The ingredients all mix with the water to create the chemical reaction that makes a big fizz, and it will take about 5 minutes to completely fizzle away, so you can wait until you’re in the tub before you pop it in.
Gifting Your Bath Bombs

These DIY bath bombs make perfect gifts. I often just gift them on their own for the hell of it, using cute little paper gift bags and some shredded tissue paper without any need other than my love of sharing homemade things.
But if it’s someone’s birthday, pop one in a gift bag with some other lovely beauty products. You could even make a nice gift basket or hamper if it’s a very special occasion.
Making Kid-Friendly Bath Bombs

Bath bombs should be for everyone, including your little ones, so how do you make them kid-friendly?
The following recipe is infused with lavender essential oil, which is well known for instilling a sense of calm necessary for sleep.
These are great to use if you have a toddler, right before bedtime. While you should be careful using essential oils on children, Lavender is one of the best EO’s you can buy for sensitive skin. Besides that, each bath bomb should have no more than a few drops, which should be fine in a tub full of water.
Ingredients
- 1 cup Baking Soda
- ½ Citric Acid
- ½ Cornstarch
- ½ Epsom Salts
- 3 tsp Peach Kernel Oil
- 1 teaspoon distilled water
- 1 teaspoon Lavender Essential Oil
- Purple Water-soluble soap dye or food coloring (optional)
I’ve used a peach kernel oil in this recipe, which I’ve used in many recipes before, and it works great. A good alternative is sweet almond oil, which is what I used almost exclusively in my recipes up until a couple of years ago.
I would not try to substitute the essential oil for anything else, as Lavender is very kind on the skin. A fragrance oil is a bit unsuitable here, as I’d prefer to use only natural ingredients for my kids and grandkids. It’s also the main ‘sleepy time’ agent in this recipe, and everyone with a little one knows how difficult it can be to get them to fall asleep sometimes.
Method

The method (and recipe) for this is nearly the same as the basic bath bombs above, so go ahead and follow that.
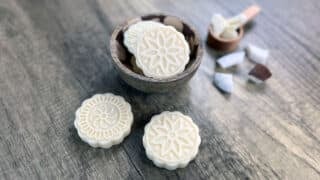
However, notice that I have used a different type of mold for this recipe. While you can use any mold you wish, if you’re using a mold like I have (see picture), simply pack the mold firmly with your hands and leave to dry for 24 hours. Then, you can gently remove them from the mold. As simple as that.
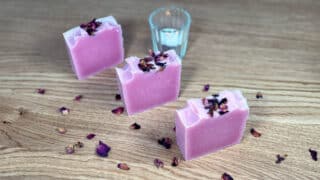
Making Multi Colored Bath Bombs

So, that’s how to make bath bombs using just one color for each. But, how do you make them multi colored?
This can actually make them very eye-catching, and it’s a great technique to learn! You can even use more than just two colors, but if this is the first time you’ve done this, start with just the two, I just think they are so cool looking!

Making multi-colored bath bombs is just one of 34 lessons in my Brilliant Bath Bombs Course. Some of my other favorites include clay bath bombs, color surprise bath bombs, confetti bath bombs, painted bath bombs, cupcake bath bombs, mooncake shower steamers, donuts, bath bomb brittle, and more.
FAQ & Troubleshooting
How long do bath bombs need to dry?
Most bath bombs need 12–24 hours to dry fully before unmolding, depending on humidity and mold size.
Why are my bath bombs cracking or crumbling?
This usually means the mixture was too dry. Spritzing lightly with witch hazel or water helps bind everything together.
Can I make bath bombs without citric acid?
Citric acid is essential for fizz. Without it, you’ll still have a bath soak, but not a true bath bomb.
How long do these bath bombs last?
Stored in a cool, dry place, bath bombs usually last 6 months or longer without losing fizz.
Can I customize this recipe?
Yes, this recipe is very flexible. You can change the scent, color, or oils while keeping the core ratios the same. Check out my other bath bomb projects.
Final Thoughts
That’s everything I have for you today. I hope you’ve enjoyed learning how to make bath bombs at home. The liquid pour stage can be a bit of a struggle sometimes, you’ll get used to it after the first few batches you make. Just remember to add the citric acid last and you shouldn’t have too many problems.
I can’t say this enough; Homemade bath bombs make fabulous gifts that nearly everyone will enjoy. Perhaps not a great choice for a man, but you never know!
The only thing I can think of that might put someone off is if the color or fragrance isn’t to their liking. Either make lots of different varieties or you can customize a batch just for them. The latter is what I tend to do as it’s such a lovely, thoughtful thing to do. Everyone will be impressed with them, all of my friends certainly are.
And don’t forget to let me know how you’re getting on in the comments section below. I love to hear your trial-and-error stories and your latest DIY bath bomb recipes. Sharing your successes and even your failures can really help someone who’s quite new to this and making bath bombs for the first time.

can I add slsa to this recipe? if so how much should I add?
I want to do this for a program with kids. I want quarter the ingredients so each kid could make their own, do you think that would still work?
It would be difficult, as you often need a bit of excess mixture to be able to fit them in the molds. You want to pack them a bit, which is hard to do if you have reduced the amount of bath bomb mixture by so much. I would instead group kids together, so they can work on a larger batch size in small groups. Maybe one bowl of mixture per table. They should all get oppertunity to make a bath bomb.
Hi, this is an extremely helpful and well-written post, thank you. I did a test run following your instructions and managed to do everything fairly well, until the very end when I removed the bath bombs from the mold. The citric acid started slowly foaming and cracking the texture of the bath bomb as it was drying. I added the citric acid at the end and controlled the moisture content but it seems like somehow the citric acid activated and foamed. Everything up until then was going perfectly. Has this happened to you? Do you have any tips for keeping the mixture moldable yet unactivated?
The best advice for this is to reduce the amount of water you add to the mixture. While it might not look or feel ‘moldable’, they likley will be. You will need to take more care taking them out of the mold to dry. Hope this helps.
can you use Mica powder instead of the liquid dyes
Absolutely you can! I do find they don’t mix as well into the water, though. Can look a bit unsightly and cling to the skin when getting out.
I cannot wait to try this recipe. I was wondering if you have ever used jojoba oil instead? What about adding a little shea butter? I am trying to make some that are super moisturizing.
Hi Hannah, jojoba oil would be a great substitute for the almond oil. You could also substitute half or all the oil with a butter.
Hope this helps Angela x
Curious where you buy your essential oil from? I want to make a big batch of the bath bombs but buying many small 15ml bottles of essential oils seems like a lot $. As they are only about 3tsp.
Thanks 🙂
I get mine from a mixture of sources, including Plant Therapy, Mystic Moments and Aromantic, but providing you’re buying for a reputable supplier you should be fine. However, I do agree, essential oils can be very expensive. You can get bottles as low as 10-5 mls, but you might need to do some hunting on the web for particular types of essential oil.
Added a little himalayan sea salt, strawberry scent and red coloring. Thought they came out kind of nice. Had to add a little more liquid. Enjoyed making them
Hi Matt,
That sounds fantastic! Thanks for sharing—it’s always valuable to put new ideas out there for others to explore.
Angela x
Regarding the mixing bowl: what is PET?
Hi Lorissa,
So essential oils have a way of destroying plastics over time. They literally eat away at it. This is bad, because as the plastic degrades it begins to leach into your products. Finding a PET plastic mixing bowl can be difficult, and also expensive. So, I would recommend using a glass bowl. You can get them most places and they’re super easy to clean after use. You also don’t need to worry about your essential oils as they cannot degrade glass.
Hi Angela,
Would omitting the molding and leaving it to dry it a tray make a bath bomb crumble type thing?
Thanks!
Hi Zara,
You could definitely try it. What you’re talking about is actually bath bomb brittle. However I’ve found that a recipe with more cosmetic butter is better for this.
Could I use this recipe to make bath bomb brittle?
Put the mix on parchment on a baking sheet, let it harden and then break it apart like brittle?
Hi Tanisha,
I’ve not tried this myself (looks super interesting), but I don’t see why it wouldn’t work. It might crumble a little more than you’d want. I’m going to try this myself soon. Thanks!
Can I use the Epsom salt with essential oil in it, for example Lavender? If so, and I skip the scent, what liquid should I use in it’s place? Or do I need to?
Many thanks!
Hi Debbi,
Yes you absolutely could. You might find the fragrance less potent, but that could also be preferable. I would replace the essential oil with any liquid oil you’re planning to use. Hope this helps!
Wonderful, thank you!
You’re welcome Debbi! Enjoy your bath bombs!