

If you’ve been making candles for a little while, you’ve probably stumbled upon silicone candle molds. I absolutely love making candles with these, so today I thought I’d show you how to use silicone candle molds like a pro.
They’re great fun, very easy to use and there’s a huge range to choose from. Christmas, Easter, and Halloween; name the occasion and they’ll be a mold to cover it.
Introduction
Something to keep in mind if you are thinking of adding color and fragrance to your candles. As with many molds, scents and dyes will eventually seep into the silicon. This will pollute it and causes it to degrade.
Having said that, you should be able to produce half a dozen or so candles before they begin to deteriorate. You can pick them up rather cheaply on Amazon if you don’t mind waiting for shipping.
What I love the most about silicon mold candles is how creative and amazing they are for such little effort. They’re pretty much the same as any other molds, with a few more steps. Nevertheless, the beautiful patterns and shapes you can make with only a couple more steps are definitely worth it!
Buying Silicon Candle Molds
- Always ask for the size of the finished candle as this can differ dramatically from the size of the mold. I’ve fallen into that trap on many occasions. You’ve been waiting for 2 or 3 weeks for your amazing mold to arrive and it makes a candle only 2 inches high! Very disappointing!
- Some silicon molds, usually the more expensive and better quality ones, have a slit down the side of the mold for easy removal. Don’t worry if the one you are using doesn’t. You can easily do this yourself with a sharp craft knife or razor blade and your mold will still be usable afterward. See step 9 on how to do this.
- Some candlemakers recommend using a candle release spray to help remove the finished candle from the mold. Although this can be beneficial, this doesn’t have a 100% success rate and can affect the shelf life of your mold. Always check with the seller before using.

As an Amazon Associate, I earn from qualifying purchases. If you buy via the links here I may earn a small affiliate commission at no cost to you, please read my affiliate disclosure.
Ingredients
Equipment
Method
- Thread the needle with the wick. Making sure you have enough for the candle plus extra to wrap around the wick holder. Thread the needle and wick through the hole in the mold.If your mold doesn’t have a hole for the wick you will need to create one. Find the center of the mold and pierce a hole with the wick needle.

- Pull the needle completely through the mold dragging the wick into place with it. You can thread from the outside or inside, whichever you feel more confident in doing.You may need to use a wick sealant or white tac, which should keep any of the wax from seeping out. I have found that the sealant doesn’t stick all that well to the silicon, but do the best you can.
- Find a suitable container to suspend the mold in. I usually find a glass or a couple of books good for this. If your mold has slits running down the sides for easy removal, place a couple of elastic bands around it so that it fits back together nice and snug.Once your mold is stable, straighten and fix the wick in place by wrapping it around Wick holder or as in my case a piece of bamboo. You may need to secure it with some sticky tape.
- Place your wax into a double boiler, if you don’t have a double boiler put a pan half-filled with water to boil on the stove.You will need to estimate the amount of wax depending on the size of your mold, but if in doubt go with more rather than less. Once the water is boiling, turn down the heat so it is only simmering and place a metal or heatproof glass bowl on the rim of the pan so that the base is only just touching the water.
- When your wax has melted and totally transparent, remove it from the heat, add your color. If you compare the amount of dye I have added here to the picture below, you can see that a small bit of dye can go a long way. Try to be conservative with your dye. You can always add more but you can never take back what you’ve already added.
- Then, add your fragrance. You can use either an essential oil or a fragrance oil. I prefer to use a fragrance oil in my candles, as essential oils are more expensive and better used in skincare products. I’m using a lovely jasmine fragrance oil for my candle today, I use around 5% of the weight of my wax
- To reduce any air bubbles forming pour your wax slowly into the mold, then set aside until solid. As your wax hardens you may notice it begin to sink. Don’t worry if this happens as it’s completely normal.
- An hour or two after pouring the wax (this would depend on the size of the mold and the amount of wax used. Re-melt any leftover wax and top up any sinkholes that have formed in the candle.
- Once the wax has cooled and hardened it’s time to remove it from the wax. If your mold already has slits running down the sides of the mold you should be able to easily remove the candle.If not you will have to carefully make the cuts yourself with a sharp craft knife or razor blade. You will need to cut about halfway up the mold and all the way through to the candle until it can be eased out. I do about 3 or 4 cuts around the mold.
- The mold is still usable after being cut, just place a couple of rubber bands around it so that it fits back together nice and snug and you are good to go.
- I like to leave a candle 24 hours after I've removed it from the mold. This just makes sure the wax is completely settled.


New to DIY skincare?
If you’re enjoying making your own products, you might like Radiance, my free email course where I teach the foundations of DIY skincare step by step!Silicon Candle Molds With Beeswax
As beeswax is a beautiful natural wax I don’t like to use synthetic fragrance oils to scent my candles. Generally, essential oils are a fair bit more expensive than fragrance oils but you don’t need to break the bank here.
Beeswax is quite expensive, so we tend not to make very large candles out of it, which means you won’t need to add as much oil for a nice scent. Shop around and use the ones that are reasonably priced. Beeswax actually has its own honey-like aroma, so maybe you won’t need to add a fragrance at all.

I’ve added sweet orange essential oil mixed with the natural mild scent of honey carried by the beeswax, it makes the room smell lovely. Lavender essential oil also works well in beeswax and has the added bonus of relaxation and meditation for a truly wonderful experience.
You could also omit the fragrance completely, therefore allowing the natural fragrance of the wax to take center stage.
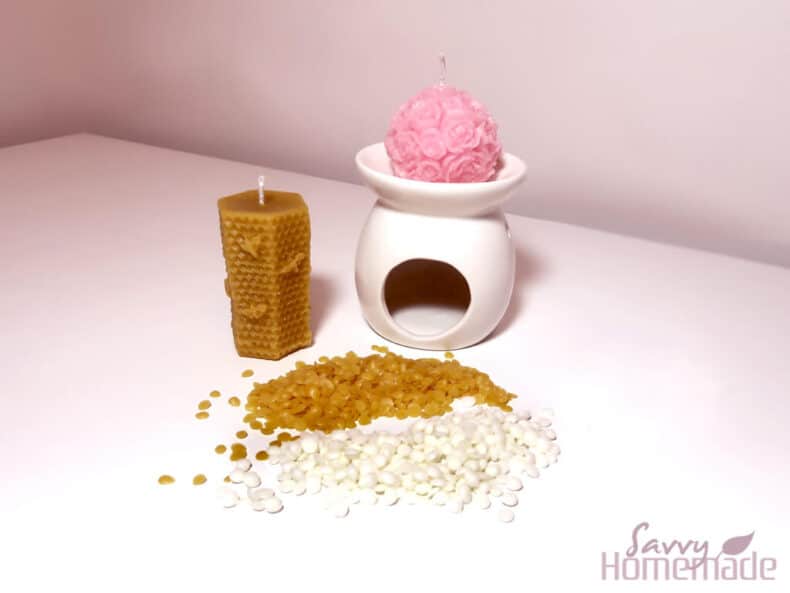
This beeswax candle has been made in exactly the same way as the pillar wax rose above with a tsp of essential oil for every 200g (7oz) of wax. So I don’t end up repeating myself too much, I’ll be showing you how I made this mainly through pictures. If anything seems vague, just have another read through my in-depth guide above and it should clear everything up.
Step1 Wick your mold using a wicking needle as we discussed above.

Step3 Stabilize your mold and use a pencil, wicking needle or piece of bamboo to hold the wick in place.

Step3 Add any color and fragrance oil (note that I am not using a dye for this candle).

Step4 Pour your wax, remembering to pour slowly to reduce bubbles.

Step5 Remove your candle from the mold using the technique I discussed above.

I hope you’ve found my post on how to use silicon candle molds informative. I also hope you enjoy making them as much as I did. Let me know in the comments section below how you got on. I’ll do my best to answer any of your questions, so go ahead and post them in the comments section below!


Thank you for this article. Air baubles are my candle curse. No matter what I do they appear. I pour slowly, I heat up the mould. I noticed the first time I use the mould it’s ok. Second time I use the mould it is full of baubles. I tried so many things yet all my candles have the air pockets 🙁
Any suggestions ?
Thank you !
Hi Ela,
It sounds like you are doing most things right, but here are a few more suggestions just in case you missed something:
1 Try pouring wax at temperatures between 130°F and 140°F (54°C and 60°C).
2 Gently tap the mold on a surface after pouring to release trapped air.
3 Run a heat gun over the candle’s surface to pop any bubbles that rise.
4 Ensure the wick is centered and taut to avoid trapping air.
5 Allow your candles to cool slowly to prevent rapid temperature changes.
6 Residual wax or impurities can cause bubbles, so clean your molds well after each use.
I hope these tips help you achieve smoother, bubble-free candles!
Best wishes, Angela x
Great tips on using silicone molds for candle making! I love how creative you can get with them for such little effort. Definitely worth a try!
Hello my name is Pamela,thank you for instructions on how to use silicon molds and how to place wicks. my question is what if you don’t have a wick needle, what can I use to thread the wick into my mold
Honestly I’d get yourself one, especially if you’re planning to work with silicon candle molds. You could experiment with using a thin blade (something like an exacto knife), then trying to poke the wick through. But I imagine that’ll be much more difficult than parting with $7 for a wicking needle on amazon.