If you have oily or breakout-prone skin, then finding the right cleanser can often seem like a difficult balancing act. If its too harsh, your skin might just feel tight and irritated. Too rich and it can feel a bit heavy.
This homemade cleanser for oily skin was inspired by the simplicity of modern gel cleansers, but its made in a way that keeps things gentle, sulphate-free and skin-friendly.
It’s a lightweight foaming gel cleanser that rinses away easily, removes excess oil without stripping and leaves your skin feeling clean and super comfortable.

Benefits Of This Homemade Cleanser For Oily Skin
- Lasts for around a year when stored correctly, making it a cost-effective, and practical DIY cleanser.
- It’s sulphate-free and cleanses gently without the harsh stripping effect of traditional foaming cleansers.
- It’s gentle enough to be used daily, both morning and evening, without disrupting the skin’s natural balance, minimising the risk of irritation or flare-ups.
- This DIY cleanser for oily skin rinses away easily with water leaving no tight, dry, or uncomfortable after-feel.
- Especially suitable for oily and breakout-prone skin as it removes the excess oil without over-drying.
- Smooth gel texture that glides effortlessly over the skin.
Key Ingredients & Why They’re Used

Distilled Water
This forms the base of this oily skin cleanser recipe, keeping it lightweight and refreshing. For oily skin, I wanted something that feels clean and fresh without heaviness.
Glycerin
Even oily skin needs hydration. Glycerin is a gentle humectant that draws moisture to the skin and helps prevent that tight, over-cleansed feeling. When skin feels stripped, it can actually produce more oil to compensate, so keeping hydration balanced is key.
Hydroxyethyl Cellulose Gum
This gives the cleanser its smooth gel texture. We’ve chosen it because it creates a soft, cushiony feel without heaviness, helping the formula glide over the skin while keeping things simple and non-irritating. If you haven’t used Hydroxyethyl Cellulose Gum before then you are going to love its smooth transparent finish.
Decyle glucoside, Coco glucoside
We are using a blend of Decyl Glucoside and Coco Glucoside because they’re gentle, sulphate-free cleansers that work well together. These are the ingredients that actually do the cleaning. They create the light foam, lift away excess oil and dirt, and allow everything to rinse off with water. Using two together helps improve the foam and cleansing performance, while still keeping the formula mild enough for oily or breakout-prone skin.
Saligard PCG Preservative
This is a water-based cleanser, proper preservation is essential, and we’ve chosen Saliguard PCG as it’s water-soluble, easy to incorporate and provides reliable broad-spectrum protection. It works well within the skin-friendly pH range of this formula and is considered suitable for all skin types, helping to keep the cleanser safe and stable without compromising its gentle feel.
Substitutions
- Distilled Water, hydrosol would be lovely. This would also give the gel a mild scent.
- Hydroxyethyl Cellulose you could use clear xanthan gum. It won’t be as smooth but the recipe will still be work,
- Decyle glucoside, replace it with more Coco glucoside.
- Coco glucoside replace it with more Decyle glucoside
- Saliguard PCg Preservative, geoguard ECT would be my second choice especially if you are looking to keep it natural. This may however change the consistency of the gel.
Watch The Video

As an Amazon Associate, I earn from qualifying purchases. If you buy via the links here I may earn a small affiliate commission at no cost to you, please read my affiliate disclosure.
Ingredients
Equipment
Method
- 5 grams Glycerine, 0.6 grams Hydroxyethyl CelluloseIn the medium sized beaker, mix the glycerin and the hydroxyethyl cellulose. Stir until smooth and the gum looks fully dissolved.

- 86 grams Distilled WaterA little at a time drizzle in the distilled water, stirring well after each deposit. Once all the water has been added, set to one side to thicken. This can take around 30mins. If your water hasn't thickened or to quicken the process up you can warm it up to around 65c (149f). I find placing the beaker in a pan of simmering water, or giving a gentle heat in the microwave for a few seconds stirring and repeating also works well. Once the water has reached 65c (149f) leave it to cool and thicken before moving on to the next step.
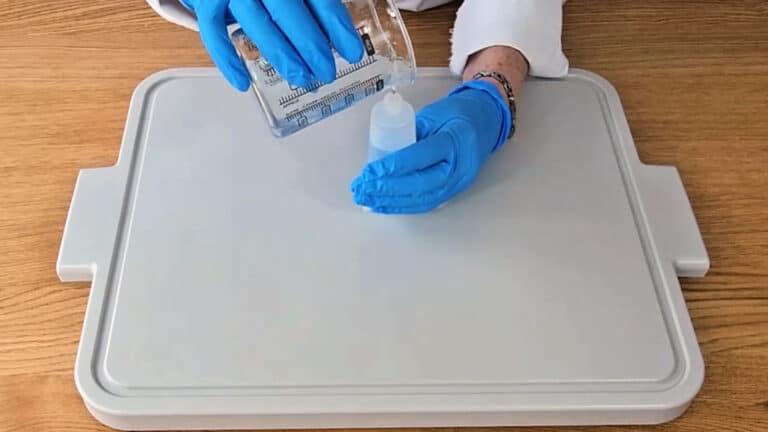
- 4.4 grams Decyl Glucoside, 3 grams Coco GlucosideWhilst the water is thickening in a separate small container, combine the glucosides together. Although they will need stirring this needs to be done gently so as not to create too many bubbles.
- Once the water has been thickened with the gum. We can add the glucosides to it. Once again careful stirring.
- 1 gram PreservativeNext add the preservative and continue with the stirring until you are sure that it's fully combined.
- Now its time to check the pH of the cleanser. Dilute a small sample of the cleanser (1 part cleanser to 9 parts distilled water). Dip a pH strip into the diluted sample and check it reads pH 5.0–5.5.
- If the pH is too high, add a couple of drops of a 10% citric acid solution to the main batch of cleanser and stir gently until fully combined. I found mine was around 5.5 to 6 so I added around 4 drops just to be sure it was closer to 5 rather than 6. Test again and repeat if needed until the pH is 5.0–5.5.
- 1 Pump BottleOnce the cleanser is at a suitable pH level, transfer the cleanser to a suitable bottle. A pump bottle is the best for this cleanser. Unfortunately we did not have one so we went with a tube container and used a slow steady pour.


Tried this recipe?
Let us know How It Was!
How to Use
Apply a small amount into your palm, rub it lightly between your hands first, then apply to damp skin and gently massage over your face for 30–60 seconds before rinsing with lukewarm water and patting dry.
Use morning and evening, following with moisturiser while skin is still slightly damp
Storage
Stored in a clean bottle this oily skin cleanser should keep for around 6–9 months, and up to 12 months if stored cool and out of direct sunlight.
Final Thoughts
Oily skin doesn’t need to be scrubbed into submission! It needs balance. When we strip the skin too aggressively, it often responds by producing even more oil, which is exactly what we’re trying to avoid.
This DIY oily skin cleanser keeps things simple. Gentle glucosides do the cleansing, glycerin supports hydration, and the lightweight gel texture leaves skin feeling fresh rather than overworked.
It’s effective without being harsh, and that’s the sweet spot for oily or breakout-prone skin.
Once you’ve made it, you’ll see how straightforward gel formulations can be. You can experiment with hydrosols, adjust the thickness slightly, or keep it exactly as it is for a dependable, everyday homemade cleanser for oily skin.