
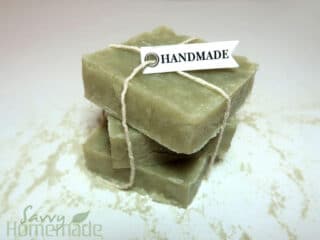
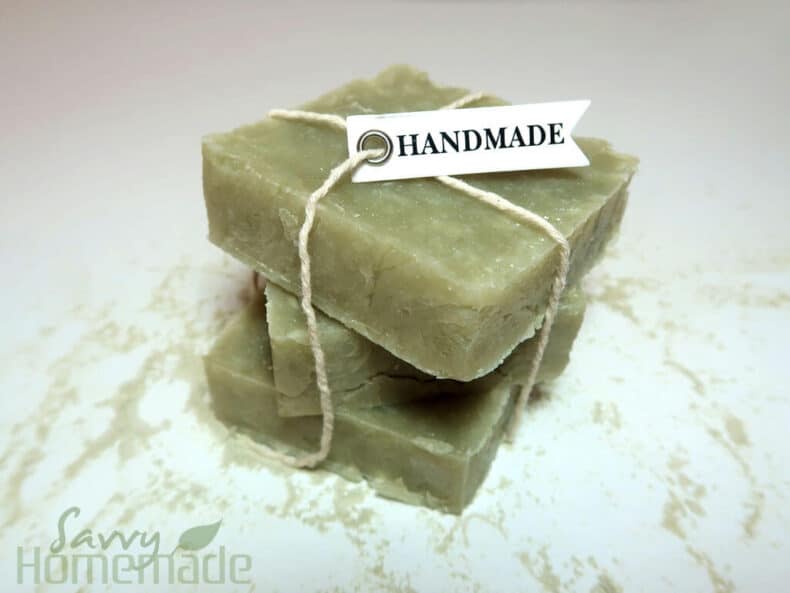
So we have another soap recipe for you this week and we’re doing another hot process, but this time we’re adding an interesting ingredient I had never used in soap before; French green clay! It gives this soap a gorgeous rustic look, with interesting cracks and a cool texture.
I’m just loving this hot process oap recipe right now, and I think it’s simply because unlike a cold process recipe you can use it almost immediately. I’m an impatient lady, I just can’t stand waiting weeks for my soaps to cure. But it could also be because I’m really getting the hang of it now, to the point where I’m finding it no more difficult than cold process.

Why Make Green Clay Soap?
So as I said, we’ll be making use of clay in this hot process soap recipe. I absolutely love to experiment, and I’ve found that adding clay can make soap feel so much silkier. I love how it feels on the skin, and it’s definitely worth a try. It adds that bit of wow to make this soap even more luxurious.
I’ve opted to use a butter alongside my oils for this recipe. Shea Butter is possibly the best butter you can buy, and is super hydrating and skin softening. I’ve made use of coconut oil and castor oil again, just because I love to use them for all their amazing protective properties.
I’ve also made use of some refined avocado oil. I purchased it a little while ago and hadn’t had a need for it until now. It has a light, soft green tint to it which compliments the green color of the clay. If you can get your hands it’s much more expensive and unrefined cousin, definitely make use of it. Although it has a deeper green hue.
I’m using two of my favorite fragrance oils to scent this soap because it’s so inexpensive. Totally swap these out for essential oils if you’d like to, which would also make this soap even more ‘extra special’. I tend to add a little less sandalwood and a little more jasmine, just for balance.
I’ve also added a bit of tallow to this French Green Clay Soap recipe, which just helps to harden it up more quickly. Vegetable fat can be a great substitute here if you’re a vegetarian. Alternatively, you can use a bit of Sodium Lactate, but I just don’t think it’s necessary.
Ingredients For This Soap
- 200g Avocado Oil
- 300g Coconut Oil
- 100g Castor Oil
- 100g Shea Butter
- 200g Tallow/Animal Lard or Vegetable Fat/Shortening
- 25ml Jasmine Fragrance Oil
- 15ml Sandalwood Fragrance Oil
- 4 tsp French Green Clay
- 3 tbsp of Distilled Water (for the clay)
- 1 tsp of Green Soap Mica (optional)
- 128g Sodium Hydroxide/Lye
- 297g Distilled Water (for the lye)
Equipment
- Crock-pot
- Stick Blender
- Soap Mold
- Measuring jugs
- Spoons and Spatulas
- Personal Protective Equipment (Gloves and Glasses as a minimum)

How To Make It
NOTE: Because I’ve posted a couple of hot process soap recipes now, I’ll be running through the method relatively quickly. If at any point a step is rather vague, I will link to one of my previous posts for further detail.
STEP 1
Pop your oils, butters and tallow into your crock-pot and switch it to a low setting. Allow the solids to melt into the liquids. Make sure you exclude the fragrance oils and the clay.

While your oils melt, mix your 128g sodium hydroxide with the 297g water to make your lye solution. You always want to pour your sodium hydroxide into your water to prevent any splashing.
STEP 2
Before we continue, we’ll need to balance the oil with the lye solution. You need both to be under 130F before you mix.
When they are, turn off the heat and pour your lye into your oils and give it a good stir. You can add a little at first just to make sure that you won’t see any adverse reactions.

STEP 3
Now we need to bring the soap batter up to a light trace. This is when the soap batter becomes thicker, allowing you to pick up some of the batter with a spoon and drip it back onto the surface without it sinking in straight away.
To do this, use a stick blender. Blend in short bursts of a couple of seconds, followed by a stir. You’ll want to repeat this until you see the sign of trace.

This process can take up to 5 minutes, but this varies depending on the temperature of your oils.

For a more in-depth look at how to get your batter to trace, take a look at our first hot process soap recipe, made with gorgeous orange essential oil.
STEP 4
Now that the batter is at trace, it’s time to use heat to expedite the saponification process. Switch your crock-pot back to a low setting and put the lid on. You’ll want to leave your batter for 20 minute intervals to ‘cook’, stirring after every 20 minutes.
Your batter will go through various stages during this process, and you will find it will look dramatically different depending on the stage. Don’t worry, this is totally normal.
Ultimately we’re looking for our batter to hit the ‘gel phase’, which is when the batter becomes slightly translucent, shiny and possess a striking resemblance to petroleum jelly. When you see this, switch off the heat.

Again, for a more in-depth look at the processes of saponification for hot process, take a look at the ‘cook’ step of our first hot process soap recipe.
STEP 5
Now that our soap has been well cooked, it’s time to add our extra ingredients. I’m using fragrance oils for this recipe, with a bit more jasmine than sandalwood to help balance the scent profile. It’s quite okay to use whatever aromas you wish, as well substituting for essential oils.

Go ahead and pour your 40ml total fragrance oils into the crock-pot and give the batter a good stir. We want to stir thoroughly so the fragrance is well distributed.
STEP 6
Now we want to add our mixture of French green clay and water. Because some clays are not heavily pigmented, you have the option of adding a tsp of green soap mica to the clay if you wish. I’ve decided not to this time.

When you’ve mixed the clay and water, add it to the soap batter.

STEP 7
We’ve now added all of the necessary ingredients, so go ahead and spoon the mixture into your soap mold. I find silicone molds work the best, but if yours isn’t, make sure you’ve pre-lined it with some baking parchment.

I find that picking up the mold and bashing it down can help to even out some of the batter. Otherwise, you can use a spatula to try and even out the mixture.
Because I often get quite an irregular surface on the top of hot process soap, so I do one of either two things. First, you can use a fork to create rough peaks. This is what I’ve done this time. Your other option is to use a soap cutter and trim a layer off the top to get a smoother surface. Either is fine to do and looks quite nice.

STEP 8
You’ll want to leave it alone for 24 hours as it hardens up in the mold. The next day you should be able to pop it out of the mold and cut it into slices. If you find that your soap is softer than you’d like, give it a week to harden. Otherwise, you’re free to use, gift and sell your soaps!

Final Thoughts
I’m absolutely loving this French Green Clay Soap right now and I think it’s simply because you can use it almost immediately. There’s nothing better than slipping into a nice, hot bath and using your very own soap to nourish and soften your skin. It’s a luxury I recommend everyone tries before they die!
The ingredients in this soap are all tailored to getting the most out of your soap making efforts. I strongly encourage you to experiment though. Perhaps you’d prefer to 86 the animal and vegetable fat in exchange for a gorgeous butter or sumptuous oil. Maybe the color isn’t to your liking, as you can get a whole range of different colored french clays to try your hand at. Experimentation is the most exciting part of soap making!
I generally find that this French Green Clay Soap is quite hard, but I think that’s probably because of the lard. If you’re substituting the lard, and still wish to get that nice, hard soap texture, then I’d strongly recommend making use of the Sodium Lactate. It should make sure your soap is nice and hard. Otherwise, just leave the soap for longer before you use it, and it’ll harden as it dries out.
I hope you manage to make a lovely soap from this recipe. If you have any questions or need some clarifications, don’t hesitate to ask me in the comments section below. Also use that space to let me know how you got on, and how amazing your skin feels after using it!

Hello! I don’t have avocado oil but I have flax, olive, and macadamia oil, will any of these work? also could I add dried rosemary to this recipe?
thank you!
Hi Angela,
Although most oils can be substituted in a soap recipe, each oil has a specific saponification (SAP) value that determines how much lye is required. Any changes you make should be checked using our soap calculator to see if the lye amount needs to be adjusted. It’s an easy-to-use tool and an invaluable resource for soap makers.
Hope this helps Angela x
Hi Angela!! I want to try this soap!!! However, I want to keep to COLD process soap.
Can I use this particular recipe for cold process or would I need to alter the lye/oils etc?
Also, how much soap does this make? I am new to soapmaking, so for now, I will be using milk and orange juice cartons!!
Thanks SOOO much!! 🙂
Hi Joy,
I’d pop the recipe through our calculator, which you can get access to via free membership. This should make sure you’ve got the right ratio of lye to water.