
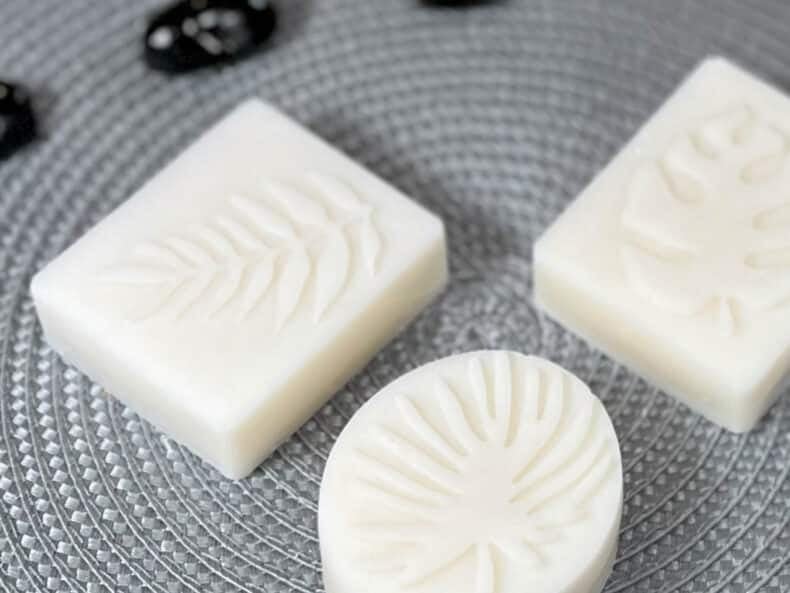
Today I’m going to share my latest recipe for coconut oil soap making. After a bit of research and more than a few test batches I’ve created something that’s more soothing and gentler on your skin than the average coconut soap.
I have worked with coconut oil for years and it never disappoints. It is a true all-rounder, rich in lauric acid, naturally cleansing, and capable of producing the kind of fluffy, bubbly lather that feels luxurious even in a humble bar. You will find this ingredient in plenty of my soap recipes, from moisturising soaps to deep-cleansing scrubs.
That said, there is one piece of advice I heard early on and took as gospel: never go overboard with coconut oil soap making. It has a reputation for being too cleansing, even harsh, when used in large amounts. The thought of making a soap from only coconut oil seemed like asking for trouble, until now…
Curiosity Got The Better Of Me

So I wondered if there was a way to make a 100% coconut oil soap that did not strip the skin. After a bit of research and several test batches, I found the trick: a generous 20% superfat.
That extra oil stays in the bar, softening and conditioning while keeping all the bubbly, hard-bar benefits of coconut oil. The result is a minimalist bar that defies expectations with rich lather, great longevity, and a gentle touch.
If you enjoy experimenting, this is worth a try. It is straightforward, beginner-friendly, and only requires three ingredients.
Why You Will Love This Coconut Oil Soap Recipe
This Recipe breaks not one, but three commonly held soapmaking beliefs:
- Single oil soaps don’t perform as well as blends of multiple oils.
- Using more than 30-40% coconut oil in a recipe is considered too drying for skin.
- Superfatting above 10% can lead to spoilage or dreaded orange spots due to excess free oils.
But in truth, the 20% superfat is actually the magic here, transforming what could be a drying bar into something balanced and skin-kind.
Do not be fooled by the short ingredient list. This soap delivers more than you might expect.
If you enjoy making cold process soap and want more reliable results, you might also like my Natural Soap Making Course.
Inside the course I share tested recipes along with clear guidance on oils, lye, colors, and additives, so you can make beautiful, dependable, & natural soaps with confidence.
It’s 25% off this week. 👉 Explore the course here
About The Ingredients:
For the basic coconut oil soap making recipe, you will only need three things:
- Coconut Oil (100%) – The star of the show. Cleansing, bubbly, hard, and long-lasting.
- Lye Solution (sodium hydroxide and distilled water) – To saponify the oil.
- Optional but recommended: A few grams of essential oil for fragrance. This is not included in the recipe card, so if you want to add it, choose your favorite blend and stir it in at trace.
Here is why it works:
- Cleansing and conditioning: Coconut oil gives a hard, bubbly bar, and the high superfat keeps it gentle.
- Fragrance ideas: While this recipe works perfectly unscented, a few grams of essential oil such as lavender or peppermint can turn it into something extra special.
- Quick to make: One oil means less fuss with melting and blending.
- Beginner-friendly: A great first cold process project that still feels impressive.
- Long shelf life: No delicate botanicals or dairy powders to shorten storage time.
Choosing The Right Coconut Oil
When making soap, it’s best to use refined coconut oil. It’s more affordable, has no strong coconut scent, and is commonly used for frying. Since the scent of virgin coconut oil doesn’t survive the soapmaking process, there’s no benefit to using the more expensive kind. Save that for your DIY skincare.
Avoid fractionated coconut oil (the liquid kind at room temperature), as it behaves differently in soapmaking and has a different saponification value than solid coconut oil.
Watch The Video

As an Amazon Associate, I earn from qualifying purchases. If you buy via the links here I may earn a small affiliate commission at no cost to you, please read my affiliate disclosure.
Ingredients
Equipment
Method
- Make sure you are making the soap in a well-ventilated area. Put on your gloves and eye protection, mask, apron, and long rubber glovesIf you are incorporating essential oils, weigh them into a small glass container and set it aside for later use.

- 450 grams Refined Coconut OilWeigh the coconut oil into a good-sized heatproof container. Melt in a microwave, using 30-second bursts. Or in a stainless steel saucepan on a low heat.

- 131 grams Distilled WaterWhile the coconut oil melts, weigh the distilled water into a clean container. Never use a glass container as this will be holding the lye water. Lye can weaken glass so it can easily break. In a separate container, weigh your sodium hydroxide/lye crystals.
- 65.5 grams Soapmaking LyeWhen you’re ready, carefully pour your lye crystals into the water, do not pour the water into the lye as this can create a violent reaction.When the lye is in the water, start stirring it. Although you are wearing a mask, we still recommend turning your head and leaning away while stirring, so you do not breathe any of the fumes. As the water and lye mix this will result in a chemical reaction, and the lye water will increase in temperature and release toxic fumes.
- Stir until the lye crystals have dissolved and the water looks fairly clear. Now place to one side, somewhere well-ventilated but safe so that it will not be knocked over. Allow to cool.Once your coconut oil is melted, also set aside to cool.
- Check the temperature of the oils and the lye water. You can do this with a temperature laser gun or a jam thermometer. We want them both to fall between 115-80F (46-27C). If they are still too hot leave them to cool for a while longer. They do not need to be the same temperature, for example, the lye could be 90f and oils 100f, but it is best to keep them within 10 degrees of each other.
- Once you’re satisfied they’re balanced, combine by pouring your lye solution into your oils.Before turning on the stick blender to mix the oils and lye, gently tap the stick blender against the bottom of your container. Continue tapping until all the air bubbles have been released.
- 7 grams Lavender Essential Oil, 7 grams Peppermint Essential OilTurn on the stick blender and blend until the oils are fully emulsified into the lye solution. Then switch off the blender and check for trace. This is when you can drizzle a small amount of soap batter on top and it leaves a visible trail or 'trace' on the surface.Now that we’re at trace, this would be a great time to add any essential oils, if you’re using them. I always recommend getting the mold ready before adding the essential oils, as they can sometimes thicken the soap batter, meaning you have to work quickly to get it into the mold.
- Now it’s time to get it into the mold. Pour or spoon the batter into your molds. Give them a couple of light taps down to even the soap batter out, and use a silicon spatula to level them out if needed.We now need to leave them to saponify for 24 hours before we can remove them from the molds. I like to keep it well insulated during this period, so the gel phase is efficient. I do this by placing a cardboard box over the mold, then placing a towel over the box.
- Once our soap has fully sapped, and the sides of the molds come away easily from the soap, it’s okay to remove it from the mold.
- The soaps will need to cure for 6 weeks before using. Curing the soap allows excess water to evaporate, resulting in a harder, longer-lasting bar. This also results in a more gentle bar and a better lather.To cure the soap bars, place them upright in a cool, dry area, and turn the bars occasionally to ensure even drying.


New to DIY skincare?
If you’re enjoying making your own products, you might like Radiance, my free email course where I teach the foundations of DIY skincare step by step!Other Single Oil Soaps
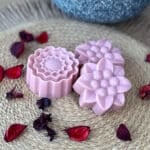
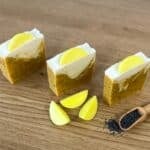
If you are interested in making other single oil soaps, here are two great examples:
Storage and Shelf Life
Once cured, store your coconut soap bars in a cool, dry spot with good airflow. A wooden tray or cardboard box works well. Avoid sealed plastic for the first few weeks, as it can trap moisture. Properly stored, they will last 9 to 12 months, although the scent may fade over time.
Optional Extras
If you want to customise this bar further, you could:
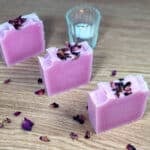
- Swap some or all of the water for chamomile tea or aloe vera juice.
- Stir in a spoonful of oat flour or botanical powder for texture and color.
- Add coconut or goat’s milk powder for a creamy look and feel.
Common Questions on Coconut Oil Soap Making
Is coconut oil soap drying?
It can be, but that is why we use a 20% superfat. It offsets the cleansing power, making the bar gentle enough for most skin types.
Can I use fractionated coconut oil?
Not for this recipe. It behaves differently and has a different SAP value, so you would need a completely new formula.
Will it work in hard water?
Yes. Coconut oil excels at producing lather even in hard water conditions.
How long should it cure?
Give it at least 10 weeks. This is longer than most cold process soaps, but worth it for hardness and mildness.
Can I use it on my face?
If you have oily skin, maybe. For most people, I would keep it as a body bar.
Final Thoughts
This 100% coconut oil soap making recipe proves that simple does not have to mean basic. With the right formulation, a single oil can create a bar that is hard, bubbly, long-lasting, and kind to skin. The high superfat percentage is what makes it possible, so do not be tempted to skip it.
If you enjoy pared-back, effective formulas, this is one to add to your soapmaking list. And if you are feeling adventurous, try adapting it with other oils using our SAP calculator to see how different fats change the personality of your soap.


I love this!