
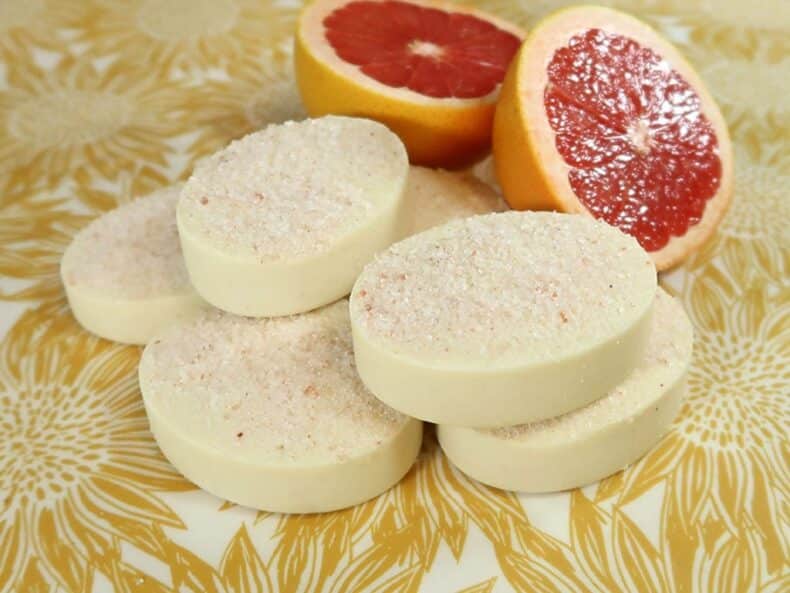
So you are probably thinking that this salt soap bar is going to be a very scratchy soap bar. But nothing could be farther than the truth. As the salt melts away in warm water, it transforms into a lusciously soft and creamy bar with only a gentle exfoliating feel.
The only problem with adding salt to a bar of soap is that salt has a tendency to stop the soap from foaming up. So we have to choose oils that have a high foaming capability, and nothing foams better in cold processed soap than coconut oil.
In this recipe, we’ll use around 70% coconut oil to create a rich, bubbly lather. Because coconut oil can sometimes be drying, we’ll offset that with a higher super-fatting level for extra moisture and skin softness.
What’s In This Recipe & Why?

Most of my soaps use about 5% super-fatting, but for this one, I’m taking it up to 15%. I’ve even tried 20% before, which felt incredibly moisturizing but a little too slippery. Through trial and error, I’ve found the perfect balance for a creamy, foamy, and luxurious salt bar that your skin will love.
Oils and Cosmetic Butters
The castor bean oil is another quick foaming oil that’s a humectant so it’s going to add some well-needed moisturizing values.
Olive oil doesn’t bring much lathering to the table, but it will bring conditioning and mildness. Adding a good amount of shea butter into the mix is definitely going to add some creaminess to the salt soap.

Pink Himalayan Salt
Hand mined from the Himalayan mountains. This salt contains 84 trace minerals that uniquely match the ones in our own bodies.
Due to its natural antibacterial properties adding a cupful of pink Himalayan salts to the soap will give the it extra cleaning power, all whilst soothing and softening the skin.
Fragrance
Staying with the pink theme and keeping it simple, I’ve fragranced this soap with only one essential oil, Pink grapefruit. I love the smell of this soap. Its fresh citrusy scent is perfect for a morning shower.
If you are unable to get pink grapefruit essential oil you could use grapefruit, or a mix of other citrus oils such as orange, lemon, or lime, all of which have very good cleaning and uplifting properties.

Molds
I don’t use loaf molds for my salt soap bars anymore. Mainly because I’ve had so many failures with them. Adding salt makes the soap harden extremely quickly, usually within an hour or two, and once it becomes too hard it’s almost impossible to cut without it crumbling.
Individual (cavity) soap molds don’t need to be cut, so no more guesswork or wasted ingredients. Once the soap is in the molds it can be treated in the same way as most of our other cold processed soaps, by leaving them in the mold for 24 hours before popping them out.
Watch The Video

As an Amazon Associate, I earn from qualifying purchases. If you buy via the links here I may earn a small affiliate commission at no cost to you, please read my affiliate disclosure.
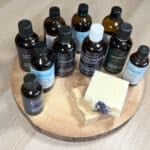
Ingredients
Equipment
Method
- If you’ve not made soap before, take a look at my full cold process tutorial here.Put on your protective clothing, gloves, mask, and glasses. I always find it best to then prepare and weigh all of the ingredients before starting.

- 65 grams Soapmaking Lye, 176 grams Distilled WaterPour the distilled Water into a sturdy jug then carefully stir in the lye. To avoid burns from splashing, always add the lye to the water rather than the water to the lye. Once the lye has dissolved in the water, set it aside in a safe place to cool.
- 312 grams Coconut Oil, 85 grams Olive Oil, 28 grams Castor Oil, 28 grams Shea ButterPlace the coconut oil, olive oil, castor oil and shea butter into a large glass jug then melt in the microwave using a 30 second burst.You can also melt the oils/butter in a stainless steel saucepan over a low heat. Once melted, set aside to cool.
- When both the lye and oils have cooled to around 120f to 40f (49c 60c) it's time to mix the lye into the melted oils. Do this carefully and slowly to avoid being splashed.
- Using a blender, start stirring your mixture for several minutes before switching it on. Turn the blender on and give your mixture a few short 3 second blitz, stirring between each burst until the batter thickens enough to leave a thin trace on the surface of the batter before disappearing back into the batter.
- 14 grams Grapefruit Essential OilNow it's time to pour in the pink grapefruit essential oil. Once added, give the batter another few blasts with the hand blender until the batter is nice and thick but still pourable.
- 226 grams Pink Himalayan SaltSwap the hand blender for a silicon spatula or something similar. Then stir in the Himalayan salt. You will notice the soap batter becoming very thick once the salts have been added.
- When you have completely mixed in the salt and that you are happy that it's been fairly evenly distributed throughout the soap batter, you can transfer the soap to the molds. If the soap batter is too thick to pour, then you may need to spoon it into the molds.
- If you are using individual soap cavities, you can walk away and forget about them for 24 hours before popping them out of the mold. It goes without saying that they will still be a bit caustic until cured so put your gloves on before releasing them. If you have used a loaf mold you will need to keep an eye on the soap and remove, then cut it as soon as it feels hard, this can be as little as an hour.
- The soap will need to cure for around 4 weeks before you can use it. Which is just a case of letting the soaps sit and air in a cool dry area and rotating them once a week. Cured soap has a lower PH so it's much milder on the skin. I hope you enjoy making and using these soaps as much as I did. They make great gentle exfoliating bars for the bath or shower, and leave the skin feeling squeaky clean and softened.


Tried this recipe?
Let us know How It Was!Final Thoughts
I love this soap. It combines two of my favourite cleansing products, soap and scrubs! You don’t just have to use pink himilayan salt, though. Just about any salt will do, although I’d avoid table slat. Epsome and sea salt are good substitutes.
They also look really cute! You don’t have to sprinkle a bit of salt on top if you don’t wanna, but I think it makes the finished product look more polished and much more professional. It’s just prettier this way.

So what are your favorite soap recipes? Have you put salt in your soaps before, how did it turn out? I absolutely love when you guys share your soaping stories in the comments section below. Or tell me all about them on social media, I’m active on Facebook, Instagram, YouTube, Pinterest, and Twitter!
If social media isn’t your thing, you can sign up for our newsletter. Be the first to hear about my new recipes, as well as some exclusive offers from time to time. I’ll be back with another soap recipe very soon!
How To Make Turmeric Soap At Home – A Natural Recipe
Turmeric soap is all the rage now, but it always bothers me when I see it’s bright orange. That’s definitely not natural organic soap. So I thought I’d share my all-natural turmeric soap recipe and what it should look like.

Love your recipes, I’m going to do the salt one,hope it goes as well as yours thanks for sharing x
Jo