
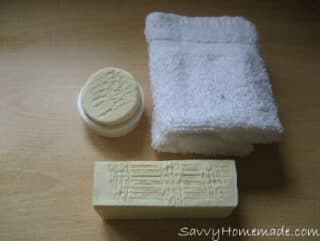
Most men need to shave every day, unfortunately, this can often leave the skin feeling dry and taught. With this in mind, all of the ingredients in this homemade shaving soap recipe have been chosen for their excellent moisturizing and conditioning qualities.
This moisturizing soap has a very manly and nutty fragrance and with both the clary sage and cedarwood essential oils having aphrodisiac properties, it will defiantly leave you feeling fresh and masculine.

Shaving Soap Ingredients
- 8.5 oz (240g) Olive Oil
- 2.5 oz (70g) Avocado Oil
- 2.5 oz (70g) Coconut Oil
- 1.5 oz (40g) Palm Kernel Oil (from a sustainable source)
- 1.5 oz (40g) Beeswax
- 1 oz (25g) Cocoa butter
- 3 teaspoons (13ml) Clary Sage essential oil
- 1 teaspoon (6ml) Cedarwood essential oil
- 2 1/4 oz (65g) Lye (Sodium Hydroxide/Caustic Soda)
- 8 oz (227g) (230ml) Distilled water
Making This Shaving Soap
Watch How To Make Basic Cold Process Soap
If you haven’t made soap before, take a few minutes to watch the video and basic steps for making CP soap at home.
- Make sure the room you are making this homemade moisturizing soap recipe in is well ventilated.
- Oil a plastic mold and then line it with greaseproof paper.
- In a good-sized stainless steel pan, melt the beeswax, cocoa butter, olive oil, avocado oil, coconut oil, and palm oil over low heat.
- Put on the protective eyewear, mask, apron, and long rubber gloves.
- Pour the mineral water into a plastic bucket or large jug.
- Slowly add the lye, using a plastic spatula to stir until dissolved.
- Use two jam thermometers, one for the lye mix and one for the oil mix. Make sure you are still wearing the protective clothing.
- When both mixtures reach the same temperature 131 F (55 C) immediately pour the lye mix into the oils, using a hand whisk, stir continuously until well combined.
- Continue to stir until it has thickened enough, when a bit of the soap is drizzled over the top it leaves a line/ trace. Pour in the clary sage and cedarwood essential oils and stir thoroughly.
- Pour the mixture into the mold that you prepared before. If you are planning on cutting the soap into bars, swirl it with a spatula.
- Leave it covered with cardboard, in a warm, dry place for 24 hrs in order for it to set.
- Line a wooden board with greaseproof paper, wearing your protective gloves turn the soap out onto the board.
- Use a carving knife to cut the soap into bars or rounds, or use a biscuit cutter.
- Put them into a tray lined with greaseproof paper and leave in a warm dark place for four weeks.
- Turn them occasionally.
Did you make homemade shaving soap? What ingredients did you use?

Can you sub the palm oil with anything?
How much does this make please?
Hi Debbie
Should make just over 20 oz
Hi, thanks. Am new to soap making so how many bars is this?!
That depends on how much you plan to pour in each coffee mug. Could be 4 to 8 depending on your needs. If you are making round bars to fit a mug then it depends on how thick you slice the bars and what kind of mold you use. A lot of unknown variables in that question!
love soap!!