If you’ve ever wanted to dip your toes into soap making but felt intimidated by lye, temperatures, goggles, gloves, and all the chemistry talk, homemade melt and pour soap is the gentlest way to get started.
& honestly, it’s how I first got my confidence years ago. MP soap making lets you skip right to the fun part of making soap, the colors and scents and all the creativity. And that’s one of the reasons I still keep some MP soap base in my cupboard, even though I make cold process soap regularly now. The other reason is that I often use it for embeds in my cp soap.
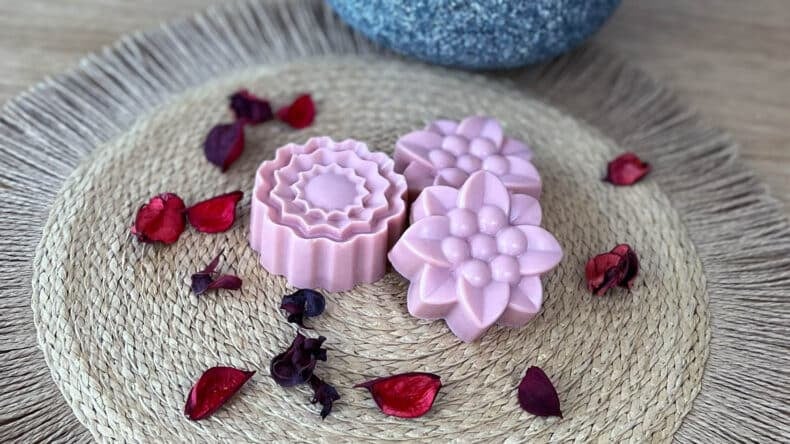
But I still love how simple MP soap making is. On days when I want a quick win, a batch of three creamy MP bars feels like magic. This recipe fits perfectly into that sweet spot, quick, beginner friendly, and surprisingly beautiful.
Basic MP Soap Recipe At a Glance

Before we get into anything detailed, here’s the quick overview. You’ll be making a small batch of around three soap bars. It’s genuine beginner level stuff, no special equipment beyond a microwave and something heat safe to melt your soap in.
There’s a short active time, then the bars set within a couple of hours. Since the base is already saponified, there’s no lye and no long cure time.
But keep things tidy and be careful with hot melted soap, it can give you a little sting if you splash it on your hand. For the measurements and the proper step by step, see the full recipe below.
Alright, now let’s talk about one of my favorite parts of melt and pour soap making, choosing the mp base.
MP Ingredients Spotlight
I will highlight a few ingredients so you understand why they’re here and how you can play with them.
The soap base is the heart of the mp recipe, everything else just customises it. If you’ve never melted a soap base before, it’s actually quite satisfying watching solid blocks turn silky smooth in the microwave!
Generally, the average soap bar weighs between 100 to 120g (3.5 to 4.8 oz) this should give you a good estimate on how much MP soap you may need. Always prepare a little extra just in case. Any left over can be poured in to a spare mold for reuse.
Choosing Your Melt and Pour Base
People often think there’s only one type of melt and pour soap base. But that not true. There are so many, and they each will create a different look and feel. I’ve used pretty much every type at some point and they all have their own little quirks. Here’s a quick look at the ones you’ll see most often.

Clear melt and pour base
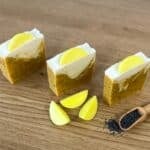
This one is shiny, transparent, and genuinely fun to play with. Perfect for layered soaps or for embedding small shapes inside. I once stuck dried orange slices into a clear base because I got carried away, and it actually turned out gorgeous.
White melt and pour base
This is the classic creamy base. It’s great if you want strong colors that pop or pretty pastel bars. Titanium dioxide usually gives it the opaque look.
Aloe vera base
Soothing and lovely for sensitive skin. I sometimes use this one in summer when I’m making a calming after sun bar.
Goat milk base
Creamy, cushy, and moisturizing. If you like that soft, old fashioned bar feeling, this one is for you.
Shea butter base
This one feels a bit more luxurious, creamier, richer. People often choose it for gift sets, and I can see why.
SLS or SLES free bases
These come in white or clear versions, and they’re perfect if you’re aiming for a more natural leaning ingredient list. Great lather without the more traditional sulphates.
Oatmeal and shea variants
If you want gentle exfoliation and a moisturising feel at the same time, these are lovely. They make surprisingly wholesome looking bars.
The base in my recipe below is a simple white version because it takes color beautifully, but feel free to switch it out once you get more comfortable with this.
Fragrance Oil or Essential Oil
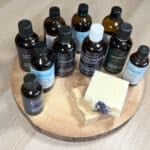
Both fragrance oils and essential oils behave beautifully in a homemade melt and pour soap recipe, and the right choice really depends on the style you’re going for. One is natural and plant derived, the other is synthetically blended, but each brings its own set of benefits.

The FDA generally recommends sticking between 1 and 3 percent usage in soap. I personally sit around the middle for most fragrances, going lighter if the scent is naturally strong and a little heavier if it’s delicate. Melt and pour base is forgiving, but skin safety always comes first.
Fragrance Oils
If you love fun, bold, or unusual scents, fragrance oils are hands down the easiest way to get them. They come in an enormous range of aromas, including ones that simply don’t exist in nature, like vanilla cupcake, baby powder, or the ever popular ocean breeze. They’re usually more affordable too, which helps if you’re making batches for gifts or markets.
They also behave very predictably in soap. Fragrance oils tend to be more stable, meaning the scent hangs around longer without fading. Most suppliers pre test them for bath and body use, so you know they’re skin safe when used correctly.
The main downside is that they aren’t natural, which can be a drawback if you’re aiming for a clean or botanical theme. Some blends contain allergens or synthetic components, so checking the IFRA documentation is important. A few fragrances can also discolour your soap, especially anything containing vanilla, which can slowly turn the bar a little brown.
Essential Oils
Essential oils sit on the opposite end of the spectrum. They’re 100 percent natural and plant derived, which gives your soap a gentle, botanical aroma that feels earthy and authentic.
The scents are softer and offer aromatherapy benefits depending on which oils you choose. Lavender, rosemary, and peppermint are all really nice in melt and pour soap, especially if you’re going for a fresh, herb inspired bar.
There are trade offs though, essential oils are more expensive, and certain ones like jasmine, rose, or sandalwood can get extremely pricey. Some oils fade faster than you expect, especially citrus varieties.
They also need careful measuring because too much can irritate skin. Scent blending can take practice, and since essential oils have a limited scent range compared to fragrance oils, you won’t get the same variety of options. And of course, some citrus oils are phototoxic when applied to skin that will be in sunlight, so make sure you buy the steam distilled versions which are not phototoxic, and always check usage notes.
Mica or Liquid Color
Let’s be honest, the coloring stage is the part everyone gets giddy about. Watching a plain pot of melted soap turn into a swirl of vibrant colour never gets old.

Mica
Mica is easily the most popular option for melt and pour. It’s beginner friendly, rarely bleeds into surrounding layers, and comes in a massive range of stunning shades. You can mix different micas to create your own custom colors, and the shimmer gives your soap bars that lovely pearlescent finish.
Micas also hold their color well over time and work beautifully for layered soaps or decorative tops.
There are a few things to keep in mind though. Some micas aren’t considered truly natural, which can be a point of debate. They can clump if you add them directly into the melted base without dispersing first. Micas can also sink if your base is still too fluid, so stirring gently as it cools helps. And metallic or shimmery shades sometimes look slightly muted in opaque white bases.
Liquid Soap Colorants
Liquid colorants are extremely easy to use. They mix straight in, dissolve instantly, and are usually very economical. They’re great for clear bases because they preserve transparency and let you make vivid jewel toned bars. You can blend them just like paints to create custom shades without fuss.
The trade offs are usually fading and bleeding. Some liquid colors fade with sun exposure, and certain shades may bleed into other layers or colors in your design. You may also need more drops to build up strong color, which can slightly soften lather if you go overboard.
Natural Colorants
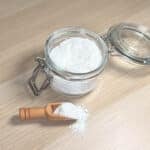
Natural colorants are beautiful if you prefer earthy, muted tones. Clays, charcoal, turmeric, spirulina, and other botanical powders can add subtle color along with skin benefits. French green clay, for example, not only colors the soap but also gives it a lovely creamy feel.
They’re stable in soap and don’t tend to bleed, which is great for simple, rustic looking bars.
On the flip side, natural powders are less predictable than mica, so the same color might look different between batches. Some botanicals fade over time, like spirulina and beetroot. They must be pre mixed well to avoid clumps, and they can thicken your melt and pour base the moment they hit it. This is how I once made a bar that looked suspiciously like mint fudge and set faster than I could pour.
They can also cloud a clear base, which is fine if you want a creamy or rustic look, but not ideal if you’re aiming for crystal clear transparency.
Rubbing alcohol
This is one of those little behind the soap making scenes magic tricks. A spritz helps pop bubbles on the surface and gives a smoother finish.
Tips and mistakes to avoid
Because I’ve made every mistake possible, here are the ones you can skip.
- If your mica clumps, pre mix it with a little melted soap in a tiny cup before adding. It saves so much frustration.
- Don’t overdo the fragrance. Stronger doesn’t mean better, and too much can irritate skin.
- Avoid pouring very hot soap into thin plastic molds. They can warp a little.
- If you want crisp layers, let each layer cool slightly before adding the next.
- Don’t stir vigorously. You’ll whip in air and create bubbles that are hard to fix.
Substitutions and variations
This recipe is simple, which means it’s easy to customize. You can swap the base for any other melt and pour variety without adjusting the method. Go clear for a jewel like look or pick goat milk if you want something creamy.
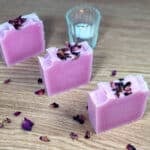
Try using two colors in a single bar, swirling them gently with a skewer. Or keep the base white and use a soft pastel mica for a spring style bar. Once you get used to the way melted soap behaves, you’ll be able to do cute embeds, glitters, botanicals, and seasonal shapes.
Alternatively, you can leave all our additional ingredients out. There’s not need to add a fragrance or a color if you don’t want to!
Watch The Video

As an Amazon Associate, I earn from qualifying purchases. If you buy via the links here I may earn a small affiliate commission at no cost to you, please read my affiliate disclosure.
Ingredients
Equipment
Method
- 350 g White Melt & Pour Soap BaseWeigh and cut the soap into small cubes. Pop the soap into the microwave wave to melt, using short 30 second blasts.

- 7 g Essential Oil or Fragrance OilOnce the soap has melted, stir in the fragrance/essential oil.
- Mica PowdersNow we can add our mica to the soap. I usually add around a ¼ of a teaspoon, but that's personal preference. Liquid soap coloring is usually very concentrated, so add a few drops at a time. The important thing when adding any coloring is to make sure that it's been well disbursed within the soap.
- Rubbing AlcoholThe soap is now ready to be poured into the mold. If the soap has become too thick and has started to harden, pop it back into the microwave wave to re melt. Give the soap a quick spray with rubbing alcohol to disburse any bubbles if need be.
- Leave the soap for a couple of hours to harden before removing it from the mold.


New to DIY skincare?
If you’re enjoying making your own products, you might like Radiance, my free email course where I teach the foundations of DIY skincare step by step!Storage and shelf life
Melt and pour soap lasts well when stored somewhere cool and dry. If your home is very humid, wrap your bars once they are fully set and cooled. Glycerine can attract moisture, which leads to the little dew drops people sometimes call glycerine sweat. Don’t worry, it’s harmless. Wrap or store in airtight packaging and you’re fine.
How to use your finished bars
Use it just like any regular soap bar. The lather is lovely and creamy. Because it’s a rinse off product, essential oils stay gentle on skin, and most skin types do well with melt and pour bars. If your skin is very sensitive, choose a mild base like aloe or oatmeal and avoid strong fragrances.
Scaling and cost notes
This small batch makes a few bars, which is perfect for testing scents and colors. If you want a bigger batch, just scale the ingredients proportionally. Since the base does most of the work, melt and pour soap making stays cost effective even when you upgrade to nicer oils or colors. It’s also a great option for craft fairs because you can make large batches quickly without cure time delays.
FAQ
Why choose homemade melt and pour soap instead of cold process?
Melt and pour soap making skips the raw lye stage, so you can focus on coloring, scenting, and pouring. It’s faster, safer, and perfect for quick craft sessions.
Can I use essential oils in melt and pour soap?
Yes, essential oils work beautifully, just make sure you stay within safe usage rates. Some softer scents, like citrus, may fade faster over time.
Why is my melt and pour soap sweating?
Glycerine attracts moisture from the air, which creates little dew drops. It’s totally normal. Store your bars in a cool, dry place or wrap them once they’re fully set.
My colors sank to the bottom, what went wrong?
The soap was probably too hot or too fluid when you added color. Let it cool slightly before stirring next time.
Can I substitute the white base for a clear or goat milk base?
Absolutely. Any melt and pour base works with the same method. Clear bases give jewel like colors, while goat milk or shea bases feel creamier.
Wrapping up
I genuinely love how accessible homemade melt and pour soap is. It gives you the joy of soap crafting without the complications of lye or long waits. If you’re new, it’s the perfect place to start. And if you’re experienced, it’s the perfect quick win when you need a creative boost.
Scroll down to the recipe card to get the exact measurements and step by step instructions. I hope you enjoy making these bars as much as I enjoyed creating them.