

DIY Shampoo bars are my new obsession. I know I have many of them; please don’t judge me. But this sulphate-free shampoo bar recipe is natural and perhaps the best and the easiest recipe so far.
If you’ve made a shampoo bar after trying to make liquid shampoo, you’ll know what I’m talking about. Honestly, I’m unsure if I’ll ever go back to making liquid shampoo. So, let’s dive into why I rate this unassuming hair product so highly.

About My DIY Shampoo Bars

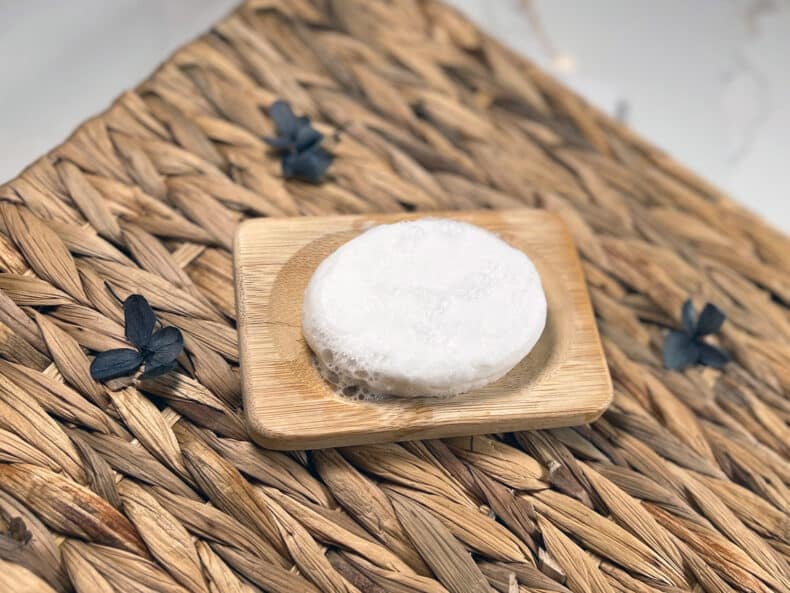
Shampoo bars are exactly what they sound like, a solid shampoo. They look like soaps, but they’re anything but true soaps. They’re actually a combination of oils, detergents, and powdered ingredients to create a stiff bar that has a gorgeous, creamy lather.
Homemade shampoo bar recipes also give you the opportunity to get creative. Provided you’ve got the ratio right, you can use whatever oils, extracts, and additives you want. Liquid shampoo, however, is another story. The viscosity of the finished product is vitally important but also super volatile, being influenced by many different ingredients in unexpected ways.
This is further complicated by the fact that liquid shampoos can be surprisingly difficult to intentionally thicken if they’re too thin. This is especially true if you’re trying to formulate naturally. There’s just way less room for experimentation, improvisation, and creativity when formulating new recipes.
So, that’s why I’m obsessed, and I encourage you to learn how to make shampoo bars, especially if you’ve tried liquid shampoo making and found it hard going.

Why Make A Shampoo Bar Without Lye
It’s important to remember that shampoo bar recipes without lye are not the same as soap making. I know, I know, I’ve seen saponified soaps being touted as excellent shampoo bars, too. But experience has taught me cold process shampoo bar recipes are not good, and let me tell you why.
Saponified soaps are very high in pH. They’re literal anionic surfactants, which, when applied to the hair, can cause many kinds of problems. Chief among them is increased sensitivity and dryness of the scalp and hair that is brittle and more prone to damage and split ends.
So, avoid using actual soap on your hair. Trust me, a shampoo bar recipe without lye is easier to make anyway.
Shampoo Bar Recipes and pH
pH is less of an issue when we make shampoo bars. If you opt for the surfactants in my recipe below, it’s unlikely your bars will be too high in pH for your scalp or hair. This is because I’ve opted for mild, low-pH surfactants. I’ve done this for two reasons.
Right off the bat, they’re just better for your hair. I don’t want to put excessively strong detergents in my hair if I don’t have to, so why should you? But it’s also because testing the pH of your shampoo bars can be a bit annoying if you want to use something else.
Because our bars are solids, you’ll need to take a small piece and dilute it in distilled water. Then, test it using a universal indicator strip or a pH testing meter. If you find that it’s too high, then the bar is ruined, and you have to start again (with a bit of citric acid added as a pH modifier).
But don’t worry, you don’t have to do that, provided you opt for my choice of surfactants. For those of you who do want to get creative, I’ll give you some guidance below on how to go about substituting and properly pH testing.
Ingredient Spotlight: Shampoo Bar Secrets!
Surfactants/Detergents

We’re using two different surfactants for this recipe: powdered and liquid. First up, let’s talk about our powdered SCI.
Sodium Cocoyl Isethionate Powder, or SCI for short, is a natural mild surfactant that is known for its mild cleansing properties, helping to remove dirt and oils without irritating the scalp.
It also produces a rich and stable lather with great foaming properties. SCI is a great stand-alone surfactant, giving the finished product a good pH level.
I’ve been having a lot of fun with this ingredient lately, and honestly, it’s perfect for this formulation. But I wanted to include a co-surfactant to help improve the lather of the bar. I went for Cocamidopropyl Betaine.
It’s the perfect choice for this formulation! It’s super gentle, so it won’t make the bar more irritating (which is a problem with many different surfactants)
Coconut Oil

Coconut oil is our main moisturizing agent for this formulation, and it’s a great choice. Firstly, it will lend some stiffening power, as coconut oil is a solid at room temperature. But honestly, I’ve included it mostly because of how great it is for the hair.
You’re probably no stranger to this ingredient. Still, for anyone who doesn’t know, coconut oil is packed full of moisture and nourishment for your hair. Its nourishing qualities will help combat split ends, control frizz, add shine, and prevent further damage.
Powdered Agents

Our powdered ingredients are actually more important than you think. They’re vital for the structure of your bar. Without them, they wouldn’t harden, and they’d be difficult to use in the shower. In fact, they’d melt in your hand like bath truffles!
For this formula, I’ve selected arrowroot powder and coconut milk powder. Coconut milk powder synergizes with our coconut oil, as it’s intensely hydrating and provides great nutrients for the hair. It can actually penetrate into the hair shaft to provide moisture deep into the roots of your hair.
Arrowroot powder, however, is mostly there to help keep our bar solid, but it does provide a more creamy texture to the finished bar.
Fragrance

This one is totally optional, as you don’t actually need to have one at all! But It’s nice to have a lovely fragrance that you like to be imparted onto the hair when it’s washed.
I opt for an essential oil every time. They just smell better to me, and I love how long-lasting they are in my hair. For this recipe, I went for distilled lime essential oil, which not only smells gorgeous but also provides some anti-microbial action.
You can, of course, use a fragrance oil if you prefer. There are some aromas that you just can’t get as an essential oil. If you want your homemade shampoo bar to smell like chocolate chip cookies, you’ll want a fragrance oil!
Important Notes
- This shampoo bar can be used as an all-over soap as well as a shampoo bar.
- To check the pH. Unfortunately, the bar needs to be solid, so you shave 1g from it and dissolve it in 9g water. Adjust the sample if needed (5 to 6pH), then multiply this by the bar’s weight. In this case, the bar is 100g, so if the sample needs to be adjusted by 0.002, we could multiply this by 100 = 0.2, so we would add 0.2g of citric acid to the next bar we make.
- You must wear a face mask whilst working with powder surfactants.
Substitutions
- Sodium Cocoyl Isethionate Powder (SCI powder): We don’t recommend substituting the SCI surfactant as the bar may end up too soft and the pH of the finished bar could be too high.
- Arrowroot Powder: Another starchy powder, such as cornstarch or rice starch, should work.
- Coconut Milk Powder: Powdered cows milk would be a good substitute.
- Allantoin Powder: Panthenol powder, or aloe vera powder at a lower rate (0.25g)
- Coconut oil: Any other carrier oil you have to hand.
- Cocamidopropyl Betaine: Coco glucoside or decyl glucoside would be a decent substitute but they have a higher pH so the formula would need to be adjusted. Add around 0.25g of citric acid with the dry ingredients. This should keep the shampoo bar at a good pH range.
- Lime Essential Oil: You could use another essential oil.

As an Amazon Associate, I earn from qualifying purchases. If you buy via the links here I may earn a small affiliate commission at no cost to you, please read my affiliate disclosure.
Ingredients
Equipment
Method
- 53 g Sodium Cocoyl Isethionate Powder, 15 g Arrowroot Powder, 5 g Powdered Coconut Milk, 1 g Allantoin PowderBefore you start making shampoo bars be sure to put on your face mask. Then, place all your drying ingredients into a bowl and stir.

- 10 g Coconut OilWeigh the coconut oil into a heat-proof container. Melt the coconut oil in the microwave or by placing the beaker into a water bath to melt and remove it once it has melted.
- 14 g Cocamidopropyl Betaine, 1 g Lime Essential OilAdd the Cocamidopropyl Betaine, the lime essential oil, and the preservative to the melted coconut oil. Stir to combine.
- Now it’s time to combine our dry and wet ingredients. So go ahead and sprinkle the wet ingredients into the dry ingredients.
- Use the spatula to bring the ingredients together. You are looking for a crumble-type consistency.
- Once you have the correct consistency that is not too sticky so that it sticks to your hands, you can use your hands to bring it all together. Give it a good knead to ensure everything has been fully incorporated and you have the consistency of play dough. If the dough is too sticky, you could add more arrowroot powder or more glycerine if it is too dry.
- When you have a good, flexible dough, start filling the mold. Make a single bar or split the mixture into two 50g bars. I like to push the shampoo dough in a bit at a time to make sure it is getting into all the corners and sides. If you prefer, you can just place the whole dough ball in and give it a good squish down.
- For a smoother finish, try placing a piece of wax paper over the dough and smoothing it down with the palm of your hand. Then, place the mold into the freezer for a couple of hours to harden. After a couple of hours in the freezer, the shampoo bar should be hard enough to remove it from the mold.
- Once the shampoo bar has hardened, you can remove it from the mold. You will notice that it will soften slightly once it has defrosted. The shampoo bar will need to dry out and harden for a good few days before you can use it. I found most bars take around a week before they are ready.


Notes
- This shampoo bar can be used as an all-over soap as well as a shampoo bar.
- To check the pH. Unfortunately, the bar needs to be solid, so you shave 1g from it and dissolve it in 9g water. Adjust the sample if needed (5 to 6pH), then multiply this by the bar’s weight. In this case, the bar is 100g, so if the sample needs to be adjusted by 0.002, we could multiply this by 100 = 0.2, so we would add 0.2g of citric acid to the next bar we make.
- You must wear a face mask whilst working with powder surfactants.
New to DIY skincare?
If you’re enjoying making your own products, you might like Radiance, my free email course where I teach the foundations of DIY skincare step by step!How To Use A Shampoo Bar
The most important thing to do first is to let your DIY Shampoo bars harden. Right after we pull them out of the mold, they are much too soft to use and will melt very quickly in the shower or bath. So, just a few days of patience is all we need to get it ready for the hot water.
Once they are ready to use, simply take one into the bath or shower with you. When you’re ready to wash your hair, lather your shampoo bar between your fingers before rubbing it against the roots and then to the tip of your hair.
When you have enough foam, put the bar to one side and massage the scalp, making sure to disrupt dead skin cells and dandruff. Rinse, then repeat if necessary.
After your shower, make sure your shampoo bar isn’t sitting in a puddle of water and that it is left to dry properly for your next use.
Final Thoughts
If you’re reading this and have never made a shampoo bar before, then you gotta try this recipe. If you have, you’ll know how easy they are to make! And how great they are at keeping your hair sparkling all week long!
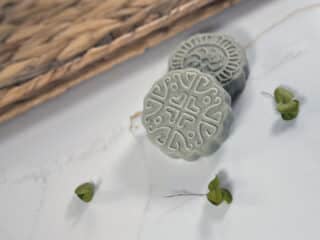
I just love how these turned out. Not only do they work wonders on my hair, but they look fantastic as well. If you get yourself a beautiful mold, you’d be surprised how sophisticated and luxurious these little bars can look!
But of course, I encourage you to experiment with this recipe. While I wouldn’t play around with the surfactants, I would totally switch out the butter and try something else. Do keep in mind that if you choose a very soft butter, you may see a change in the hardness of your bars.
I hope this has inspired you to try your hand at your own super easy, lye free shampoo bars. While I’ve always sung the praises of a good quality homemade shampoo bar, this recipe makes it so simple that there’s really no reason not to try it!


Hi
Is it possible to make and use a shampoo bar without heating and melting the sci powder?
Thank you 😃
Could colloidal oatmeal reasonably be used in place of the starch, or would it be too sticky? My DIL is into colloidal oatmeal and specifically requested it.
Can you skip the preservative?
You could try. But if you do this, you have to ensure that the bar remains completely dry whenever you are not using it. So you won’t be able to store this in the bathroom. If you’re looking to sell or gift these, absolutely never do so without including a preservative in the formulation, as you cannot be sure they will treat the product the way you might.
I was curious, but haven’t tried it yet. I would love your input on this. Could you replace the arrowroot with rice flour? I know the proteins and minerals in rice is so good for hair health, but wasn’t sure if it would be an appropriate substitute. Thanks for all of your great formulations!
I’m wanting to try my hand at making my own shampoo bars. Every shampoo there is is too much for my very (very) dry hair, even if I only wash it once a week. Shampoo bars work so far but it’s hard on the pocket. Are these ingredients good for very dry, long coarse hair? 53 g Sodium Cocoyl Isethionate Powder, Cocamidopropyl Betaine? please forgive my ignorance, I’m new to this.
Hi,
Although this is a mild and gentle recipe for dry hair, for very dry hair I would substitute 1g of arrowroot powder with D-panthenol powder and replace some of the coconut oil with a butter.
Best wishes
Angela x