If your fingertips look a little rough after dishes, winter air, or just life, you’re not alone. That’s exactly why I make this DIY cuticle balm and keep a tiny tin in my coat pocket.
Last week, I showed you how to make a nourishing DIY cuticle oil for daily hydration. This balm is its perfect partner, solid, mess-free, and extra protective for when your hands need more TLC.
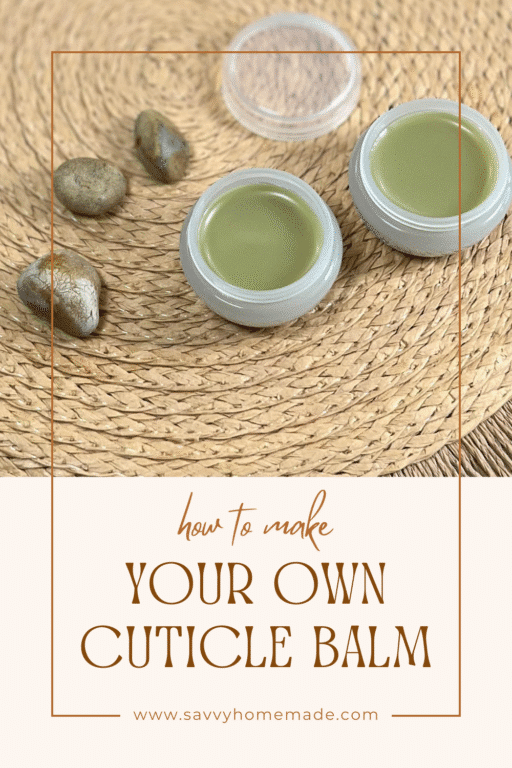
It softens dry edges, helps prevent those painful little splits, and gives nails a calm, healthy sheen. And because it’s solid, it won’t leak in your bag. A little truly goes a long way, which always surprises me, even after so many batches.
About My Winter Rescue DIY Cuticle Balm

I’ll walk you through how this nail and cuticle balm works, what’s special about this particular blend, and the real-world tweaks I’ve learned from using it daily.
If you want exact amounts and step-by-step directions, jump to the recipe card at the end. This post is your friendly kitchen companion, the one that shares the tips you only learn after you’ve spilled oil on the counter at least once.
At a Glance
- What you’ll make: A small jar or tin of vegan, water-free balm for nails and cuticles, travel friendly and gloriously unfussy.
- Difficulty: Beginner friendly, the kind of quick win project that makes you feel capable.
- Time: Short hands-on time, then it sets on its own while you sleep.
- Who it suits: Anyone with dry, rough cuticles; folks who wash hands often; anyone trying to stop picking (been there).
- Safety nudge: This is an anhydrous formula, so no water and no traditional preservative needed. Keep your tools clean and add an antioxidant for best shelf life.
- Where to find the specifics: The recipe card has all the quantities and the full method. I keep it printable and simple.
Why a DIY Cuticle Balm Earned a Permanent Spot in My Bag
Cuticles put up with a lot. Cold weather, constant washing, sanitizer, gardening without gloves, detergent, even typing. A good nail and cuticle balm gives you:
- Supple, moisturized skin around the nail plate so things look neat rather than ragged.
- Fewer hangnails and less cracking, which means less temptation to pick.
- Nails that flex instead of snap, because they’re better conditioned.
- A protective buffer against water and surfactants.
- Gentle support for tiny nicks or splits, so they calm down faster.
- That quick self-care moment that makes you pause, breathe, and rub in something lovely.
This homemade version checks all those boxes and, yes, it’s vegan. No beeswax needed!
Ingredient Spotlight, With Real-World Swaps

I’m spotlighting just a handful here. The full lineup is in the recipe card, but let’s talk about how each star ingredient is pulling its weight, and what you can substitute if your pantry looks a little different.
Candelilla Wax
This is the architect of the balm. It firms the formula and creates that breathable seal that keeps moisture where it belongs. Since it’s plant-based, it’s a great alternative to beeswax.
Swaps: Beeswax if you’re not keeping it vegan, which will feel creamier. Carnauba if you want a harder, shinier finish. Berry wax for a softer, lighter texture (if you can find it). Adjust firmness by balancing with your oils.
Mango Butter
The smoothing specialist. It lends creaminess, helps soften rough patches around the nails, and contributes to that buttery glide. It’s rich in skin-loving lipids without feeling heavy.
Swaps: Kokum butter is my first choice. Shea works too, just expect a creamier feel and a touch more richness.
Jojoba Oil
Jojoba is famously similar to our skin’s natural sebum, which is why it sinks in so nicely. It helps condition nails, reduce brittleness, and balances heavier oils so the balm doesn’t feel greasy.
Swaps: Squalane or camellia oil for a silky, quick-absorbing finish. Grapeseed is a light option as well, though keep in mind it has a shorter shelf life.
Almond Oil
A gentle nurturer that softens and soothes. It’s rich in vitamin E and essential fatty acids, which support elasticity around the nail bed. I reach for it when I want a cushioned feel.
Swaps: Apricot kernel is very similar and a strong one-to-one stand-in. Sunflower and rice bran also play nicely here, just note they absorb a touch slower.
Tamanu Oil
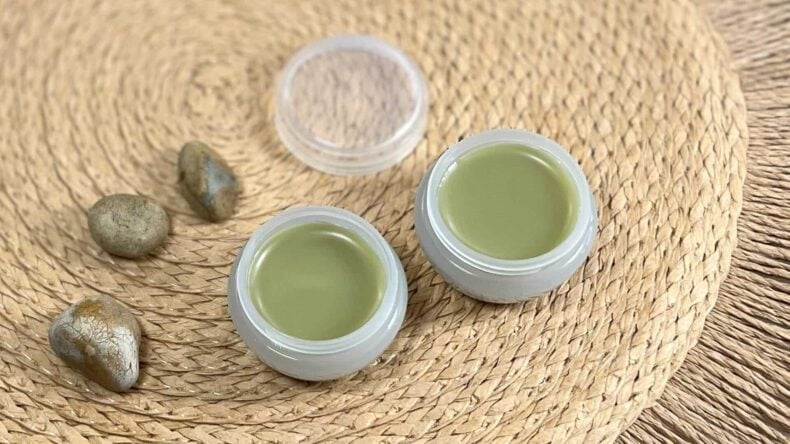
Here’s the truth, and it matters. Tamanu is the reason the balm has that warm green glow and that deep, earthy scent. It’s prized for nourishing, protective, and calming properties on stressed skin. It can also stimulate healing of the skin. I keep it for what it does, not for how it smells.
Swaps: Calendula-infused oil for comforting care without the same aroma. Sea buckthorn gives a lovely golden-orange look and a different antioxidant profile. Hemp seed and avocado contribute omega-rich nourishment if you’re repairing damage.
Vitamin E
This is your friendly antioxidant. It slows oil rancidity and offers a little extra care to frazzled skin. In an anhydrous balm like this, it’s more about maintaining freshness than “preserving,” and it’s well worth including.
Swaps: Rosemary extract can help protect oils. Use sparingly and be mindful that it doesn’t bring the same skin benefits as vitamin E.
Essential Oils
I use a trio for a balanced aroma and practical perks. Lavender for soothing, tea tree for a clean, crisp edge, and sweet orange for lift and brightness. They play nicely together, though they don’t fully hide tamanu’s earthy scent profile.
Swaps: Keep it simple if you like. A single essential oil can be lovely. Lavender alone is a classic. Roman chamomile is gentle and cozy. Or choose a skin-safe fragrance oil if scent is your priority. Whatever you pick, respect safe usage rates.
Watch The Video

As an Amazon Associate, I earn from qualifying purchases. If you buy via the links here I may earn a small affiliate commission at no cost to you, please read my affiliate disclosure.
Ingredients
Equipment
Method
- 6 grams Candelila Wax, 10 grams Mango ButterWeigh the mango butter and candelilla wax into a heat-safe beaker.

- 15 grams Jojoba Oil, 6 grams Tamanu Oil, 11 grams Sweet Almond OilAdd the remaining heated phase oils to the beaker (Jojoba Oil, Almond Oil, and Tamanu Oil)
- Place the container into a hot water bath. This is a shallow pan with about an inch of water. Heat until the oils have melted.
- Once the oils have melted, remove them from the water and allow them to cool slightly. The oils should still be liquid but not piping hot. You may need to stir the oils constantly to prevent them from hardening too quickly. If they do start to harden, you can pop the beaker back into the water bath to remelt them.
- 1.5 grams Vitamin E Oil, 0.3 grams Lavender Essential Oil, 0.15 grams Orange Essential Oil, 0.10 grams Tea Tree Essential OilOnce the mixture has cooled slightly, add the remaining cool-phase ingredients (Vitamin E and essential oils). Stir gently to combine.If the balm begins to harden while you’re working, you can pop the beaker back into the warm water bath for a few seconds to loosen it — but avoid overheating, as these ingredients are heat-sensitive.
- Cosmetic Jar 2 ozTransfer to suitable containers and allow to cool before placing the lid on.


New to DIY skincare?
If you’re enjoying making your own products, you might like Radiance, my free email course where I teach the foundations of DIY skincare step by step!Tips and Mistakes to Avoid
- Don’t rush the melt. High heat can scorch delicate lipids and dull the scent. Slow and steady wins here.
- Cool before aromatics. Add vitamin E and essential oils when the mixture is warm, not hot. If the bowl is too hot to touch, it’s too hot for those last ingredients.
- Test firmness in a spoon. Dip a clean spoon, pop it in the fridge for a minute, and check texture. Still too soft for pocket carry? You’ll know before you pour the full batch.
- Watch out for graininess. Some butters can crystallize if cooled too slowly or too fast. A gentle cool at room temperature usually prevents that. If you see grains later, a gentle remelt and controlled cool can save the batch.
- Tidy pours help. Warm your tins or jars slightly so the balm sets evenly with fewer surface ripples. Not essential, just satisfying.
- Tweak scent expectations. Tamanu has a strong, earthy aroma. The blend softens it, but you’ll still notice it. I’ve grown to like it. The first week I didn’t. Honest.
While we’re on the topic, it’s totally fine to skip tamanu if you’re scent-sensitive. You’ll still get a lovely balm with the right swaps we’ve discussed above.
Storage and Shelf Life
Since this DIY cuticle balm is water-free, there’s no traditional preservative in the formula. That said, oils still oxidize over time. Keep your tins out of direct sun, avoid leaving them in a hot car, and try not to double dip with dirty fingertips.
I usually give myself a fresh tin seasonally, which keeps the scent bright and the texture perfect. If you used a more delicate oil, plan on finishing it sooner. Vitamin E helps, but it’s not magic.
If you’re planning to sell any of your anhydrous products, it’s worth including a broad spectrum preservative to protect your customers. You have no idea how they’ll use it.
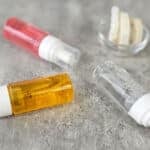
Consider using a lip balm tube instead of a tin pot if you prefer an easier, no mess, on the go application.
How to Use It
Massage a pea-sized amount into each cuticle and over the nail plate. Morning and night is ideal, but I’m not going to pretend I never skip. Even once a day makes a big difference. If your hands have been in water, apply after drying.
Sensitive skin? Start with a tiny area and keep the aromatics simple. Teenagers love this as a post-homework ritual, by the way. It turns fidgeting into care.
For an extra-nice finish, rub whatever is left on your fingertip across your knuckles or that stubborn patch near your ring finger. Two birds, one balm!
Scaling and Cost Notes
Because the recipe is built in percentages, scaling up or down is straightforward. The main things that change with size are heat management and pour time. Larger batches hold heat longer, so give yourself space to cool before adding the aromatics. Smaller batches set fast, which is convenient but means you should have your tins ready. Precision scales make a world of difference.
Cost wise, you’ll notice the savings once you’ve made it once. The upfront spend on a few good oils and a wax pays you back for months. Plus, tiny tins make sweet gifts. People love getting something practical that feels handcrafted.
A Few Personal Notes From the Bench
The first time I made this exact blend, I didn’t love the scent. I tried to convince myself I did. I didn’t. By day four, it had grown on me. The earthy note makes the citrus and lavender feel grounded instead of perfumy, and my nails were the best they’d looked all winter.
Another imperfect detail, because it might help you: I once forgot to warm my jars and poured into cold metal tins. The tops were set with little ripples. Still worked great, but if you care about a smooth surface, warm your containers a little. Learned that the hard way.
A Quick Word on Why DIY Wins Here
Store-bought balms can be lovely, but they’re often packed with extra texture modifiers or scent that isn’t quite you. With a homemade cuticle balm, you decide how firm it is, how quickly it absorbs, and how it smells.
You also skip leaking bottles in your bag, since this product remains a solid at room temperature. And when you want a fresh tin for travel, you can make it in the time it takes to clean the kitchen.
Ready to Make It?
You’ve got the why, the how, the swaps, and the fixes. Now make a small batch and tuck a tin into your pocket. For exact quantities and the full method, check or print the recipe card for Winter Rescue Nail and Cuticle Balm. If you try a variation, tell me what you did and what you’d change. I love seeing your tins, smooth tops or not.
Happy making, and here’s to softer cuticles by the end of the week.