
Here’s how to make your own container candles at home. Once you start making these beautiful, scented creations, it is almost impossible not to get hooked.
I find myself constantly looking at random jars and containers, imagining how they could be turned into candles. With just a little wax, a wick, and a lovely fragrance oil, you can create an exquisite homemade candle that looks and smells amazing.
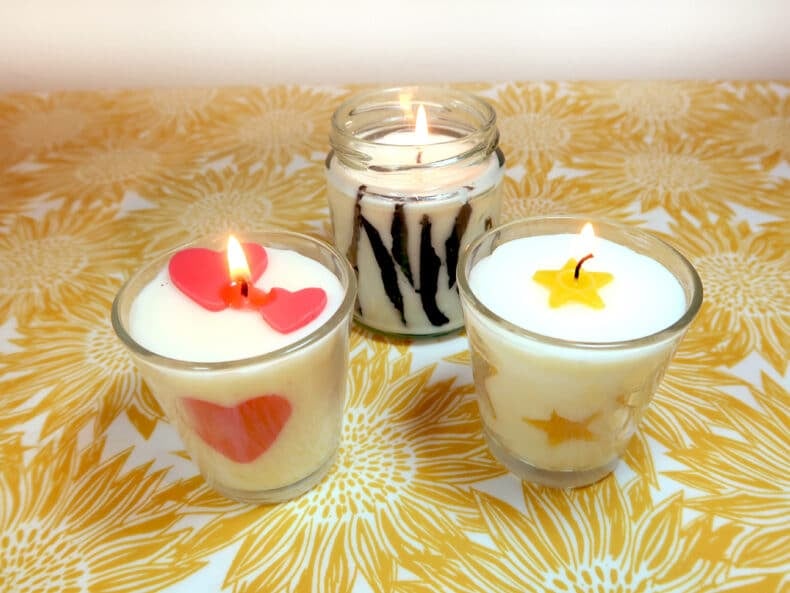
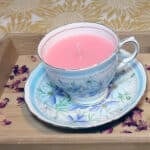
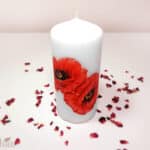
Glass containers are some of my favorites because they are so versatile. You can create single-color candles, two-tone fades, layered designs, or even add a touch of glitter for extra charm.

About My Container Candles
Recently, I started experimenting with candle embeds, which I am going to show you how to make today.
I’ve used gel wax before with great results, but this time I wanted to try soy wax. Since the embeds need to stay visible and secure against the sides of the glass, beeswax was the perfect choice. Its naturally tacky, flexible, and easy to work with, especially with a little help from mod podge to keep everything in place.
Choosing The Right Container

What’s important here is that you need to be able to fit your fingers and hands in the container so you can stick the embeds/cutouts to the inside of the glass. You also need enough room to coat the outline of the embeds with the mod podge glue so the opening needs to be of a decent size.
So the size of your container is really going to depend on the size of your hand. But you can totally scale it up from there if you wish.
Why Bother With Mod Podge?
The first time I made these candles I didn’t coat them cutouts with glue. I was hoping that if I pressed them firmly enough against the glass this would be sufficient. How wrong I was.
Unfortunately for me at the time, I found the warm soy wax seeped between the cutouts/embeds and glass in various places, causing them to sink back into the wax.
Coating the edges of the imbeds gives them a waterproof seal that prevents this from happening. You have seen me use mod podge before in very different types of crafts, but it works great here as well!

Cutting Out Beeswax Imbeds
You can hand-cut your shapes out of the beeswax. If, like me, freestyling isn’t exactly your forte, try to keep things simple and use a pattern that doesn’t need to be uniform, like the black and white zebra pattern in the photo.
Otherwise, cookie cutters are great for this. I found these great mini cookie cutters on amazon that fit my votive hot glasses perfectly. But you can find all sorts of cookie cutters in a variety of different shapes and sizes.


As an Amazon Associate, I earn from qualifying purchases. If you buy via the links here I may earn a small affiliate commission at no cost to you, please read my affiliate disclosure.
Ingredients
Equipment
Method
- Place the beeswax into a heatproof container and place it into a pan with a couple of inches of simmering water to melt. Whilst the wax is melting, cut a piece of baking parchment big enough to pour the melted beeswax onto.

- Once the wax has melted, stir in the color, making sure it fully dissolves and is well combined.
- Pour the melted beeswax onto the baking paper and leave it to cool and harden to the point where it’s still a little flexible.
- Using a cookie cutter or craft knife, cut out your shapes. I’d recommend cutting out a few spares to cover any mishaps and breakages.
- Carefully press the shapes/cut-outs against the inside of the glass. You want to be firm enough to get them to stick, but gentle enough so that you don’t squash or misshapen them. When you are happy with their positioning, coat the edges of the beeswax embed so that the glass and the inbed are firmly sealed. This will stop any of the container wax seeping in-between the shape and the glass.Note: The glue needs to be completely dry and transparent before pouring the soy wax into it.
- Use a little of the glue to attach the wick to the bottom of the glass, then set aside and leave it to dry completely before we pour the wax.
- Place the soy wax into a heat-safe container and melt in the same way as you did the beeswax. Once the wax has melted, add the fragrance oil and stir well. Leave the wax to cool slightly, until it starts to turn cloudy. Be sure, however, that you can still pour it. Then move to step 9.
- Pour the cooled melted wax into the container. Secure the top of the wick with a pencil or bamboo stick and wrap a piece of kitchen foil around the container to stop the wax from drying too quickly, resulting in air traps.
- As the candle cools and hardens, it can often form a sinkhole near the wick. Use a toothpick or bamboo stick to poke a few shallow holes through the surface of the candle, then top it up with a bit more of the melted container wax, and leave to harden.
- Once the candle has hardened you can spruce it up and make it more unique by adding a little decoration to the top of the candle. Of course, this is completely optional, and it will melt fairly rapidly when it’s lit, but it does look nice before the initial burn. If you want to place the shape/cut-out over the wick. Pierce a hole through it with the end of a bamboo stick or pencil first.


New to DIY skincare?
If you’re enjoying making your own products, you might like Radiance, my free email course where I teach the foundations of DIY skincare step by step!Final Thoughts
So there you have, a simple yet effective way to decorate a glass container candle. If you are making an embed candle for a gift, then why not give your candle a personal touch by adding the initials of the recipient of the candle rather than a shape? That’s such a cute touch to show the person you really care about them.
I absolutely love candle making, which is why I keep trying to push myself to make more interesting and complicated candle crafts. But I was actually shocked at how easy this really was. There’s absolutely no reason you won’t be able to make these yourself.
I keep wracking my brain as to what kind of candle I want to make next. Something will come to me eventually, and I’ll be sure to share it with you lovely readers as soon as I do.
Don’t forget to sign up for our newsletter for the latest info on all the things I get up to, as well as following us on social media. I try to post as often as I can!


I’m thinking of doing this for Christmas. For my side embeds I was thinking green trees. Also i was thinking white on the bottom and blue with white dots for sky and snow/stars in the top half?
I’m planning to use pillar wax instead of bees wax. And a blend of waxes for the base. it’s much softer than pillar wax. I’m also planning to use a wooden wick after i do some experiments. Any comments appreciated!
Hi Kerry,
Sounds lovely, I actually really want to see the finished candle! You’re making a container candle, so you should be fine with using a blend for the base will be fine