

So, you want to learn how to make candles from scratch? Well, you’ve come to the right place, today I’m going through everything you need to get started at home.
I’m going to walk you through all the basics in detail, how to use a mold, how to color them in interesting ways, how to make use of fragrance oils and essential oils, and how to scent them in interesting ways. I’ll also show you examples of my most successful homemade candles!
This post should serve you well if you’ve not experimented with candle making before. Although it’d be good to read everything this page offers, once you get started, it will be an excellent referencing guide.
Essential Supplies For Candle Making
First, let’s have a look at the ingredients and equipment you will need for making a candle.

Soap Making Wax
There are a few options when considering which wax to use for your candles. However, paraffin wax is the cheapest and most readily available wax for candle making. So, for this basic page, we’ll use paraffin wax to make a pillar candle.
I discuss using soy wax, beeswax, and gel in many of my other candle-making posts.

How many grams or pounds of wax to use will depend on how large of a mold or container you have.
Fill your mold or container with water and empty it out into a measuring jug or cylinder. Water weighs the same as its volume in metric, so you could also weigh it in grams. Once you have this measurement, subtract 20% and this will be exactly how much wax will be needed to fill your mold or container. This is specific to paraffin wax; I discuss how to work out how much soy wax you’ll need for a container here.
Sinkage and imperfections can be a real issue for most people, so add a bit extra so we can top up and prevent any sink holes when needed. An extra 10 grams should usually do it for a medium sized candle. As you become more experienced, waste will most certainly decrease. But if you’ve got wax left over when you’re completely finished, bag it up and use it for our tea light candles!
Using Wicks
(and stabilizer if you’re planning on using a container rather than a mold)

The correct-sized wick is important, so I’ve decided to dedicate an entire post to just wicks. I discuss everything you need to know about wicking (including using wooden and multiple wicks).
But as a general guide until then, a small candle (25-55mm) will probably need an LX wick size 10, a medium sized (65-75) should probably need an LX16 and a large candle (up to about 100mm) should need an LX26.
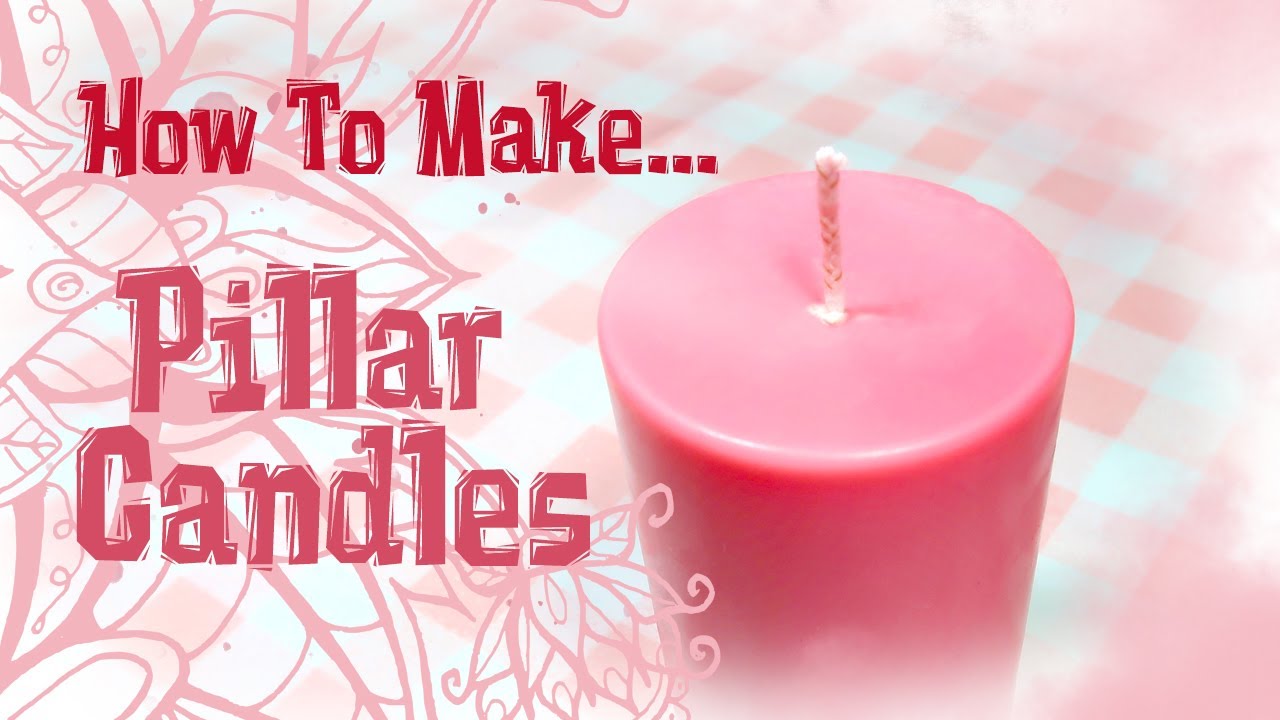
Basics Of Using A Candle Mold
So, to start off today I’m going to go through, step by step, making the most basic and universally recognized candle, the pillar. I will be using a metal mold for this, as they are the easiest to use and the best quality molds you can buy. I will also discuss how to avoid the dreaded sinkhole, the bane of all candle makers!
After the basics, I will discuss other types of molds you can make use of, including plastic and silicone. There are lots of pros and cons to making use of molds created from various materials, so we’ll go through them and you can make an informed decision before you part with your hard-earned cash.
As this is the basic guide, I’ll be making use of paraffin wax in the homemade candle I’ll be showing you below.

As an Amazon Associate, I earn from qualifying purchases. If you buy via the links here I may earn a small affiliate commission at no cost to you, please read my affiliate disclosure.
Ingredients
Equipment
Method
- Gather your materials.

- Use a double boiler to melt your paraffin wax. If you don't have a double boiler put a pan half-filled with water to boil on the stove. Once it’s boiling, turn down the heat so it is only simmering and place a metal or heatproof glass bowl on the rim of the pan so that the base is only just touching the water.
- This is an easy way of getting your candle wax melted without it getting too hot and burning off. Your wax will take a few minutes to melt and should be totally transparent once it has.
- While you’re waiting for your wax to melt, you can wick your mold. Thread your wicking needle and push it through the hole of your mold. De-thread your needle and put it to one side, leaving just your wick threaded through the hole at the base of your mold. There should be enough length so that the wick extends beyond the open top of your mold a few inches (not the hole at the base).
- Now you’ll want to make sure that no wax can escape out through the bottom of the mold.To do this, take some of your sealant (blue tack or preferably white tack can be used as a substitute) and plug the hole on the outside of the base of your mold. You can also wrap it around the wick so that it doesn’t move through the hole.
- The mold can then be placed the right way up. The remaining of your wick then needs to be threaded through your wick holder or wrapped around a pencil that sits on top of the mold.Wicking your pillar mold correctly should make sure your wick is completely straight when you pour your wax.
- By this point, your wax should be completely melted. Check the temperature with a temp gun or a thermometer. You want your wax to be relatively hot when you pour so that you get a nice glossy exterior of your candle. For paraffin wax, I recommend a pouring temperature of between 180-190F. Although not absolutely necessary, I find warming the mold before pouring also helps to get that smooth surface on a candle. You can do this by resting the mold on a radiator, or popping it into a warm (but not hot) oven for a couple of minutes.When it’s time to pour, make sure your wick holder/pencil stays in place and that you pour at a slow, steady pace. This will make sure your candle burns properly and that you don’t introduce any air bubbles into the wax as you pour. If you find that the wick holder is getting in the way while you're trying to pour the wax, move it off-center and then return it once you've finished pouring. Put your excess wax to one side, as we’ll be making use of that later on.
- Keep an eye on it over the next few hours, waiting for it to begin to harden. This can take about 2 hours, but be sure not to let it completely cool. Once you’ve reached this stage, grab your skewer or bamboo stick and push vertically into your wax, leaving behind a hole that extends down leaving roughly an inch on the bottom of your mold. This sounds crazy, but you’ll want to do this a few times around your wick, but being careful not to disturb it. This should allow your wax to contract as it cools without creating horrible sinkholes.
- Once your candle has cooled, top up with your excess wax, filling the holes you have made as you go. Your candle should then cool once more with a lovely flat surface on the bottom.[
- Once your diy candle has cooled enough, gently work it out of the mold. If you’re struggling, pop it into the fridge for about 20 minutes, but with a metal mold you shouldn’t have too much difficulty getting it out. Once it’s out, trim your wick at both ends and it’ll be ready to burn! I recommend leaving them for a couple of days before you burn or gift them, but otherwise, you’re all finished.


New to DIY skincare?
If you’re enjoying making your own products, you might like Radiance, my free email course where I teach the foundations of DIY skincare step by step!Other Molds
So you’ve seen me use a metal mold, but I’m sure you’ve also seen candle making molds made from lots of different materials available to buy online and at your local craft stores. Besides metal, the most widely used molds are made of plastic or silicone, and you’ll want to make use of these for different reasons.
Plastic Molds
Plastic molds are by far the cheapest variants available. If you’re completely new to candle making and don’t want to dump too much money into a hobby you might not commit to, plastic is definitely a good place to start.
Plastic molds are also good for getting more interesting shapes. Pyramids, orbs and all different weird and wonderful shapes can be made with plastic molds. Although you could source some of these in metal, you will not find the same breadth of variety as you will with plastic molds.
However, plastic molds are not the best if you’re looking for a top quality product. Plastic molds are far more likely to leave a mottled or scuffed appearance on the surface. It happens to me all the time, so don’t worry. Also, they will scratch on the inside much more readily than metal, meaning you could be left with impressions on the surface.
Lastly, I have read many times than plastic molds are not suitable for DIY candles, as the fragrance oils can ruin the inside of your mold. Although I have (and often still do) used fragrance oils in plastic molds before and they’ve been fine, but after a while they do start to lose the polish on the inside surface of the mold. But like I said, plastic molds are cheaper and so easier to replace.
Silicone Molds
Silicone molds are super popular right now! Not only are they useful for this, but they are great soap or cake molds as well, making them wonderfully versatile. Because of the flexible nature of a silicone mold, its chief use is to get creative and innovative shapes that just wouldn’t work with a rigid mold. Although you can get some interesting shapes with plastic, silicone pushes the boundaries even further.
Think of it like this, once the wax has hardened within the mold, you simply stretch the silicone so that the candle pops right out, making this otherwise difficult and annoying process a dream. But it also means you can have some pretty crazy shapes, as you don’t have the issue of trying to get it out of a very stiff, inflexible mold.
However there is a but. I would suggest getting yourself well acquainted with plastic and metal molds before moving on to silicone, as I would consider silicone to be advanced practice. We’ve considered doing a whole post about how to use silicone molds, but we’ll come back to this another time.
Containers and Jars
If you’d rather make use of jars and containers, you can pour them in the same way as I’ve discussed here in my soy wax candle making craft. Although we’ve used soy wax rather than paraffin, the method is basically the same.
Why Candles Sink In The Middle

So I’ve already mentioned this above in the step by step how to make a basic pillar candle, but I thought it necessary to mention it again as it’s one of the most annoying aspects of this craft! You’ve poured your wax. It has a lovely, even base or top. But then a couple of hours later it’s sunk dramatically and looks horrible. How very rude!
The problem of ‘why do homemade candles sink in the middle’ has a relatively simple answer and an even simpler fix. Wax sinks when it sets because as the wax cools, it slowly contracts and can leave what I refer to as ‘sink holes’ in the middle of your candles, but can also present as sunken dips around the wick.
Pillars are generally less likely to form sinkholes, but in order to prevent this from happening, or more precisely ‘fix’ a sunken candle (because let’s face it, it’s going to sink) use a bamboo stick or a thick skewer to poke vertical holes in the top. You’ll want to do this about a couple of hours after you’ve poured your wax, just as it is is beginning to properly set but long before it’s fully cooled. You’ll want to go quite deep, leaving roughly an inch on the bottom. Be careful to keep your hole vertical and not to disturb the position of the wick.
Then you’ll want to pour your excess wax on top, making sure the holes are filled with the liquid wax. Do this even if you don’t see any sinking on top, as sink holes can be hiding in the middle of your wax and this method should completely fill them.

Coloring With Dye
Coloring your DIY candle is the next step on your way to becoming proficient in this craft. The process is not very difficult, but like anything, it can take a bit of practice before you know exactly what you’re doing. Working with dyes can be a bit tricky, as it’s very easy to use way too much. But we’ll guide you through, step by step, how to color your candles.
I’ve got a couple of techniques I use to color mine. The first is your basic, solid color. However, I’ve started to make use of layered, multi-tonal or multi-colored candles that look totally cool! It’s a little trickier to get right, but I’ll give you all the info you need to ace it!
Solid Color
Step 1: Considering what we have discussed about coloring paraffin wax, decide which color dye you would like to use. If you are using block dye, crush up a small amount so it is ready when needed. If using flakes, separate a few flakes from your bag.

Be careful with your dye. Only make a small amount of your dye available at one time. This will make sure you don’t make rash decisions and dump it all in at once (too much dye will look awful in a finished product). Also, dye may stain textile and clothing.
Step 2: Prepare your wax by melting it as we discussed in our step-by-step approach to making a pillar above.
Step 3: Remove your bowl from the double boiler. Working quickly so as not to let the wax cool, drop small amounts of your dye into your liquid wax a bit at a time and stir as you go. If your dye doesn’t melt, pop it back on the double boiler and let it melt there.

You’re probably wondering ‘When do I stop adding dye?’ The color of your liquid wax after you’ve added some dye can be quite deceiving. Although it might look quite vivid, when the wax hardens and less light manages to pass through the wax, it will darken in color.
So, how can we gauge how much to use? After you’ve added some, use your spoon and pour some of the wax onto a bit of grease-proof paper/baking parchment. Once it has cooled, the color of the wax on the paper should look a bit like your finished color (although it will be a bit darker when backed up by more layers of wax).

Getting the right amount of dye is very difficult, as we’re talking VERY small measurements here. If you’re a candle making beginner and you’re really not sure, experiment with an amount of dye and then let all of the wax harden in the bowl. This should give you an idea of how much more dye you’ll need, or let you know if you’ve added too much. You can then re-melt the wax and continue with the same method I discussed for the pillar.

Layered Color
You can do this two ways – one with multiple colors or one with multiple tones of the same color. It’s mostly the same method, but the only difference is if you’re working with two colors you’ll need to separate your wax into two bowls first. It’s possible to do as many colors and layers as you like, providing your mold or container is large enough. For the pictures, I’ve made a two tonal candle, but the method for both is very similar.
Step 1: Decide which color(s) to use and then prepare them so they are ready to go.
Step 2: Prepare your wax by melting it. If you’re using two colors, split your wax pellets in half before you begin to melt the wax and put one half aside for later. If you’re making a multi-tonal candle, melt all of your wax together.
Step 3: Dye your wax in the same way as we have discussed in the solid color guide above. If you’re doing multiple tones rather than colors, be conservative as we’ll be pouring the lighter color first (this will mean that a free-standing candle will have the darker tone on the bottom and a container will have the darker tone on top).

Step 4: Prepare your mold or container with a wick. For a mold, you can do this in the same way as I’ve mentioned above in the step by step pillar section. If you’re using a container, take a look at how I wicked the mason jar in how to make soy wax candles.
Step 5 (multi-tonal ONLY): Pour half of your wax into the mold, then leave to set for at least 1 hour. You want there to be a nice hard layer of wax on top before you add any more, so that it won’t melt immediately and bleed your beautiful layers together.

Once it’s cool enough to add more, reheat your wax and add more of the same dye. We want the color to be roughly double the strength of the previous layer, so add roughly half the amount you originally added to the leftover wax.
Step 5 (multi-colored ONLY): Go ahead and pour all of your melted wax into the mold or container, and leave it to set for at least an hour. It should fill it about halfway. Once it’s set, melt down the other half of your wax that we set aside earlier.
Pick your second color, and then add roughly the same amount of this dye as you did your first (this will help match tones and make it look a little more cohesive with multiple colors). Make sure your dye is well distributed.
Step 6: Once your dye is fully distributed, pour about an inch of the wax into your half-filled container or mold. Let it cool as before. Repeat this step until you have used your remaining wax (keeping some aside for sink holes).

Step 7: Leave it to set for 2 hours, and then dig your holes and top up with your remaining wax to prevent and fix any sink holes. When the time comes to take it out of the mold, if you’re struggling pop it in the fridge as we discussed in our pillar above and then slide it out. Admire your beautiful multi colored or multi tonal homemade candle!

You could even do an ombre effect, or make use of lots of colors (rainbow candle, anyone?). The only difference for making an ombre candle would be that you’re going to want to pour an inch at a time for all of your wax, adding more color as you go so you get distinct layers. For lots of layers of different colors, divide your wax by the number of colors you’re using and work with one layer, no less than an inch tall, at a time.
Coloring Soy Wax
Although I mostly discuss using paraffin wax in this post, I wanted to give a quick overview of coloring soy wax flakes, as it’s a bit different than coloring paraffin.
Soy wax, in general, doesn’t color as well as other types of wax. Don’t ask me why, because we really don’t need to know all that science just to make one. All you need to know is that soy wax doesn’t take to dye as well, and that’s that.
I’ve found highly concentrated dye flakes to be much more efficient at coloring this type of wax than the standard block dye. If the flakes are particularly dark (as in purple and red look almost black before you add it to your wax) then you’re on the right track.
I also find that when coloring soy wax, aiming for a nice pastel color works best. This will afford you lovely colored homemade candles without the annoyance of having to use too much dye, and reducing the overall.
Using Scents

Scenting is a wonderful way to turn a boring pillar into a beautiful, luxury gift! When you light this and your wax begins to melt, the fragrant oils will vaporize with the wax and infuse the air with a lovely aroma.
Although I strongly suggest you make use of synthetic fragrance oils, I will also discuss using essential oils, as well as how to build a scent profile by using multiple different fragrances or essential oils. It’s exciting stuff that gives you ample room for experimentation. So let’s move on to learn how to make beautifully scented candles.
Final Thoughts
So that’s that, candle making for beginners, all the information you need to get started is right here.
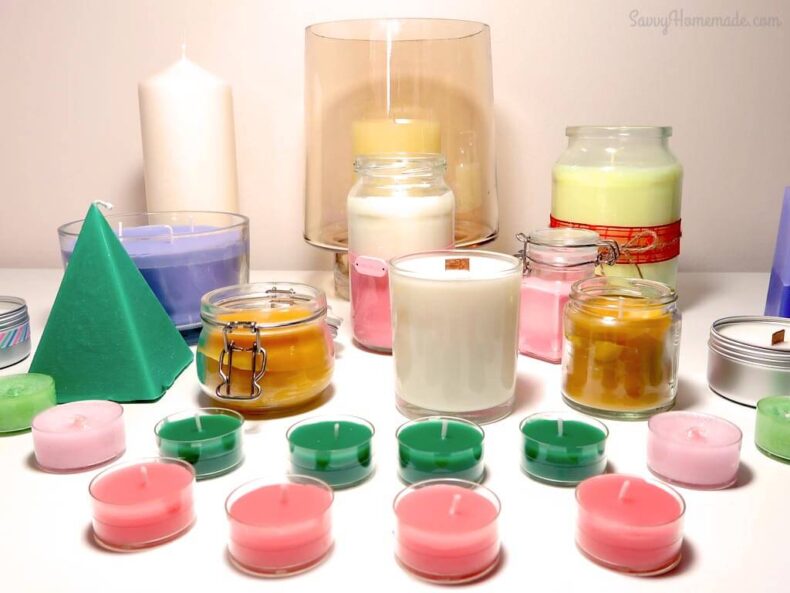
For now, take a look at more finished candle examples, and next week I’ll be posting a page about wicks and wicking, giving you the opportunity to learn about using multiple wicks, making use of wooden wicks and exactly how to pick the right sized wick
Candle making is an extremely rewarding endeavor, and I hope it’s the same for you! I love the sense of satisfaction it gives me, watching the wick burn and the wax melt thinking ‘hey, I made this myself!’. I also like to think it helps us get back to our roots.
This craft (and pretty much everything else on Savvy Homemade) is not something new. The techniques have existed for hundreds and sometimes even thousands of years. I never feel more connected to where I’ve come from and as a human being as I am when I’m making my own homemade things.
Anyway, I’m going off on a tangent, so I won’t keep you any longer. Below you will find some other types of homemade candles. Take a look at those, but don’t forget to come back and post a photo of yours in the comments below. Also, subscribe to our newsletter so that you’re the first to hear about all our new crafts!


Hi is there a way to melt the paraffin wax in the microwave?
What is the best way to prevent tunneling in homemade candles?
Hi Bella, this can happen when the wrong size or type wick has been used, however there are few things you can do to help elevate this.
1 Let the candle burn until the entire surface is melted on the first burn.
2 Keep the wick trimmed to 1/4 inch.
3 Wrap aluminum foil around the top of the candle, leaving an opening in the center. Burn until the entire surface is melted.
4 Melt the wax evenly without lighting the wick.
Hope this helps Angela x
I am a beginner soy candle maker. If I need to take a 4 oz candle tin that was just poured to someone else will it affect the quality or cosmetics I it move it after one hour?
Hi Leslie,
It could do. It’s best to keep your candles at a consistent temperature during the cooling process. It’s best to just sit and leave them.
most helpful course thank you so much mam
Thanks for this nice article.
This was a great article.
So much thank u! im just at begining of that amazing process of candle making.
Your welcome Helika, have a great time!
Just discovered your lovely website!
Your info and videos are great. Thank you for teaching handcrafted items. I love learning the “how to” projects for gift giving. Do you know of a site that sells pouring jug similar to in your video? Thank you!
Hi Sue, thanks for the kind words!
Iv’e had that jug a long time now, its a barista style jug made for pouring milk when making lattes and other frothy coffees, not sure where I got it, probably Amazon 😉
I am so glad that I tried my first shot at candle making it was simple to do and I added a scent,I think I did pretty good ow let’s wait 2 hrs and see the out come I’m sure it will be Greeaat!!
Thanks for the tips . ~signed ~
A new beginner
Hi Michelle,
How exciting! I hope you had a lot of fun making your candles! Let me know how it goes!
nice work,thanks so much.
Thank you so much for this brilliant article. Your generosity and unselfishness is greatly appreciated. I have long wished to “have a go” at making my own candles, not only because commercial candles are becoming increasingly expensive, but because the craft provides the opportunity to make something beautiful and useful without having to purchase tons of equipment. Candles are such a lovely gift to both give and receive. I love that candle making would provide me with the opportunify to create a unique gift., rathef than just buying a ready made one.
Once more Many Thanks
You’re very welcome Michelle, I’m so glad you liked the post, it means a lot to me 🙂