
If you’ve never made a conditioner before, you’re in for a treat! hair conditioner recipes are fun to make, and you can tweak them until your heart’s content.
Adapting them to your very own hair needs is easy. Quite frankly, I don’t think you will ever go back to store-bought once you’ve tried it.
You can whip up this DIY hair conditioner in minutes with a simple method and hair-conditioning ingredient suggestions. And once you feel more confident you will be adding ingredients that can penetrate your hair strands from top to bottom.

Step By Step Homemade Hair Conditioner
Many ingredients can help to strengthen brittle hair, tame frizz, and add shine. Some can even provide that much-needed protection against the heat of styling tools. It’s one of the best hair care products I’ve made this year!
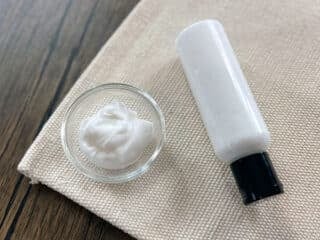
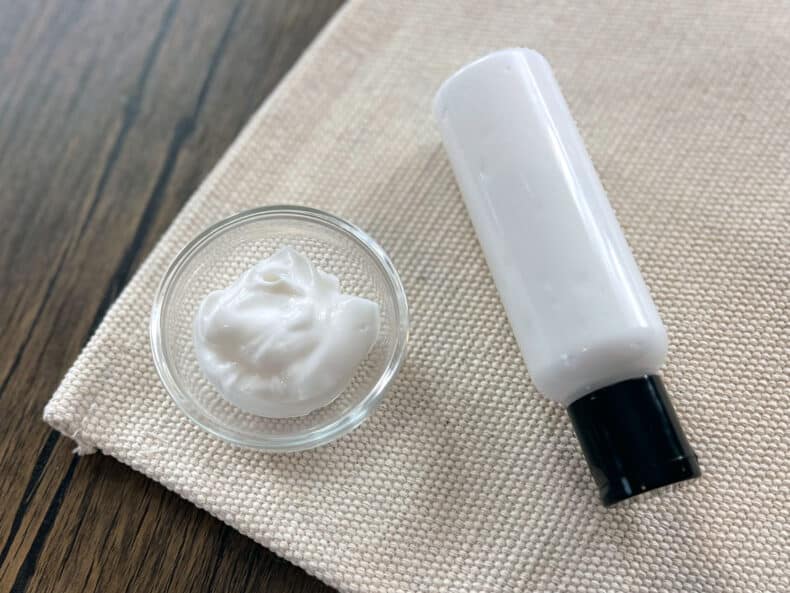
My starter, step-by-step recipe, is a DIY conditioner with lavender and coconut. It smells divine and contains no harsh or irritating ingredients. All ingredients are easy to source and it’s suitable for all hair types! It’s one of my go to DIY hair care products after I use my shampoo.

I’m in love with this recipe, mostly because of how easy it is to make. I keep coming across conditioner formulas that are overly complicated. Don’t get me wrong, they’re great recipes! But perhaps not the best choice for your first try at this product type.
So, if you’re interested in learning more about these different ingredients and why I’ve chosen them, scroll past the recipe for an in-depth analysis of my formula.

As an Amazon Associate, I earn from qualifying purchases. If you buy via the links here I may earn a small affiliate commission at no cost to you, please read my affiliate disclosure.
Ingredients
Equipment
Method
- 120 g Distilled Water, 3 g D-Panthenol Powder, 6 g GlycerinePlace the phase A water ingredients into one of the heatproof beakers (water, glycerin, and panthenol) and give it a quick stir to combine.

- 9.75 g BTMS-50 Emulsifying Wax, 9 g Coconut OilIn the other beaker place the phase B oil ingredients (BTMS-25 and coconut oil)
- Place both beakers into a bain marie or a shallow pan of simmering water, ensuring the water is not so high that the beakers are moving. Let them sit until the wax has melted and the water has heated through.
- Once melted, remove both beakers from the water and quickly combine them. I personally find it easier to pour the water into the oils rather than the other way around.
- Give the mixture a quick stir with a spatula, then change to using the stick blender. Start blending the oils and water, blend for a couple of minutes then leave the conditioner to stand for a couple of minutes. As the conditioner thickens and starts to cool, stop using the blender and change to using a spatula.
- Continue stirring using the spatula at regular intervals until it has cooled to 40c (104f).
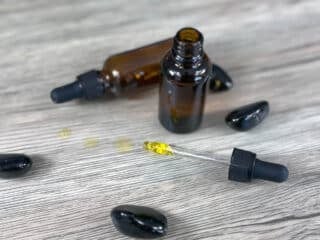
- 1.5 g Geogard ECT, 1 g Lavender Essential OilNow the conditioner has cooled, we can add the cool-down ingredients. Go ahead and add the preservative and essential oil. Give the conditioner a good stir to make sure everything is well combined.
- 8 oz PET Plastic BottleTransfer the conditioner to a bottle or container ready for use.


Notes
New to DIY skincare?
If you’re enjoying making your own products, you might like Radiance, my free email course where I teach the foundations of DIY skincare step by step!How To Use & Store Your Conditioner
Product Shelf Life: 6-12 months (with preservative)
Storage Instructions: Store in a cool dry place, out of direct sunlight
Storage Notes: It’s important to choose the right container for this recipe. Because of the presence of essential oils, our container must be made from PET plastic, glass, or aluminum.
How To Use:
- Shampoo your hair as normal
- Massage into the scalp and roots of the hair
- Work the DIY conditioner to the tips of your hair
- Leave for 5 minutes to allow the product to sink into the hair
- Rinse, dry, and style as usual
Frequency Of Use: Safe to use after every shampoo wash. It’s recommended that you wash your hair no more than once or twice a week.
In-Depth Formula Analysis
Formula Inspiration and Theming
I originally planned for this recipe to be the most basic it could be. A beginner’s recipe of sorts. But even a beginner wants a product that actually works. So I’ve tried to balance it between easy to make and also great for your hair. So let’s break down the formula for a homemade hair conditioner.
- 79- 93% Water
- 3-5% Humectant
- 3 – 7% Emulsifying Wax
- 0-6% 0ils (to include solid waxes and butters)
- 0-6% Active Ingredients (Extracts/Silicons/ Proteins ect..)
- 0-2% Fragrance or Essential Oil
- 0.5 – 1% Preservative
So, to put it basically, there are four main components in a DIY hair conditioner. These are water, emulsifying wax, and preservatives.
Without the water, we don’t have a backbone for our formula. We also wouldn’t have the same cleansing action. Without the emulsifying wax, our formula wouldn’t come together at all, and would separate. And finally, without our preservative, only after a week our product could make us sick.
As long as these three things come together, we have a stable formula to make a conditioner. Everything else we include, including humectants, oils and active ingredients, are all hair loving ingredients.
Ingredient Specification and Purpose

It’s important to use distilled water in your cosmetics, as it’s a clean backdrop for our formulation. There are no extra minerals or trace particulates that could interact with our ingredients. However, distilled water doesn’t have any benefits beyond this.
Our preservative is similar, in that it is a necessary ingredient that only really does one thing. I’m using Preservative Eco, Geogard ECT. But you can use any water soluble preservative you like to work with. Now, let’s take a look at our other ingredients.
BTMS-50
BTMS 50 is one of the best conditioning waxes available. It is very easy to use and its conditioning properties are second to none. If you are unable to get it BTMS 25 would also work but its condition properties will not be as good. If you care about dIY hair care products that work, you’ll want to include it.
There are a few natural emulsifying waxes that would also be suitable, however, they are harder to work with, and once again (in my opinion) the conditioning is not as good
Glycerine
Glycerine is a humectant, which helps to prevent moisture loss from both the product as the hair. It’s always good to include one in a homemade conditioner, as it can help stop the scalp from becoming overly dry.
Glycerin would be the obvious choice here as its moisturizing properties are second to none, it’s easily accessible and very economical. honeyquat is also a good choice.
Panethnol
Is a powerful humectant that will support the strength and elasticity of the hair, as well as penetrate deep to provide moisture at the core of our hair. A fantastic ingredient that can be omitted, but definitely worth it. Comes as a powder or liquid.
Coconut Oil
Coconut oil is a great conditioning agent for your hair. It’s also soothing for the scalp too and provides some antimicrobial action to help keep your hair feeling and smelling fresher for longer. Perfect for DIY hair care formulations and treatments.
Lavender Essential Oil
Fantastically soothing and healing, lavender essential oil is a fantastic choice of keeping your scalp and hair looking and feeling gorgeous. Its floral yet herbaceous aroma is beautiful and imparts on the hair well.
However, lavender also provides some great antioxidant action, helping to minimise oxidative stress on the hair and scalp. It’s also been proven to be antifungal and anti-inflammatory too!

Final Thoughts
That’s all I have time for today. I really hope you’ve enjoyed learning about my new DIY hair conditioner, this super easy formula. It’s the best place to start if you’ve never made one before!
It’s a great stepping stone to more complicated recipes, too. If you have any problems or any questions, just let me know in the comments and I’ll do my best to answer them.


Hi Angela. Thank you so much for the great tutorial and study advice. These trainings have been a great help to me, I believe even for those who have never practiced it will be a help too. Thank you very much.