

I have been asked on many occasions for a shea butter bath bomb recipe that can fully emulsify into the bath without using polysorbate 80. So I decided to dust off my apron from the last time I made bath bombs, and get making some more!
Honestly, I’ll take any excuse to make bath bombs. They look amazing, are simple to make and use and almost anyone who enjoys a good bath will love them. They never hang around long in my house.
Adding a wax emulsifier to a bath bomb not only gives the bath bomb some extra skin conditioning goodness, but it also makes the bath bomb harder, which is never a bad thing.
Using Bath Bomb Molds

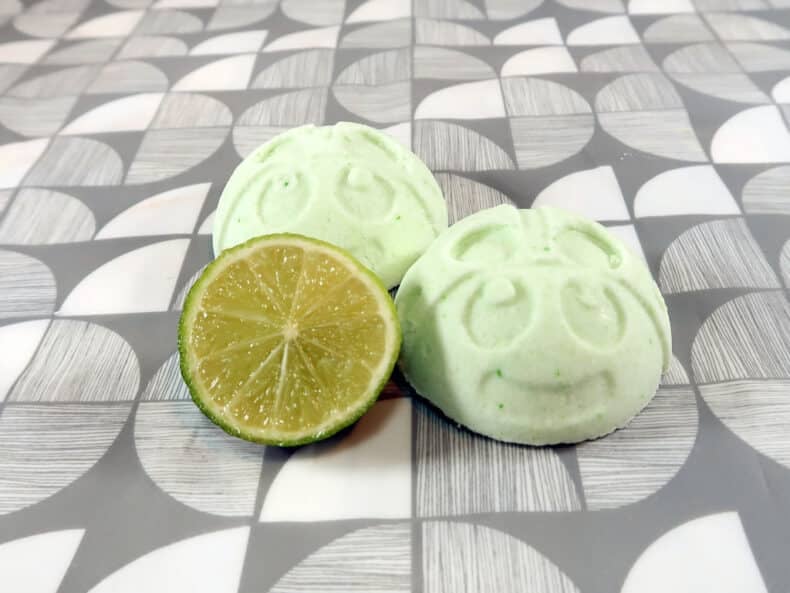
I am not sure why I felt the need to make a green ladybird bath bomb that smells of lemon and lime. But I had the mold to hand so tried it, and I have to say that it looks quite cute and smells wonderful.
This is a good, hard solid bath bomb that will work well using either simple silicon or stainless steel molds without too much detail.
I had no problem using the ladybird mold as the detail was still quite basic. But when I tried to be more adventurous, it crumbled in the finely detailed parts (see pic).

This is not unusual behavior for bath bombs and they still looked good, just a bit rugged around the edges, however, if you are looking for perfection stick to the simple ones.
Watch The Basic Technique First
This recipe makes 4 good-sized and will keep for around 9 months if stored correctly. Bath bombs are best kept in a cool dry area in a cellophane bag, cardboard box, or glass container to keep them fresh and to stop them from going soft. Or, if you’re like me, you won’t have to worry because use them all up long before they go bad.
If you enjoy making bath bombs but find they sometimes crumble, crack, or behave unpredictably, I cover this in detail inside my Bath Bomb Making Course.
You’ll learn reliable recipes along with the techniques and ingredient insights that help bath bombs hold together, fizz properly, and come out consistently every time.
It’s 25% off this week. 👉 Explore the course here

As an Amazon Associate, I earn from qualifying purchases. If you buy via the links here I may earn a small affiliate commission at no cost to you, please read my affiliate disclosure.
Ingredients
Equipment
Method
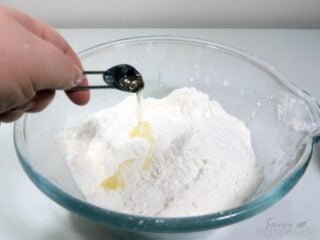
- Sift the baking soda into a bowl and set aside. This will ensure there are no lumps.

- Place the butter and emulsifying wax into the heat proof container. Melt them in the microwave using short 30 second bursts, or place the heat proof container into a saucepan, containing a couple of inches of simmering water (water bath) until the wax and butter have completely melted.
- Once the wax and butter has melted, we can add this to the baking powder. The wax has a high melting point so please be aware that the container and the wax/butter will be extremely hot, so handle with care. Make sure the melted butter and wax is fully combined with the baking soda, I often find it is easier to get my hands in the mix and give it a good squish around.
- Next, it's time to add the essential oils. Once again you will need to blend them in until they are distributed throughout the mix.
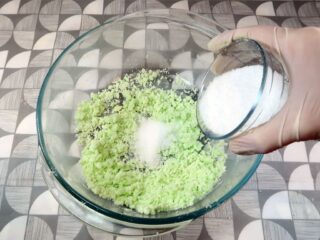
- Add a few drops of the coloring, blending them in as you go, until you reach the stage where you are happy with the shade.
- Finally it is time to mix in the citric acid. This needs to be mixed in the same way as you did with all the other ingredients. Undissolved Citric acid can be drying on the skin so I would recommend wearing disposable gloves at this point.The finished bath bomb mixture should hold together when squeezed and should feel like damp sand. If it feels too dry you can give it a squirt of rubbing alcohol or witch hazel, if you do not have any to hand water should do the job. Do this sparingly as too much liquid will set the citric acid of fizzing.
- Once you are happy with the feel and texture, press the mixture in to the mold. If you are using a silicon mold fill it a layer at a time, pressing down firmly after each layer until the mold is full. For a round bath bomb (see below), fill both halves of the bath bomb mold with the mixture, pack it in and heap it high. Press both sides together and twist the mold into place.
- Leave the bath bomb sitting in the mold for 24 hours before trying to remove them. I like to give the bath bomb another 24 hours once it has been removed, just to make sure that its completely dried out. This is a hard bath bomb that can easily be broken when removing from the mold. If you are using a silicon soap mold don’t use one that has too much detail on it, as it will crumble.


New to DIY skincare?
If you’re enjoying making your own products, you might like Radiance, my free email course where I teach the foundations of DIY skincare step by step!Two Tone Emulsified Bath Bomb

Another interesting take on these shea butter bath bombs is the two-toned look. I made these using the same recipe as the lady bird bath bombs above. I’m using red and blue food coloring, with good old Champa fragrance oil.
1. As with the recipe above sift the baking soda into a bowl. In a heat proof container melt the butter and wax, then combine this with the baking soda. Once combined, blend in the essential/fragrance oil.
2. This is where the method varies from the one above. Before you add any of the coloring we are going to mix in the citric acid. Then separate it into two bowls.

3. Add a couple of drops of color to one bowl, and a couple of drops to the other.

4. Grab one half of your mold, choose a color to start with, and then add a layer, gently pressing down as you go. In this case I am using blue for my first layer.

Take your second color (pink) and layer it on top of blue. You can make the layers as thick or thin as you like. Continue to layer until the mold is packed and heaped, then do the same with the other half.
5. press the two mold half’s firmly together, sometimes it helps to use a twisting motion. If you have multiple molds, I suggest you fill them, and leave them to sit over night to harden before removing.

6. if you only have one mold, remove the top half of the mold, and gently roll the bath bomb on to a flat surface. This needs to be somewhere it can sit undisturbed for a good 24 hours.

I tend to use a chopping board covered with wax paper. If the bath bomb does not roll out and it seems to be stuck in the mold. Replace the other half of the mold and give it a good tap in the areas its stuck before trying again.

Final Thoughts
So there you have it, two cool ways to make emulsified bath bombs. Not only does the added conditioning effect of the bath bomb make your skin feel amazing, but these are probably the most sturdy, well-made bath bombs I’ve ever churned out.
Sure, you still can’t get away with a super intricate mold, but I always think bath bombs look their best when they’re mostly a simple shape. You can make things interesting by adding different colors and textures with your optional ingredients.
If you want to stay up to date and learn how to make bath bombs in many more ways, why not sign up for my newsletter? You’ll be the first to know when I post something new, as well as some nice free ebooks for you!


This is a very interesting article. I wanted to know does the emulsifying wax prevent the colors from staining the tub. Also, does it keep the fragrance oils and carrier oils from floating on top, or does it help both merge seamlessly with the water? Thanks for sharing and keep up the good work!
Hi Jessica,
You’re exactly right, the emulsifying wax does prevent colors from staining your tub and immerses both our aromatic and carrier oils (as well as our cosmetic butter). It also provides some good skin softening benefit.