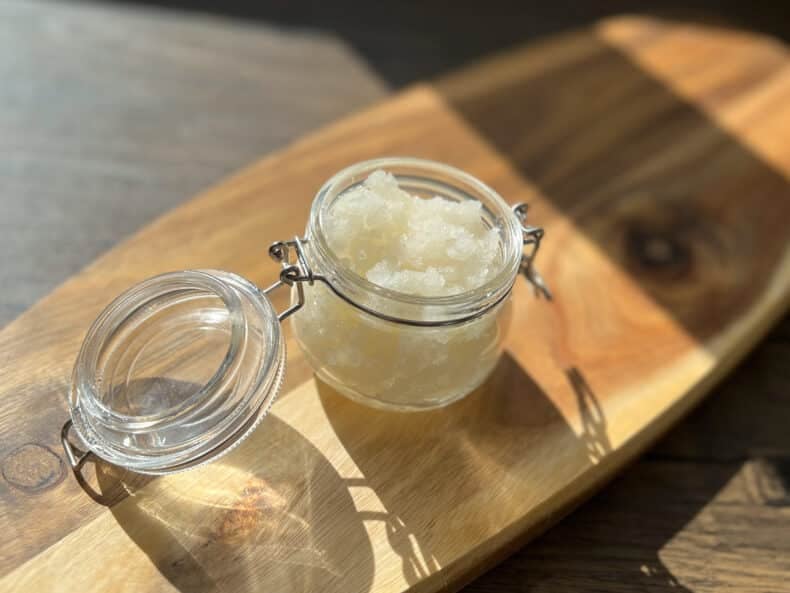
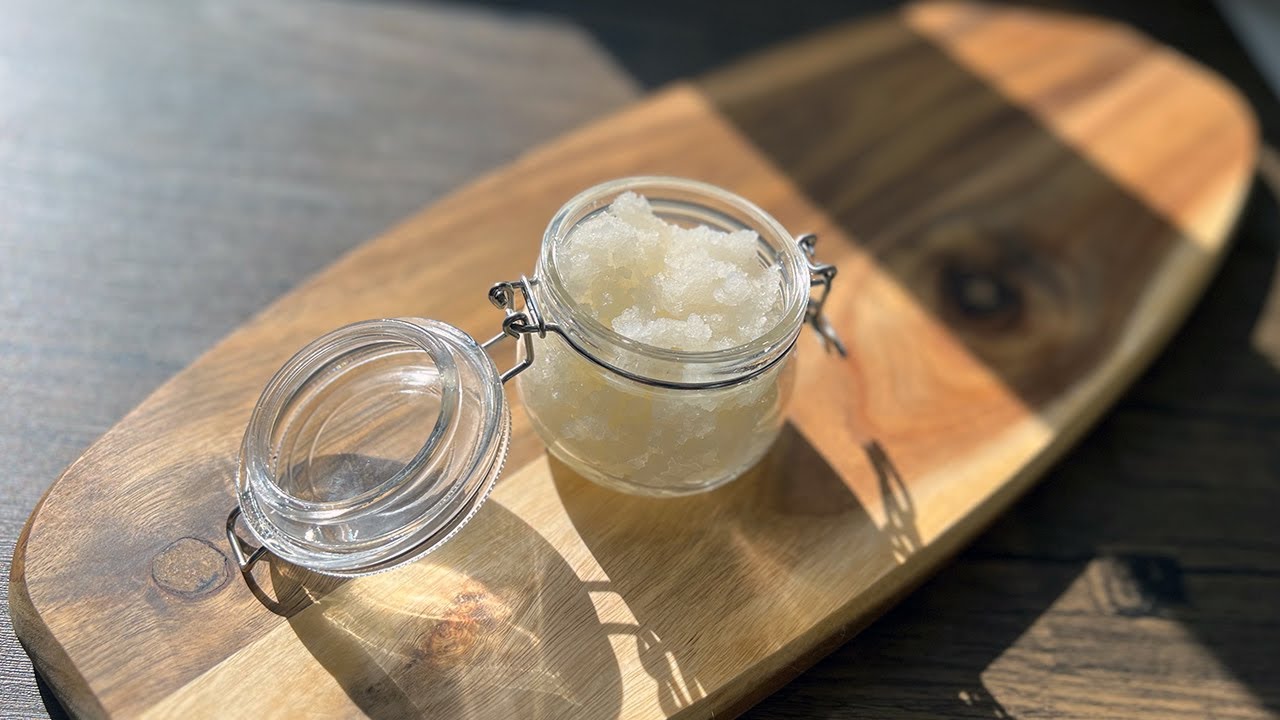
This is my Ocean Breeze sea salt scrub. It’s great and maybe my favorite of all. It combines all the stuff I really love in a salt scrub recipe. Exfoliating scrubs, nourishing carrier oils, and a fragrance oil or essential oil of your choice.
I’m using Ocean Breeze fragrance oil because it goes with my theme of ocean-inspired exfoliation. There are different sea-inspired fragrance oils to try, such as sea salt fragrance oil! I’ve also put in a little oil-soluble seaweed extract. It’s great for the skin and again goes with this ocean theme.
Watch It Being Made
The Ingredients
So let’s take a better look at these ingredients.
Exfoliants
The sea salt is our main exfoliant here. It’s wonderful for the skin, helping to keep it clean, infection-free, and deodorized for longer. Whatever you do with this one, you’ll need to get yourself some fine sea salt.
Sea salt is especially good in a scrub recipe because of how good of an exfoliant it really is. It’s extra effective at removing hard stuck layers of dried skin. We need to remove this, as it can create a porous surface on our skin that captures microbes that can’t escape with cleansing alone.
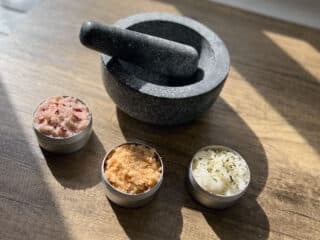
If you can’t get the fine sea salt, then you can use coarse and grind it down yourself with a pestle and mortar. You can also swap these out for the benefits of pink Himalayan sea salt or Epsom Salts if you so wish.
But if you want to use dead sea salt, you absolutely can – although on its own it’s much too soggy. So you’d only want to replace around 12% of your sea salt with dead sea salt.

Carrier Oils
Our carrier oil for this recipe is coconut oil. It’s a soft, solid carrier oil that can lend some amazing cleansing benefits to your sea salt scrub.
Firstly, coconut oil is very soothing and anti-inflammatory. This can help with any nasty blemishes or skin infections that present on the skin on application. However, it also helps to prevent these things by helping to reinforce the skin’s natural barrier protection.
However, you can substitute this oil if you want. I would go for something deeply nourishing, such as jojoba oil or grapeseed oil. However, as both of these carrier oils are a liquid at room temperature, you should expect the scrub to be softer and a little more runny.

Antioxidants
Antioxidants are crucial in just about any product that contains oil-based ingredients. Because this product is completely anhydrous, we’ve got to include one! I’ve selected vitamin e, mostly because it’s my favorite. It has some great skin-loving benefits, such as deep hydration.
Without an antioxidant, the oils in this recipe will be susceptible to oxidation, which can lead to our product being more reactive on the skin. For example, oxidized ingredients can cause inflammation on the skin.
However, it’s not your only choice. You can opt for a rosemary co2 extract, at 0.2%. It’s a great alternative, and at these concentrations, you’re unlikely to notice any rosemary-like scent in the product.
Fragrances
I’ve opted for a fragrance oil for this recipe. While I often prefer to work with essential oils for their beautiful aromas and ability to bring about changes in the skin – sometimes I only want a smell.
This is a wash-off product, meaning that anything going in won’t spend a lot of time sitting on the skin. Therefore, dumping many active ingredients can be seen as a bit of a waste. I’ll pop something in (for example, the seaweed extract), but I don’t always feel it needs essential oils to go with it – especially as they can be expensive!
So a fragrance oil here should be fine. If you reject synthetic ingredients, then opt for an essential oil of your choice. Many would work well here, and there are no right or wrong answers.
Tip: I would consider EOs that inspire an invigorated and energized mind, and ones that help to keep the skin cleansed for longer (peppermint, tea tree, eucalyptus, and cedarwood are great examples and would work wonderfully here).
Other Ingredients
I’ve included two things that aren’t natural but are pretty important for this recipe. Polysorbate 80 and a preservative. Let’s discuss why.
Polysorbate 80 is a solubilizer that you’ll often come across when making bath products.
I’ve included it here because it’ll help to cleanse the skin, but also reduce any slipperiness we’ll get from our oils in the bath.
Important: Because a scrub is best used while in the shower, I wanted something that would allow the oils to mix with the water and slip down the sink without leaving much behind. You can leave this out, but be careful in the shower! There is also no great substitute, so there’s not much reformulating we can do to make this product more natural.
However, the inclusion of a preservative is a little easier.
There are preservatives that are accepted in natural skin care, such as preservative eco. But if you’re not bothered, you can use any broad spectrum, oil soluble preservative you prefer (a good choice is Optiphen Plus)
You might think that this formula doesn’t require a preservative. While in theory this is true, in practice a preservative is needed for this product. Unless you can be 100% sure that during storage of this product, it isn’t contaminated with water, then I’d say go ahead and omit the preservative.
However, for a product that is ordinarily stored in the bathroom, and used with wet fingers, this is almost impossible to do. Even a tiny bit of water could absolutely ruin a product.
So do yourself and your skin a favor and add one – without it, you’re not protecting your skin.
Your best option for a natural preservative system here is Geogard ECT known as Preservative Eco in the UK (Inci: benzyl alcohol, salicylic acid, glycerin, sorbic acid). It is accepted in natural skin care and is soluble in both water and oil (up to a certain point).
If you’re not bothered about the natural status of your ingredients, there are several other preservatives available.

As an Amazon Associate, I earn from qualifying purchases. If you buy via the links here I may earn a small affiliate commission at no cost to you, please read my affiliate disclosure.
Ingredients
Equipment
Method
- 130 g Fine Sea Salt, 22 g Dead Sea SaltPlace both the sea salt and dead sea salts into a medium-sized mixing bowl.

- 16 g Coconut OilWeigh the coconut oil into a small heatproof container and give it a few second blasts in the microwave until it's just melted.
- 20 g Polysorbate 80, 4 g Seaweed Extracts, 2 g Vitamin E Oil, 4 g Ocean Breeze Fragrance Oil, 2 g PreservativeOnce the coconut oil has melted, add the remaining ingredients & stir well so that they are fully combined.
- Pour the oils into your salts and mix again. Check the consistency of your salt scrub. If it's too dry, you can add a little more oil. If it's too runny, add more salt until you achieve the desired texture.
- Cosmetic Jar 8ozTransfer the finished scrub into an airtight container for storage. Make sure to label it with the name and date. Store it in a cool, dry place away from direct sunlight.


New to DIY skincare?
If you’re enjoying making your own products, you might like Radiance, my free email course where I teach the foundations of DIY skincare step by step!How To Use This Scrub
- Begin by applying some warm water to the skin. It’s always helpful to get things damp first, as it helps with minimizing friction from the exfoliant.
- Then, scoop out a generous amount of the scrub and apply it to the skin. I find it helps to massage it into your skin, using long circular motions. Spend a little extra time on those trouble areas, including the elbows and knees which can see a significant build-up of dead skin.
- After exfoliating, rinse off the excess with warm water. It helps to do all of this in the shower, then you don’t risk the sea salt scrub ending up on your carpet.
- I always follow this up by patting the skin dry with a clean towel. I do this routine once or twice a week to keep my skin feeling ultra-soft, smooth and blemish-free!
I love this recipe, it’s one of four lovely salt scrubs. I love that it’s easy to apply and easy to get off too. Using it in the shower is an absolute dream.