

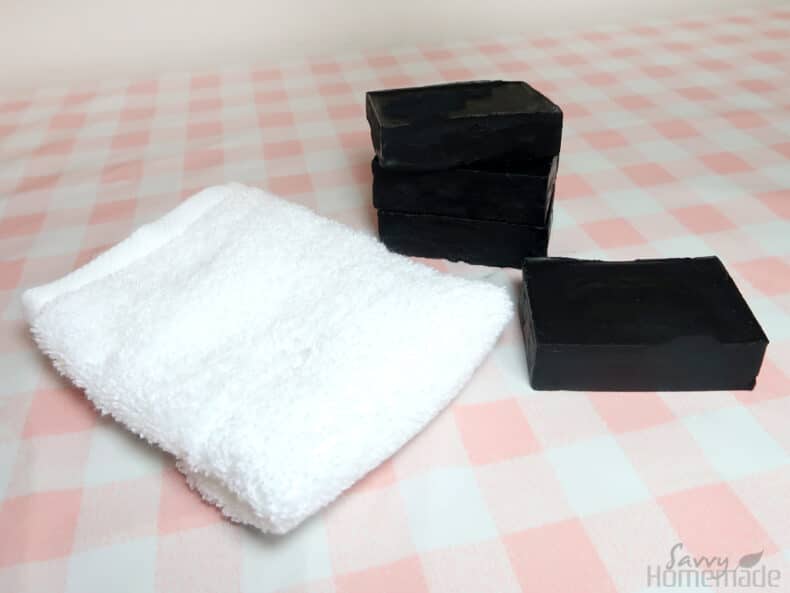
I don’t know about you, but I want my skin toxin and dirt-free at ALL times! This fresh-smelling activated charcoal soap will do just that, suck out any nasty toxins that leave our skin prone to acne, blackheads, and other nasties we really don’t want.
Have you ever heard of activated charcoal being used in hospitals? Well, it’s because of how good it is at binding toxins that they give it to people who they suspect have been poisoned.
While it does have quite a dark color and leaves this soap looking a little intimidating, the charcoal can do wonders for easing skin imperfections.
About My Activated Charcoal Soap Recipe

While this is one of many homemade soap recipes that are great for pretty much any part of your skin. I like to use this one just for my face as it is obviously the most visible part of our bodies. And like anyone, I always want this skin to look its best.
Vegan Friendly
One of my favorite things about this is that it’s totally vegan-friendly! I have a lot of vegetarian and vegan friends, and this is a great soap to use as a gift for anyone who takes animal rights seriously.
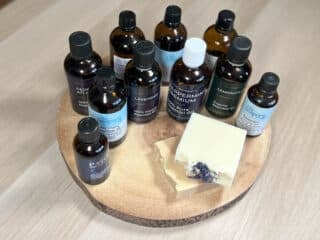
I’ve used a nice selection of essential oils in this recipe. While tea tree doesn’t smell all that good, the other EO’s I’ve chosen should mask any unpleasantness. You could consider leaving the tea tree out, but it’s absolutely fabulous for your skin and combined with the charcoal makes for a double-action, extra powerful soap to leave skin positively glowing!
Watch How To Make Basic Cold Process Soap
If you haven’t made soap before, take a few minutes to watch the video and basic steps for making CP soap at home.
Notes For Making Charcoal Soap
- This charcoal soap recipe makes around 6 individual bars which I find perfect for personal use. If you are considering gifting or selling it you may prefer to double up on the ingredient and use a loaf mould.
- If you are using the larger mould and working with a larger batch you won’t need to place the soap on to heat pad.
- This is a relatively soft soap, so sometimes it can be a little tricky getting it out of the mould. This doesn’t bother me as I like a rustic look to this soap and they’re simply for personal use.
- However, you can speed up the hardening of the soap by adding vegan-friendly sodium lactate. For this amount of batter, add 1tsp to the lye water once it has cooled (right before mixing into the oils). This will make the bars harder in general as well. The properties of the soap should remain unchanged.

As an Amazon Associate, I earn from qualifying purchases. If you buy via the links here I may earn a small affiliate commission at no cost to you, please read my affiliate disclosure.
Ingredients
Equipment
Method
- If you’ve not made soap before, take a look at my full cold process tutorial here.Make sure you are making the soap in a well-ventilated area. Put on your gloves and eye protection, your mask, apron, and long rubber gloves.

- 135 grams Coconut Oil, 31.5 grams Shea Butter, 180 grams Olive Oil, 67.5 grams Avocado Oil, 36 grams Castor Oil, 126 grams Distilled Water, 63 grams Soapmaking LyeI like to start off by making sure my essential oils are weighed out and combined in a glass container. As it can take some time to get these measurements right, it’s easier to do it now so you just have to tip it in later when it counts.Then, weigh out your sodium hydroxide/lye crystals and your water in separate containers. I like to use a glass jug for the water. When ready, pour the crystals into the water and stir with a stainless steel spoon.This will begin the chemical reaction, and the lye water rapidly increases in temperature. Avoid inhaling any fumes that release. Turn your head and lean away from the lye solution.Now, place the jug aside to cool, preferably somewhere with good ventilation and move on.
- Weigh out the coconut oil and the shea butter. Then, melt together. You can use a water bath, although a series of 30-second bursts in the microwave works well for me. Then weigh the olive, avocado and castor oils and add them to the melted coconut oil and shea butter.
- Now that we’re almost ready to mix, check the temperature of the oils and the lye water and compare them. We want them between 90F and 120F.Once you’re satisfied that both fall within this range, pour your lye water into the oils and blend with a stick blender until you reach trace.Not quite sure what trace is? Take a look at our basic cold process soap recipe for a more in-depth description of trace.
- 10 grams Tea Tree Essential Oil, 5 grams Rosemary Essential Oil, 5 grams Lavender Essential Oil, 1 tbsp Activated Charcoal Powder, 2.5 grams Peppermint Essential OilNow that we’re at trace, go ahead and add the activated charcoal and essential oils (in that order), mixing thoroughly after.
- Now we’ve added our last ingredients, the batter will begin to harden. So, working quickly but carefully (as the batter is still caustic) pour or spoon your batter into your soap molds.While it saponifies, it’s important to keep it warm. I like to use a heating pad on a medium to the low setting for a few hours, but if you don’t have one just keep it well insulated with a piece of cardboard on top and an old towel that you’re not using anymore..
- Allow this to saponify for 24-48 hours before removing from the mold. If your soap is still spongy after the first 48 hours, leave it for another 24 hours before attempting to remove it. Or, when you come to make it again, try adding the sodium lactate.Then, when we have it out of the mold, we’ll need to let it cure for about 4 weeks in a cool and dry environment. Check with PH indicator strips to ensure that your soap is safe to use, especially before gifting or selling.


is this soap good for sensitive skin and a person that has eczema
Hi La’Dea,
This soap should be fine, but all skin is different so it’s possible that you could see a reaction from the essential oils. Otherwise I don’t really see any problems using this soap. Let me know how you get on with it? Thanks so much <3
Hi, Thank you so much for this recipe – it turned out awesome! I was just wondering, is this recipe super-fatted at all?
Hi Ana,
Great to hear that you like the recipe. Yes it is super fatted, at around 5%
I’ve made this soap on the 4th of July and my son used it today. He loved it. Thank you so much for this recipe,it truly is divine 😍
I have been making CP soap for 10+ years. I super fat at 5%. So therefore if charcoal (alkaline) is added, doesn’t the extra oils (acid) combine the charcoal and produce more soap? Leaving with no charcoal?
We have been making soap with lard. Can I simply add the charcoal and essential oils to my lard recipe rather than using the other oils? I don’t see a reason why not, but thought I’d ask.
Hi Elisabeth,
I’m sure that would work just fine. I haven’t done it myself so I can’t give you a guarantee, but I’d love to hear how it works out. Let me know how you get on.
Thanks for your reply. So far the soap looks beautiful and is curing. I’ll let you know the final result.