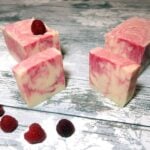
Raspberry Ripple Swirled Soap Recipe
Today I’m going to show you how to make swirled soap in a loaf mold to achieve a cool marble effect. I’m so absolutely obsessed with soap making that I just can’t stop doing more.
Print
Pin
Yield (adjustable): 12 Bars (approx)
Ingredients:
- 380 grams (13.4 oz) Shortening
- 330 grams (11.64 oz) Coconut Oil
- 300 grams (10.58 oz) Olive Oil Plus an extra tbsp to mix your soap dyes
- 300 grams (10.58 oz) Distilled Water
- 145 grams (5.11 oz) Soapmaking Lye
- 1 tsp (0.01 pt) Titanium Dioxide
- 1 tsp (0.01 pt) Mica Powders Pink is also fine
- 40 mls (40 mls) Fragrance Oil For Soap 50/50 Raspberry and Vanilla
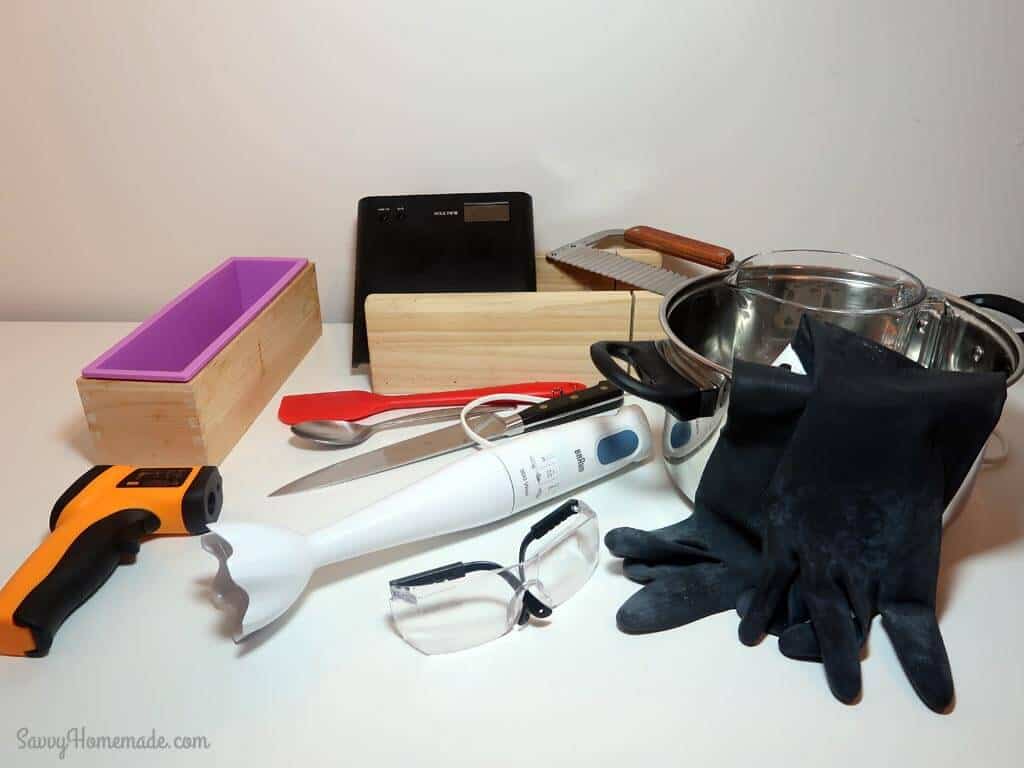
Equipment:
Instructions:
- If you’ve not made soap before, take a look at my full cold process tutorial here.Make sure you are making the soap in a well-ventilated area. Put on your gloves and eye protection, your mask, apron, and long rubber gloves.

- Gather your ingredients. If you aren’t using a silicone mold, you’ll want to line whatever you are using with baking paper. Try to keep the paper as smooth as possible, as it can leave marks on the surface of the soap if it wrinkles.
- This is the time for you to prepare all of your ingredients, measure everything, all of your oils, butters, water and lye. But do not mix your water and lye yet.In a small dish or glass, mix 1 tablespoon of olive oil with 1 tee spoon of red or pink mica, set this aside or later. Do the same with the titanium dioxide in a separate glass (you can usually mix this with oil, water or glycerine, check packing to be sure).Using a milk frother, whiz both mixtures so that they are diluted and mixed very well, you do not want any lumps at all in this.Note on Titanium Dioxide: Although the Titanium Dioxide is completely optional, I find it’s necessary to get a brighter color out of your soap. This will help the ripples of red mica coloring pop and look fantastic. But the recipe will work perfectly fine without it.

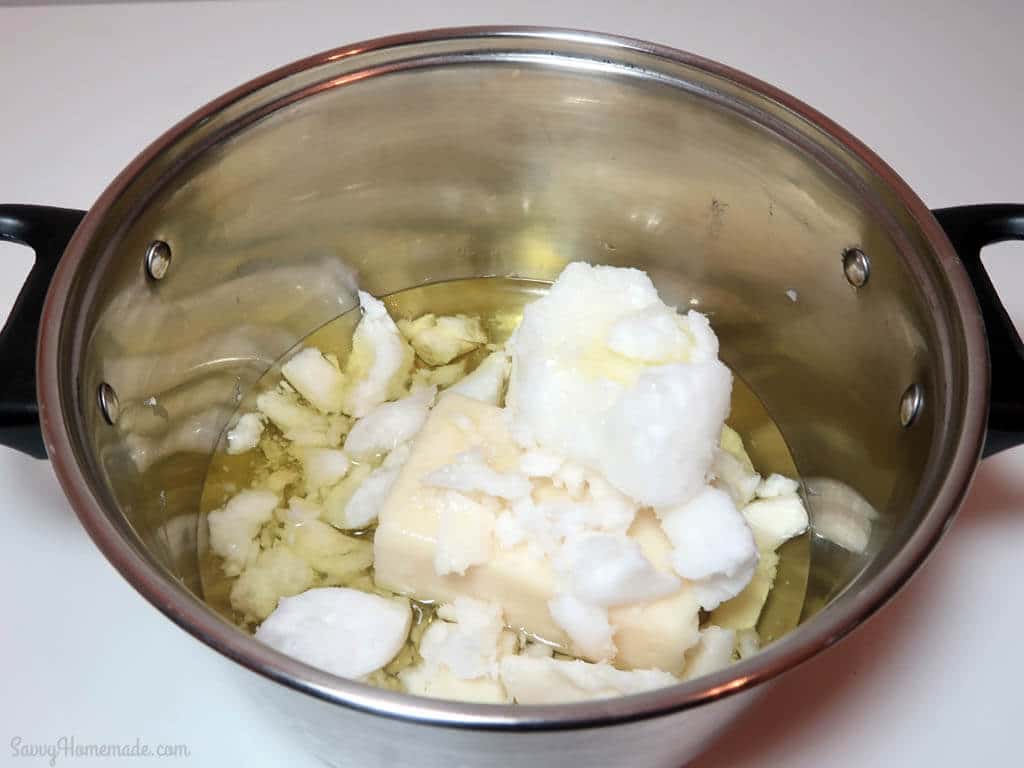
- Combine your butter and oils in a pan and put it on the stove on a low heat. You don’t want your oils to boil or even simmer, just melt gently.
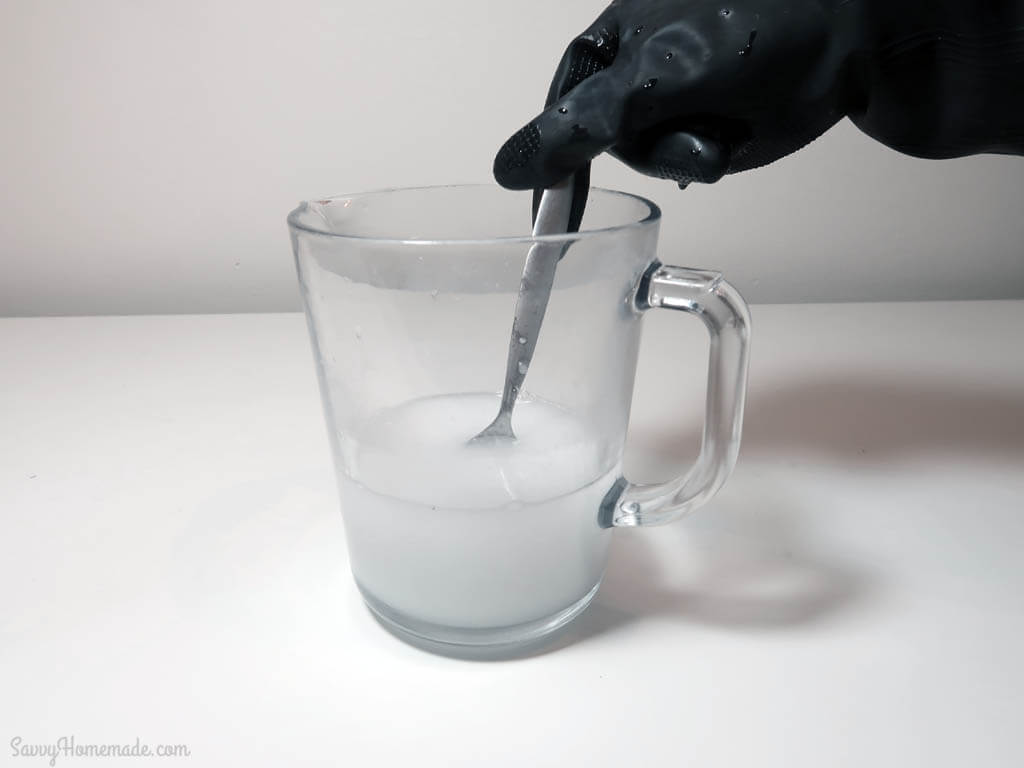
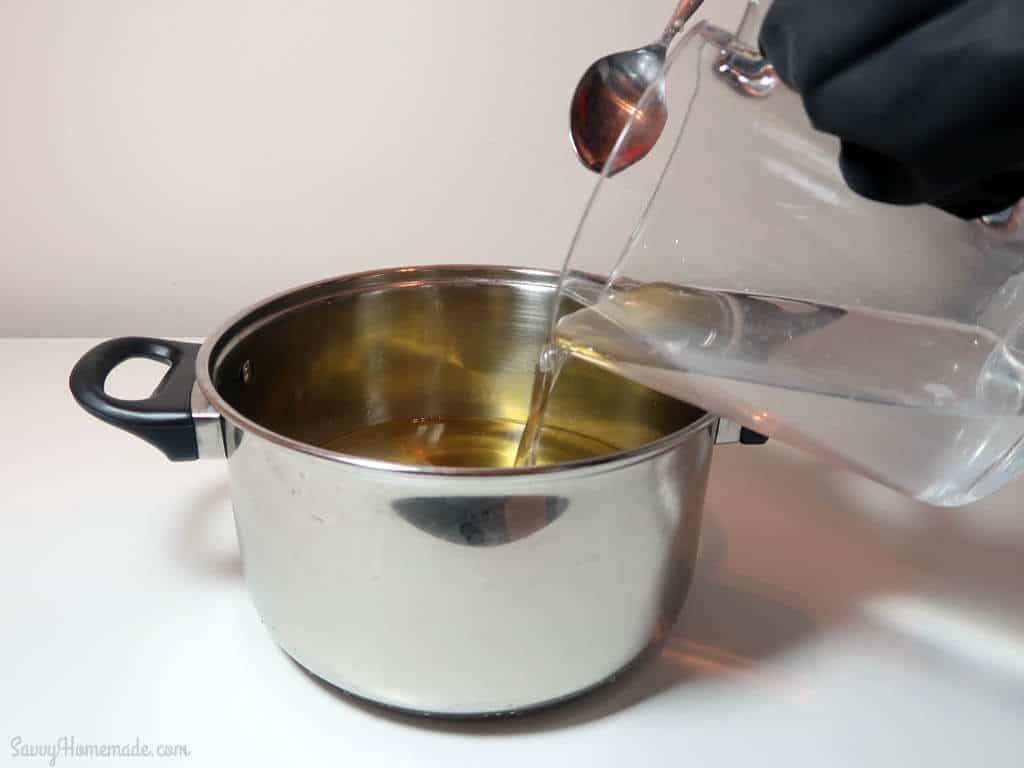
- Right after you’ve put your oils on to melt, combine your lye and water and mix gently so not to spill or splash. This will spark the chemical reaction, causing the lye to become very hot very quickly.You can place it on the windowsill with the window ajar to help ventilate your work space and cool it down more quickly.If you have little ones in the house, be very careful during this and the next few steps. I find it best to set them up in another room with some coloring and keep them well away from my lye.
- You’ll now want to balance the temperatures of your lye and your oils. You want both to be between 120-140F before you mix. Once they’re roughly the same temperature, pour your lye into your oils and mix thoroughly but carefully so not to spill or splash. I like to use an infrared thermometer gun to test my temperatures.
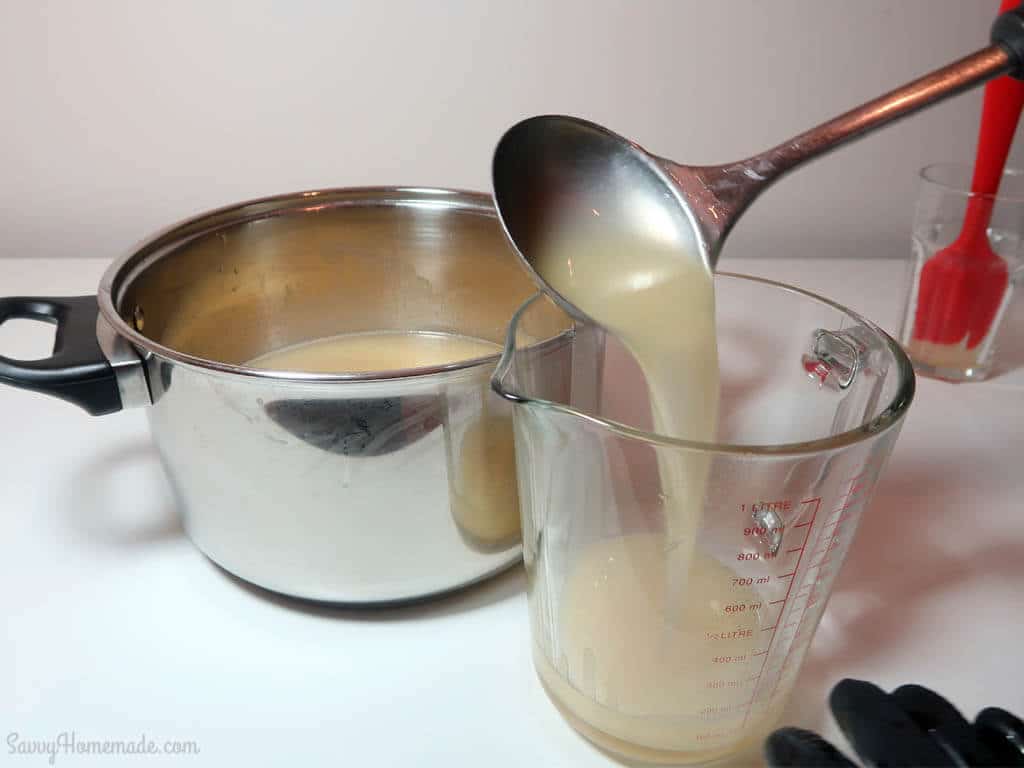
- Using your soap making stick blender, whizz the soap mixture until you reach a light trace. You’re looking for that residual trace that is left behind when you run the stick blender or a spoon through the mixture.Once you reach this point, ladle out 3 spoonfuls of your mixture into a separate jug and put to one side.
- Add your fragrance oil to the larger part of your soap mixture and mix thoroughly.
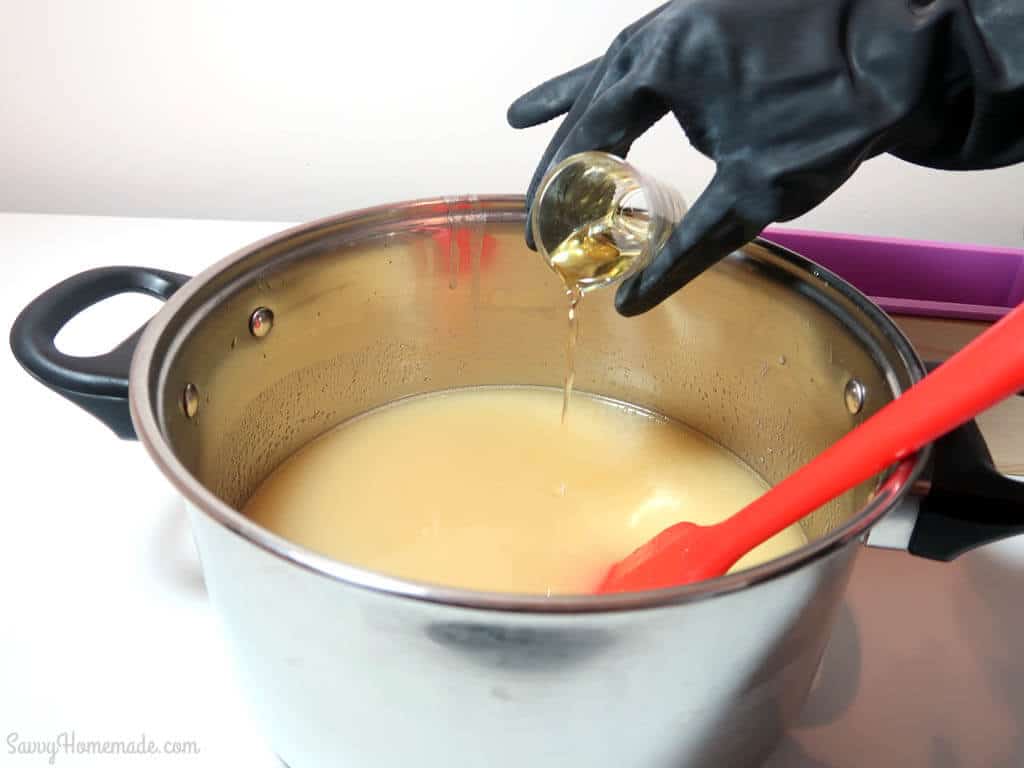
- Now pour the titanium dioxide into your main soap batter mixture and stir thoroughly.

- Now we can add the mica to the soap batter we collected earlier. It is very important that your oil and colors are fully mixed and must never be lumpy when you add it to your soap.

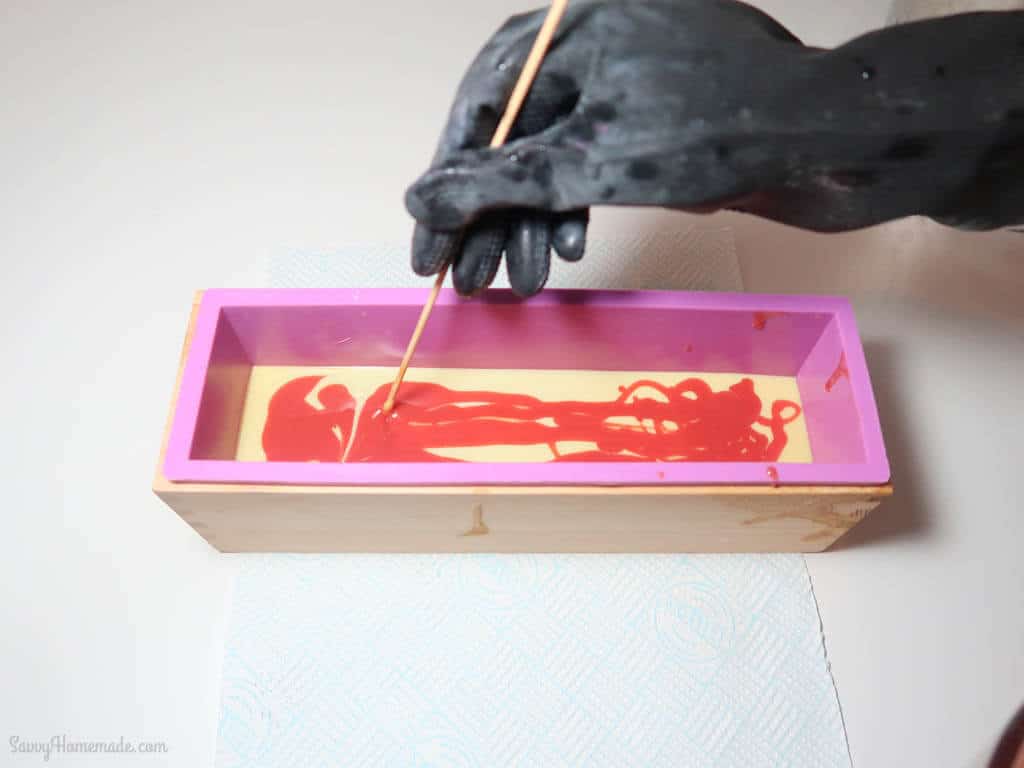
- Working in layers, pour your soap batter, you’ll want to do a layer of white soap about half way up.Follow this with a thin layer of the colored soap batter, using a spoon to dribble it on.
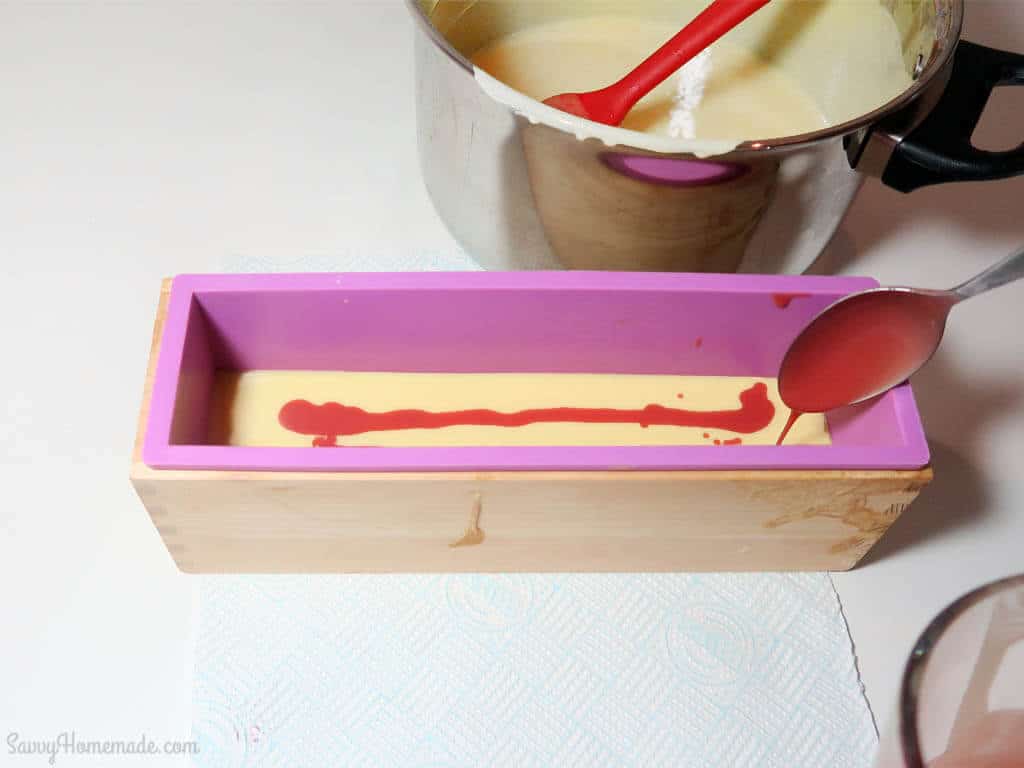
- Then, using the thin bamboo stick, give the mixture a quick stir. You don’t want the colored soap to fully immerse into the plain soap, we’re looking for that cool marbled effect.
- Then pour the rest of your white soap batter up to the top of the mold.
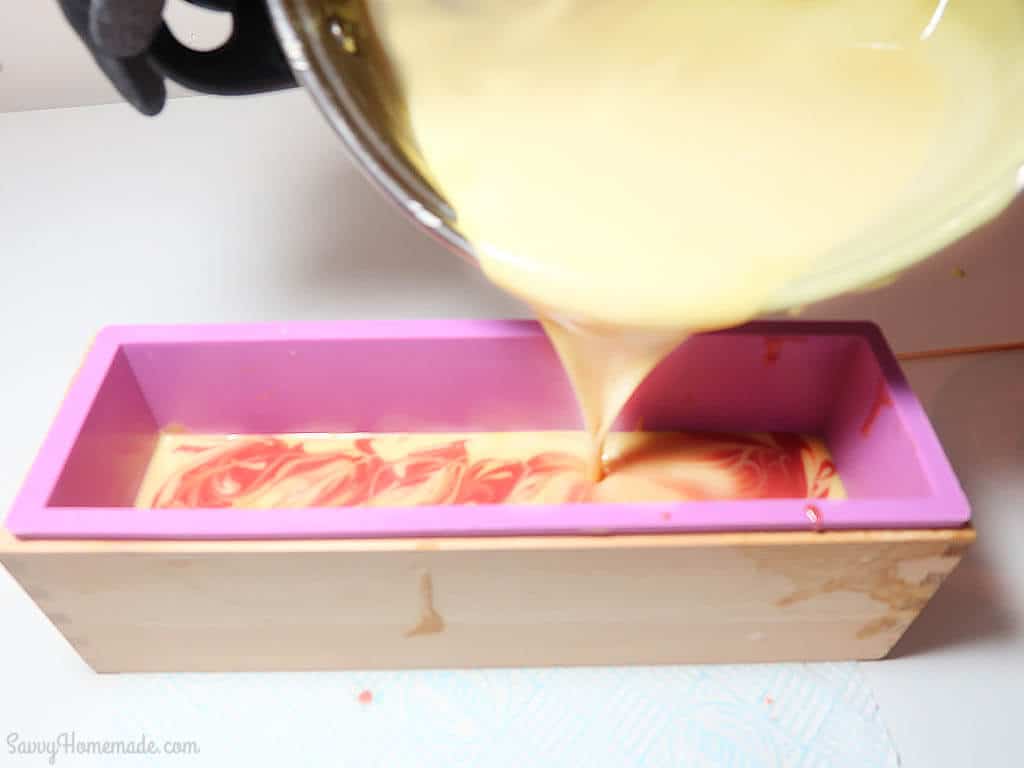
- Spoon more of the colored soap solution and use the thin bamboo stick to give the mixture a quick stir again. You don’t want the colored soap to fully immerse into the plain soap, we’re looking for that cool marbled effect again.
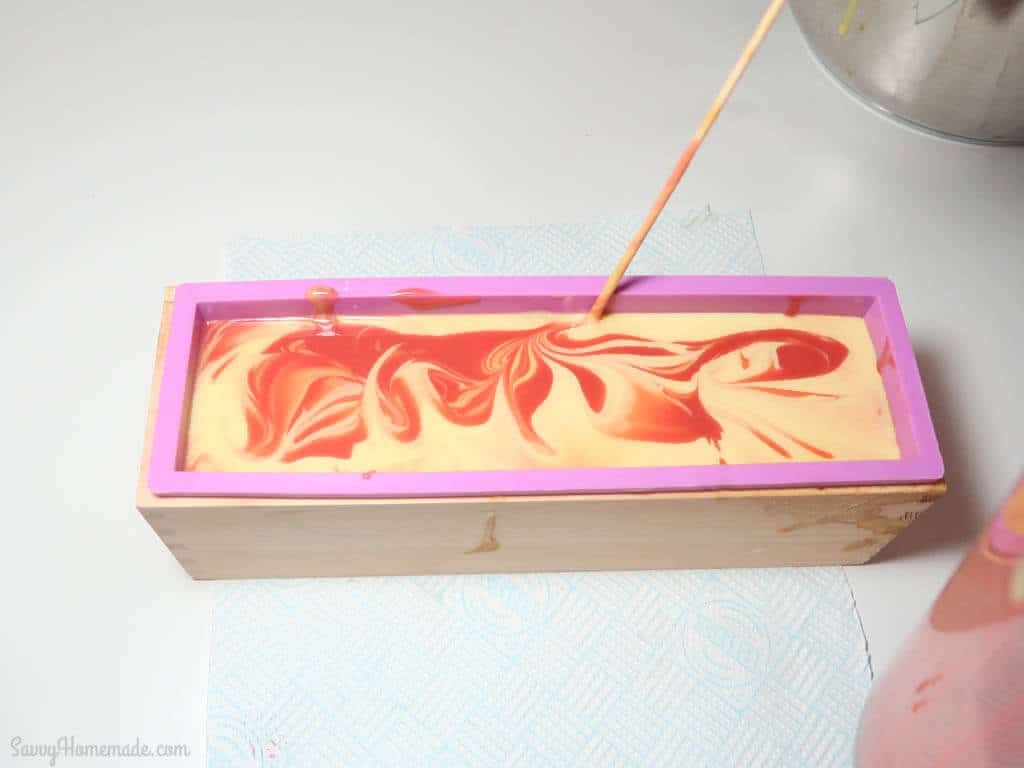
- Once you’re happy with the marbling of your soap mixture, cover the top with a piece of cardboard and then lay a towel over it to insulate through the gel phase.

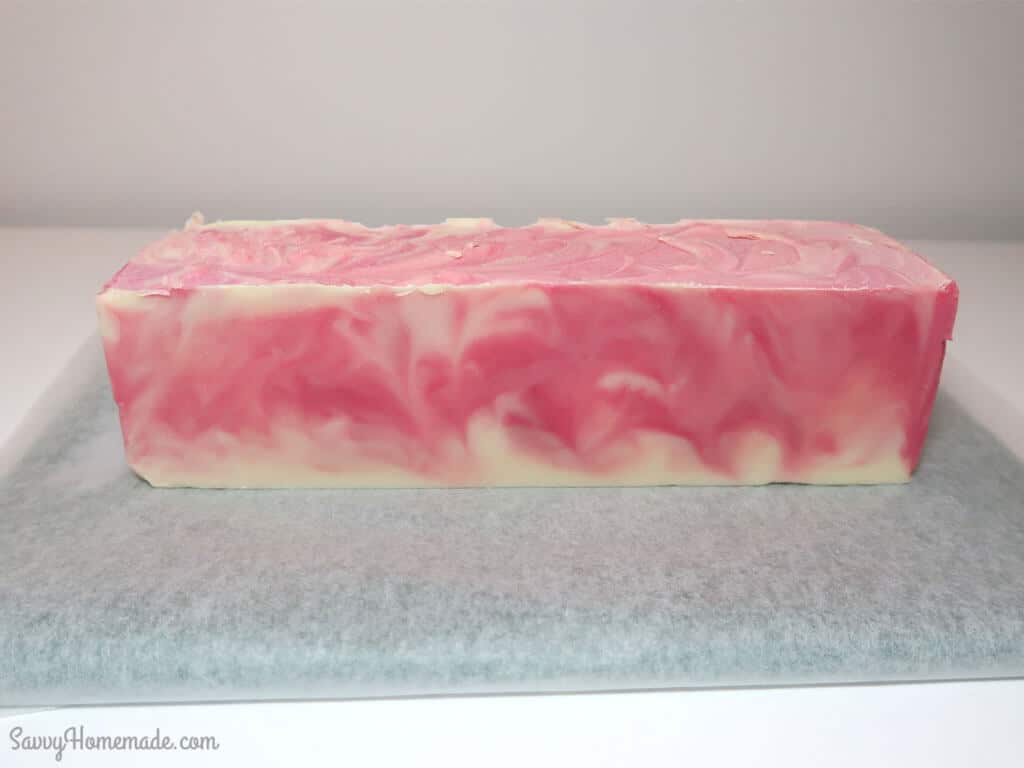
- Leave your soap of a minimum of 24 hours, although sometimes it’s necessary to leave it as long as 48. Free your soap from the mold and cut it into even rectangles. I like to cut my soap by hand for a more rustic look, but you can use a soap cutting box for precision.You’ll want to then recover and leave to cure for around 4 weeks. Test with PH Strips to ensure that your soap has fully saponified and is safe to use.
Tried this projectMention @Savvyhomemade or tag #savvyhomemade!