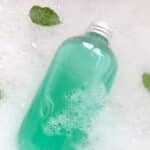
How To Make Bubble Bath At Home
When I'm looking forward to a nice long soak in the bath, I want lots of lovely bubbles that last for ages. So I decided to indulge myself and design a homemade bubble bath recipe that has exactly that.
Print
Pin
Yield (adjustable): 200 grams
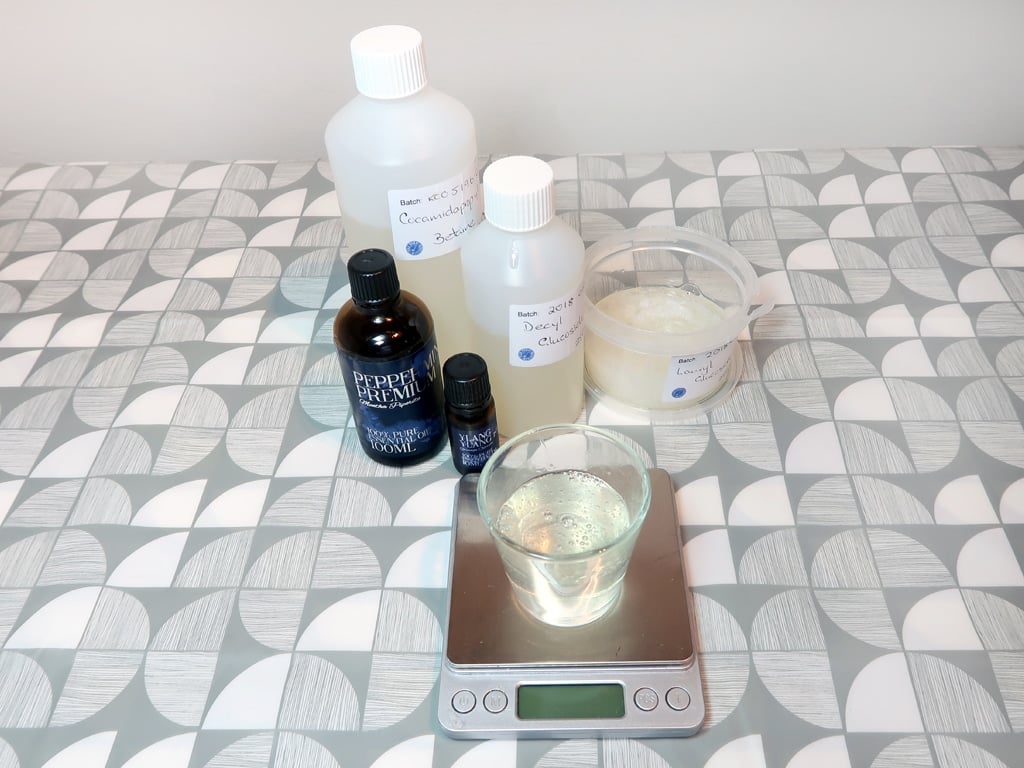
Ingredients:
- 80 grams (2.82 oz) Distilled Water
- 40 grams (1.41 oz) Cocamidopropyl Betaine
- 40 grams (1.41 oz) Lauryl Glucoside In UK buy from Naturally Thinking
- 20 grams (0.71 oz) Decyl Glucoside In UK buy from Naturally Thinking
- 20 grams (0.71 oz) Glycerine
- 2 grams (0.07 oz) Xanthan Gum
- 1 gram (0.04 oz) Peppermint Essential Oil
- 0.4 grams (0.01 oz) Ylang-Ylang Essential Oil
- 1 gram Preservative Water-based, high PH tolerant, eg Liquid Germall Plus or Plantaserve P
- (1) 8 oz PET Plastic Bottle
- PH Modifier Lactic Acid, or a dilution of Citric Acid
Equipment:
- Spoon or Spatula
Instructions:
- Combine your glycerine and your xanthan gum. Xanthan gum works as our thickener in this recipe. Without it, you will have a super runny liquid that isn't at all easy to use.It's important to combine the glycerine and xanthan. This is because your cosmetic gum cannot be added directly to your liquid soap, otherwise you are left with an end product that has lumps of unmixed xanthan gum... Trust me this isn't a good look.20 grams Glycerine, 2 grams Xanthan Gum

- Now we can weigh out surfactant. If the Lauryl glucoside is paste-like or crystalized, weigh this out first then warm it until it has melted. I do this in the microwave it only takes a couple of seconds (literally). Then, add them all together. If you are using any essential oils, you'll need to add them to the surfactant now.While surfactants are great for producing lovely bubbles, They will also act as a solubilizer for any ingredients that are not water-soluble. As we're not producing an emulsion (like in a lotion) or using lye to bring about a chemical reaction, your essential oils will separate from your liquid soap without doing this.When you add anything to your surfactant, it's important to mix it in very slowly. While you are unlikely to produce lots of bubbles at this point, it is still possible to bring about foaming with vigorous stirring. So be careful and stir gently.40 grams Cocamidopropyl Betaine, 40 grams Lauryl Glucoside, 1 gram Peppermint Essential Oil, 0.4 grams Ylang-Ylang Essential Oil, 20 grams Decyl Glucoside
- Next, add your surfactant (or surfactant/essential oil mixture) to the glycerine and xanthan. Stir it in well, but gently for the same reason we just discussed.
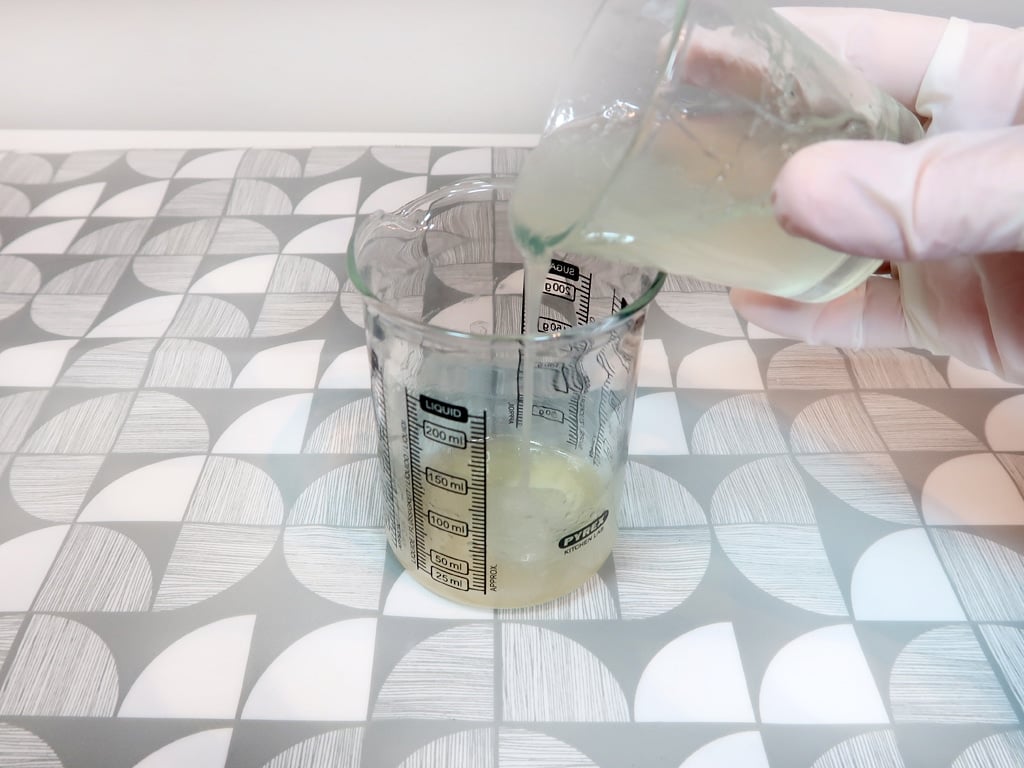
- Its time to add our distilled water. Pour this very slowly and stir gently as you do. It's more important to stir gently now than at any other point. When surfactants are exposed to water, they will foam much more easily.80 grams Distilled Water

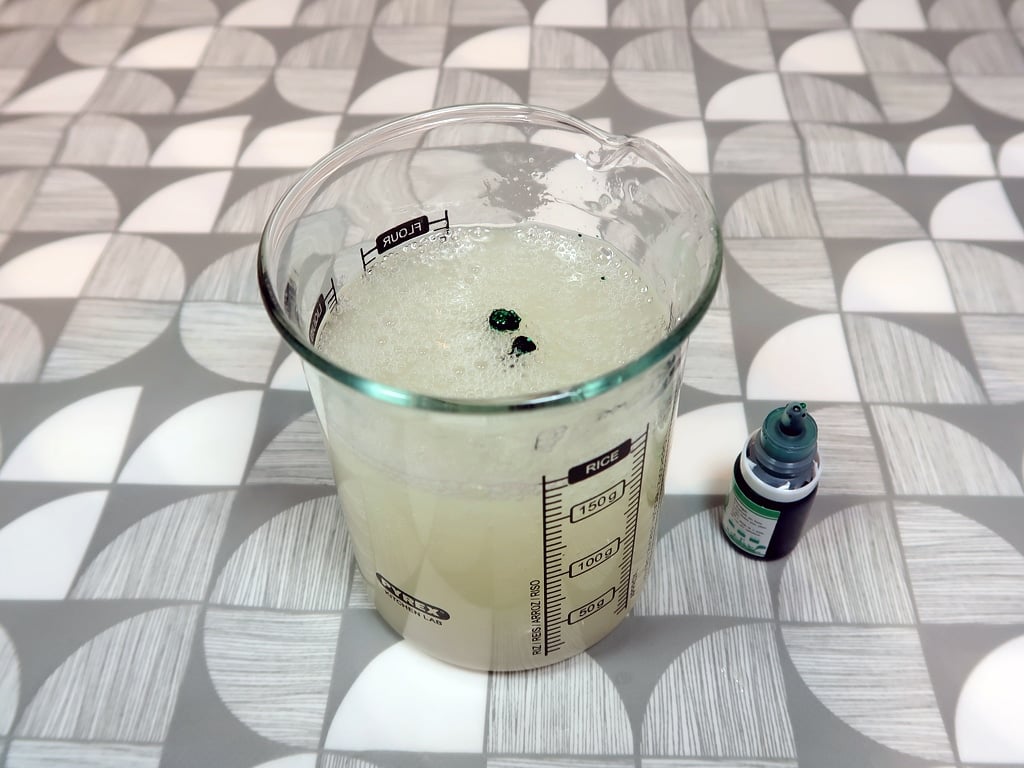
- As your stir, your liquid soap will begin to resemble... well, liquid soap! Once it has achieved this level of thickness and all of your ingredients are thoroughly combined, you can go ahead and add any liquid soap dye you wish to use.
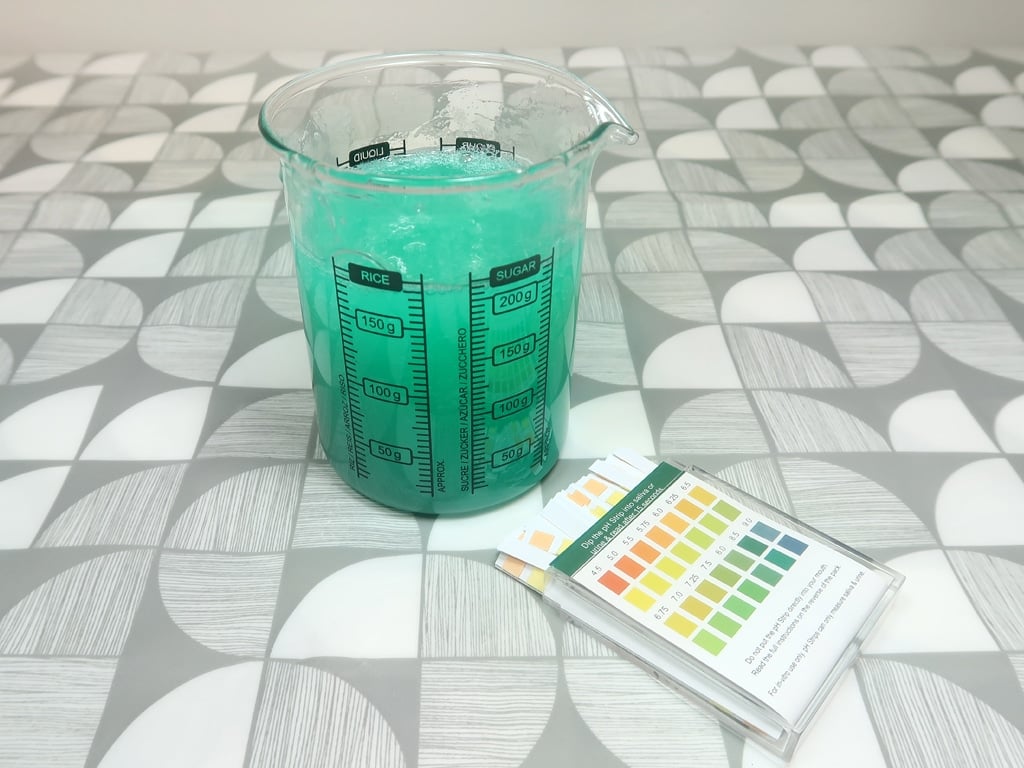
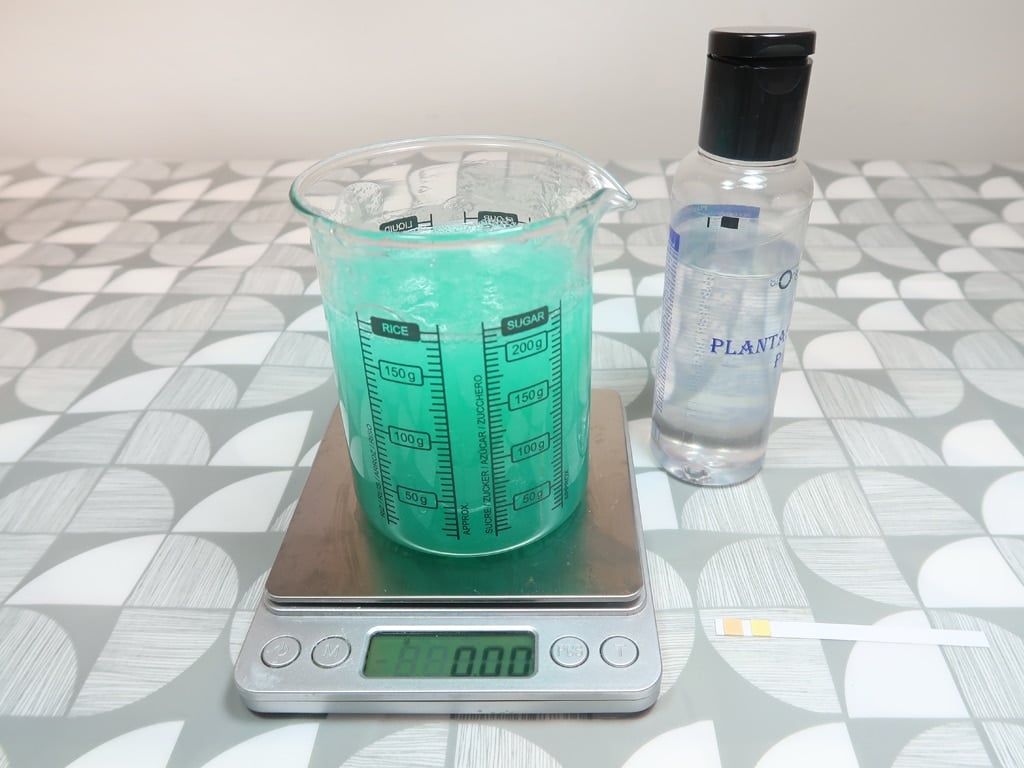
- Now we can test the PH of the product to ensure that it is an effective range. You’re looking for a PH of between 4-6. If, when testing, you find it is outside this range, we can make use of a PH modifier to alter the acidity of the product. If it is too high (which it normally is) you can bring it down adding a few drops of lactic acid. Or you can also bring it down with a little diluted citric acid solution. Mix 10% citric acid with 90% distilled water. If you are unsure how much PH modifier to add, only add a very small amount (say a drop of lactic acid or citric acid) and then test the PH of the product again. Repeat this until you reach an appropriate PH of between 4-6. The first time you do this, you may feel that you are using too many ph strips but expericance will reduce this going forward.PH Modifier
- Now its time to add the preservative. Once you have added the preservative and blended it in, you will need to retest the PH and bring it down if needed as you did in step 6. This may seem a bit of a pain but its best to get it right and you will develop a sense of how much Ph modifier to add with experience.1 gram Preservative
- Last but not least, you can transfer it to a PET plastic bottle that has an airtight lid. I like to use a pump bottle for something like hand soap or body wash. However, a pouring bottle might be best for something like a bubble bath.If you have used essential oils in your recipe then it is vitally important that the bottle is made of PET plastic. This is because essential oils will rapidly degrade ordinary plastic, which causes the plastic to leach into your product. While you can use glass or aluminum bottles, I find that PET plastic works well here as you can squeeze the bottle if needed.8 oz PET Plastic Bottle

Notes:
With a preservative, this DIY bubble bath should last around 9 months
Tried this projectMention @Savvyhomemade or tag #savvyhomemade!