
Coconut Milk Soap Recipe With Coconut Oil & Lime
Here's an absolutely wonderful coconut milk soap recipe that I just adore. I'm using lime, coconut oil & real coconut milk, but you can use pretty much any milk.
Print
Pin
Yield (adjustable): 6 Bars (approx)
Ingredients:
- 200 grams (7.05 oz) Coconut Oil
- 200 grams (7.05 oz) Olive Oil
- 50 grams (1.76 oz) Shea Butter
- 147.96 grams (5.22 oz) Frozen Coconut Milk
- 66.17 grams (2.33 oz) Soapmaking Lye
- 20 grams (0.71 oz) Lime Essential Oil
Equipment:
- Mixing Bowl (Glass, Aluminium or PET)
Instructions:
- If you’ve not made soap before, take a look at my full cold process tutorial here.Make sure you are making the soap in a well-ventilated area. Put on your gloves and eye protection, your mask, apron, and long rubber gloves. I always find it best to then prepare and weigh all of the ingredients before starting so we can add them efficiently later on.

- First up, we need to freeze enough coconut milk. To do this, simply weigh out the amount of milk you’ll need and then pour it into an ice cube tray.Then, put it into the freezer. This should take about 3-4 hours to freeze, although I like to do it the day before so I don’t have to wait around before I can get started.Once your coconut milk has frozen, weigh out your essential oils now into a glass container and set it to one side. This is so we can add them quickly later when we need to.Weigh out your sodium hydroxide crystals. In a separate container made of glass, empty out your frozen coconut milk cubes. Make sure to get all of the cubes as we need exact measurements.Now, Slowly pour your sodium hydroxide crystals into your frozen coconut milk. Give it a stir so that the crystals coat the cubes. This will result in a chemical reaction, and the mixture will begin to increase in temperature and release noxious fumes. You should immediately notice the frozen milk starts to melt as the chemical reaction begins. Place it to one side, preferably somewhere well ventilated.147.96 grams Frozen Coconut Milk, 66.17 grams Soapmaking Lye

- Weigh out the coconut oil, olive oil and shea butter into a large, glass mixing bowl. Be sure it’s one you use only for soap making.Pop this in a microwave and nuke in 30 second bursts until the coconut oil and shea butter melt. If you don’t have a microwave, you can use a water bath.200 grams Coconut Oil, 200 grams Olive Oil, 50 grams Shea Butter

- Now we need to balance our oil and lye solution. Check the temperature of both using a laser thermometer.If you’ve ever made soap with ordinary lye solution before, you’ll notice that the lye solution is much cooler at this stage than it ordinarily would be. This is fine.You’ll want both your lye solution and your oils to be within a temperature of 90-120F, although I have mixed my lye solution at around 80F before and had good results.Just be sure neither are hotter than 120F or cooler than 80F. Once they are within this range, pour your lye into your oils and mix them with a spoon or spatula.

- Now we’ve mixed, it’s time to blitz! Using an electric stick blender, blitz your batter in pulses. You don’t want to be blitzing longer than a second at a time. Then give it a little stir.Continue this until you achieve a light trace. Never heard of light trace before? Take a look at step 6 of our Soap Making - A Guide For Beginners post to learn all about it.

- Now we’re at light trace go ahead and add the essential oil, then give it a good stir. You can use a couple of pulses of your stick blender to do this, but no more than 2.20 grams Lime Essential Oil

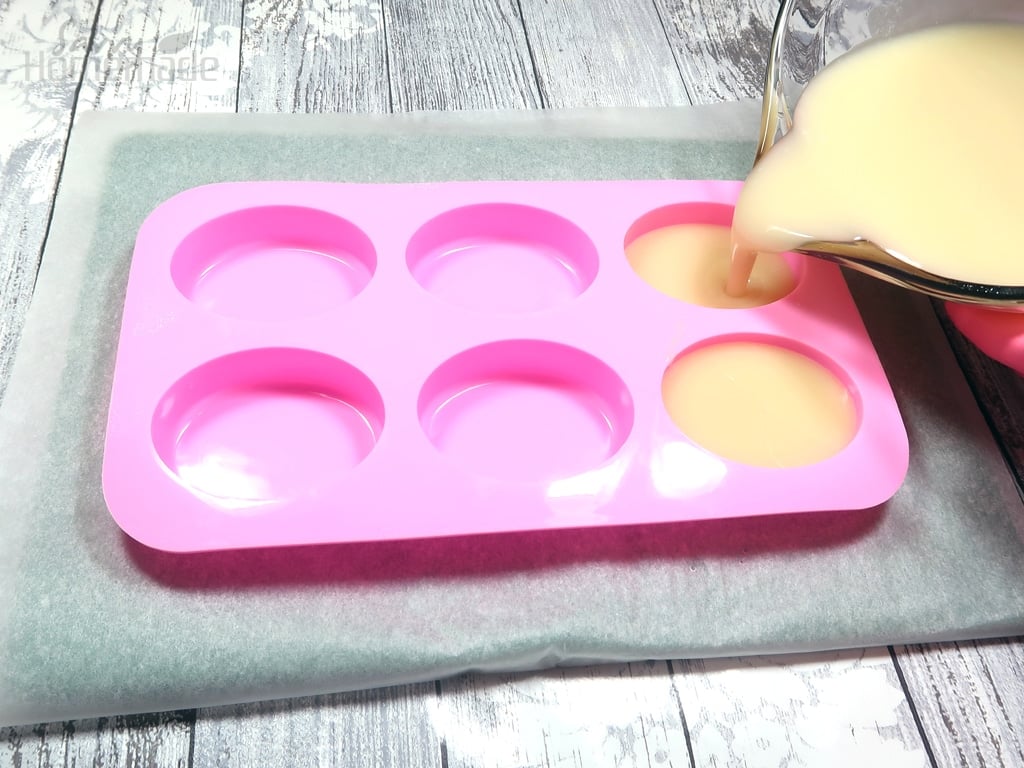
- If you’ve made soap before, you’ll know that when you add ingredients at trace that batter will rapidly begin to harden.This is particularly noticeable with essential oils. So once the essential oils have been added work quickly be carefully to pour or spoon the mixture into your mold.The longer you wait the stiffer your mixture will be, and in turn the harder it will be to get a smooth finish on top.
- Once your batter is in the mold, you’ll want to leave it for 24-48 hours to harden.In order for us not to burn the milk, many soap tutorials will tell you to put the mold into the fridge for the first 24 hours. This will also prevent gel phase.I like do this for a milk soap. However, beware that it can make soap take a little longer to harden. After the first 24 hours, remove from the fridge and leave for a further 24.If you don't put it in the fridge, I find the color of the soap is much darker. If the soap is allowed to gel, it will darken even further. Note the picture below. The soap on the left if the finished product of this tutorial that has been put in the fridge. The one in the middle was left out of the fridge, but not allowed to gel. Finally, the one on the right is a small bar of milk soap that has been gelled. Best to ignore the texture on the middle soap, I was a bit heavy-handed with the spoon; but the color is quite accurate for a non gelled, non-refrigerated milk soap.

Notes:
Once your soap has hardened, remove from the mold and cut into even bars. Although keep in mind that your soap is still caustic at this stage and should not be used right away.
Allow your bars to cure for 4 weeks before using, and test with universal indicator strips to ensure that the soap is between 8 and 9.
Tried this projectMention @Savvyhomemade or tag #savvyhomemade!